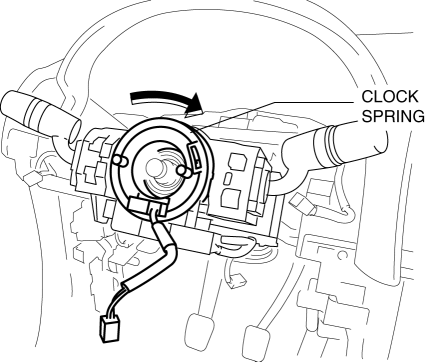
Mazda CX-5 Service & Repair Manual: Clock Spring Adjustment [Standard Deployment Control System]
1. Set the front wheels straight ahead.
CAUTION:
-
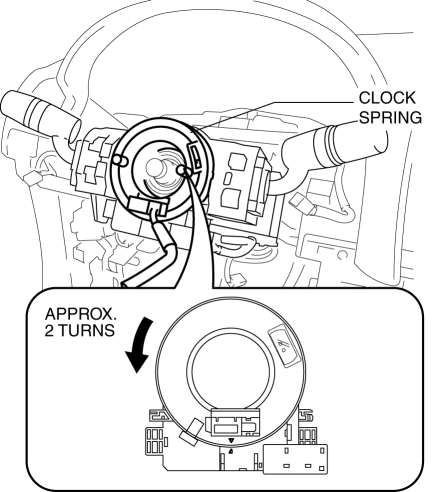
The clock spring will break if over?wound. Do not forcibly turn the clock spring.
2. Turn the clock spring clockwise until it stops.
3. Turn the clock spring counterclockwise approx. 2 turns
.
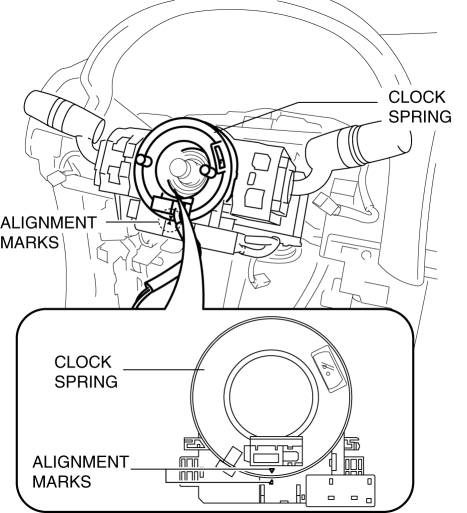
4. Align the mark on the clock spring with the mark on the outer housing.
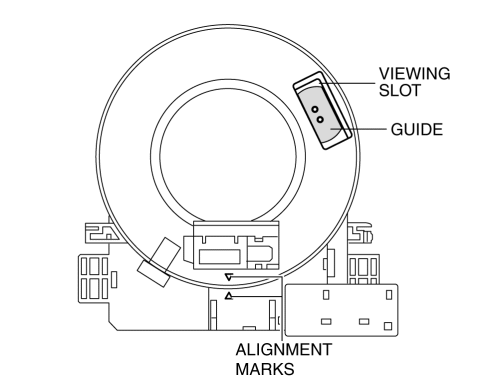
NOTE:
-
After adjusting the alignment marks, the guides can be verified in the viewing slots shown in the figure.
 Barometric Pressure (Baro) Sensor
Purpose/Function
Detects the BARO as basic information for mainly determining the fuel injection
amount.
Detects the BARO and inputs it to the PCM as a BARO signal.
Constructio ...
 Clock Spring Adjustment [Two Step Deployment Control System]
1. Set the front wheels straight ahead.
CAUTION:
The clock spring will break if over?wound. Do not forcibly turn the clock
spring.
2. Turn the clock spring clockwise until it stops. ...
Other materials:
Synchronizer Mechanism [C66 M R]
Purpose, Function
For smooth gear changes, the synchronizer mechanism synchronizes the rotation
of the engaging area and engages gears.
Construction
Detent ball-type synchronizer key
A detent ball-type synchronizer key has been adopted for the synchronizer
mechanism ex ...
Rear Power Window Regulator Removal/Installation
1. Fully lower the rear door glass.
2. Disconnect the negative battery cable..
3. Remove the following parts:
a. Rear door trim.
b. Rear door quarter glass.
c. Rear door speaker.
d. Rear power window motor.
e. Rear door glass.
4. Remove bolts.
5. Insert a hand through the speak ...
Power Outer Mirror System
Outline
Power outer mirrors which can be operated remotely have been adopted.
Structural view
System wiring diagram
Function
Mirror glass adjustment function
Outer mirror glass can be adjusted up/down and left/right electrically.
Operation
Mirror glass adjustmen ...
