Mazda CX-5 Service & Repair Manual: Wiper And Washer Switch Removal/Installation
1. Switch the ignition ON (engine off or on).
2. Open the driver's door.
3. Switch the ignition OFF.
4. Disconnect the negative battery cable..
5. Remove the column cover..
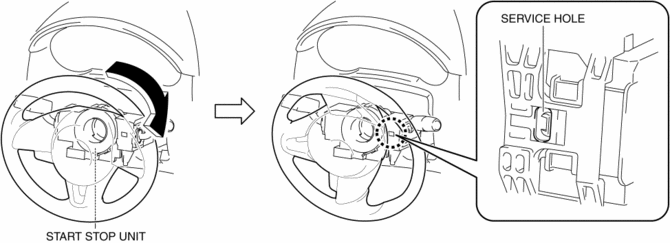
6. Rotate the steering wheel in the direction of the arrow shown in the figure to the angle where the service hole is visible.

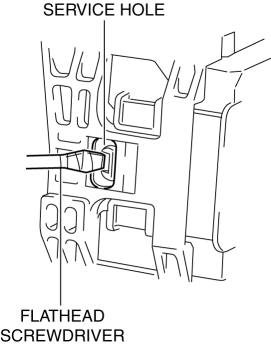
7. Insert a tape-wrapped flathead screwdriver into the service hole in the position shown in the figure.

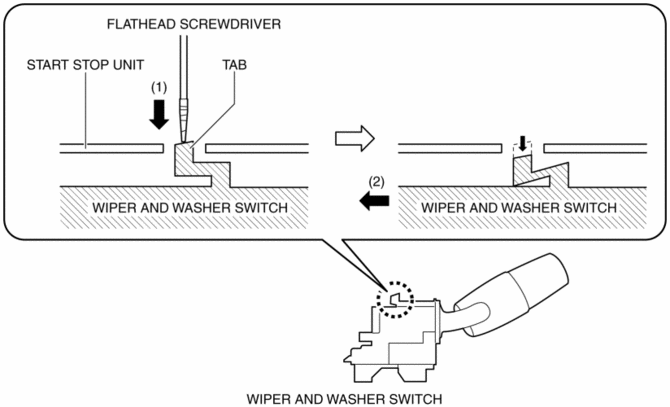
8. While pressing the wiper and washer switch tab in the direction of the arrow (1) shown in the figure using a flathead screwdriver, pull out the wiper and washer switch in the direction of the arrow (2) shown in the figure to detach the wiper and washer switch tab and the start stop unit.

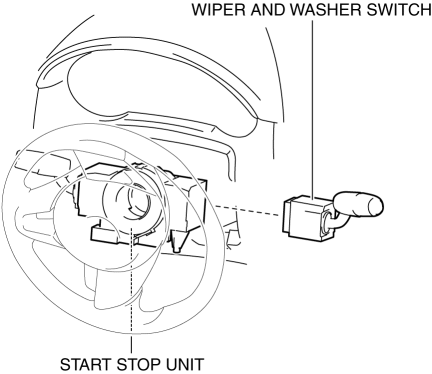
9. Remove the wiper and washer switch from the start stop unit.

10. Install in the reverse order of removal.
 Rain Sensor Removal/Installation
1. Disconnect the negative battery cable..
2. Spread open the rain sensor cover in the direction of the arrows (1) and disengage
tabs A to remove it.
3. Disconnect the rain sensor connector ...
 Washers
...
Other materials:
Discharge Headlight Service Warnings
Discharge Headlight Service Warnings
When replacing a discharge headlight bulb, performing the servicing with
the negative battery cable connected or in a wet work area could result in electrocution.
When replacing a discharge headlight bulb, perform the servicing under the following
...
Rear Shock Absorber Disposal
WARNING:
Whenever drilling into a rear shock absorber, wear protective eye wear. The
gas in the rear shock absorber is pressurized, and could spray metal chips into
the eyes and face when drilling.
1. Clamp a rear shock absorber on a flat surface or with the piston pointing
...
Oil Pressure Inspection
WARNING:
Hot engines and engine oil can cause severe burns. Turn off the engine and
wait until it and the engine oil have cooled.
A vehicle that is lifted but not securely supported on safety stands is dangerous.
It can slip or fall, causing death or serious injury. Never work ...
