Mazda CX-5 Service & Repair Manual: Washer Tank Removal/Installation
With Washer Fluid-level Sensor
1. Disconnect the negative battery cable..
2. Set the front over fender aside..
3. Set the mudguard (RH) aside..
4. Remove the front bumper..
5. Remove the bracket.

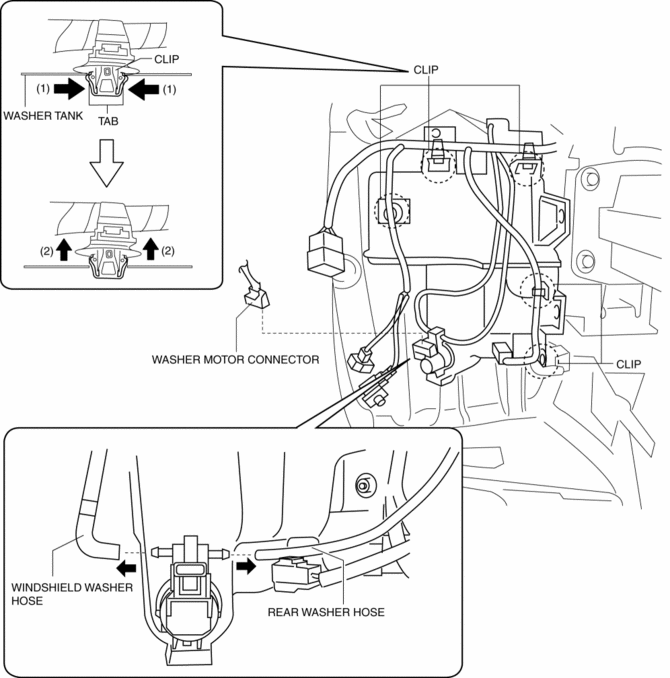
6. Disconnect the washer motor connector.
7. Disconnect the washer fluid-level sensor connector.
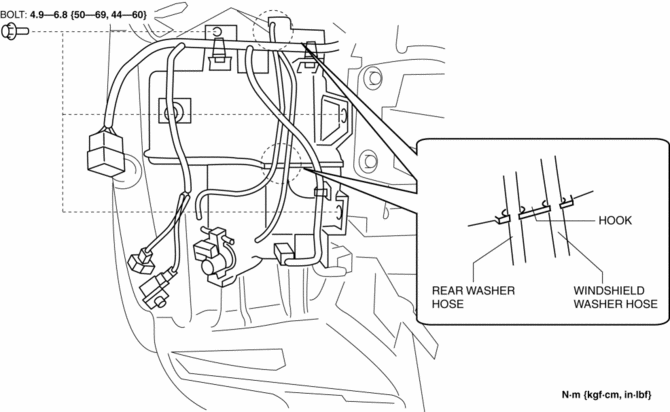
8. Disconnect the windshield washer hose.
9. Disconnect the rear washer hose.
10. While pressing tabs of clips in the direction of the arrows (1) shown in the figure, remove it in the direction of the arrow (2).
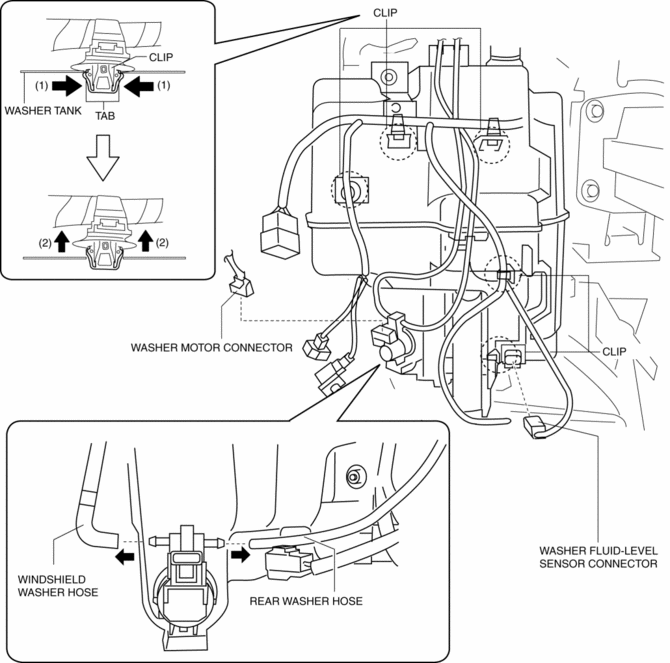
11. Remove the windshield washer hose from the hooks.
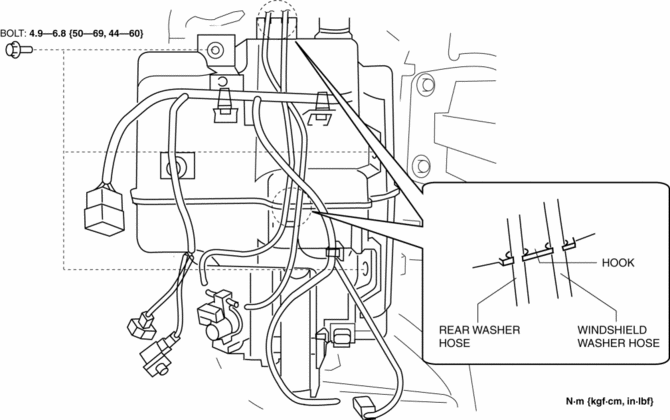
12. Remove the rear washer hose from the hooks.
13. Remove bolts.
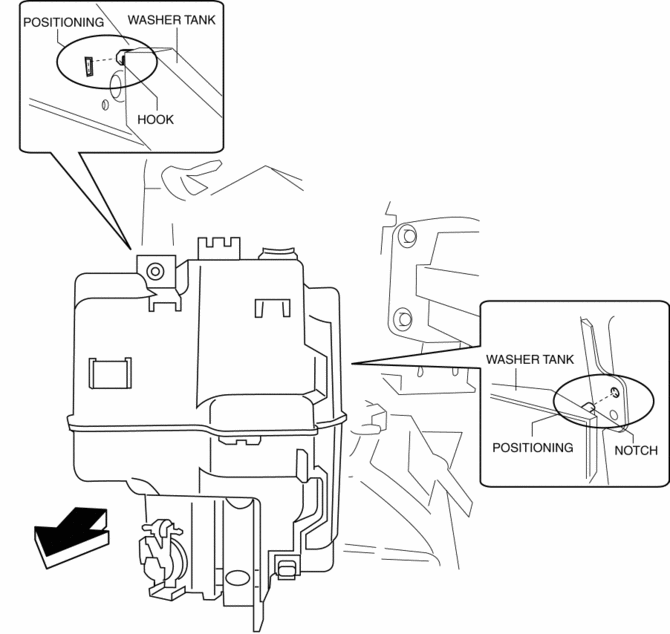
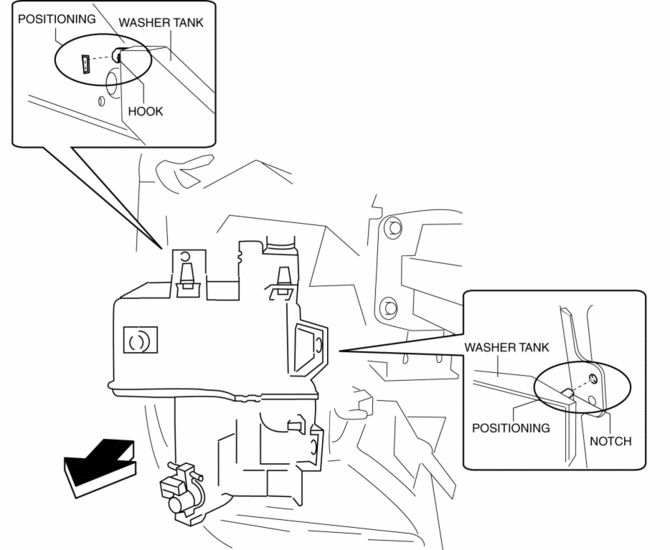
14. Remove the washer tank positioning hook and notch from the vehicle and remove the washer tank.
15. Install in the reverse order of removal.
Without Washer Fluid-level Sensor
1. Disconnect the negative battery cable..
2. Set the front over fender aside..
3. Set the mudguard (RH) aside..
4. Remove the front bumper..
5. Remove the bracket.
6. Disconnect the washer motor connector.
7. Disconnect the windshield washer hose.
8. Disconnect the rear washer hose.
9. While pressing tabs of clips in the direction of the arrows (1) shown in the figure, remove it in the direction of the arrow (2).
10. Remove the windshield washer hose from the hooks.
11. Remove the rear washer hose from the hooks.
12. Remove bolts.
13. Remove the washer tank positioning hook and notch from the vehicle and remove the washer tank.
14. Install in the reverse order of removal.
 Washer Nozzle
Purpose
The washer nozzle sprays the washer fluid sent from the washer motor to the
optimum positions on the windshield.
Construction
A ball-shaped spray orifice is set inside t ...
 Windshield Washer Hose Removal/Installation
1. Disconnect the negative battery cable..
2. Remove the front over fender..
3. Remove the mudguard (RH)..
4. Remove the windshield wiper arm and blade..
5. Disconnect the windshield washer ho ...
Other materials:
Add-On Non-Genuine Parts and Accessories
Non-genuine parts and accessories for Mazda vehicles can be found in stores.
These may fit your vehicle, but they are not approved by Mazda for use with Mazda
vehicles. When you install non-genuine parts or accessories, they could affect your
vehicle's performance or safety systems; the Maz ...
Cargo Compartment Light Bulb Removal/Installation
1. Disconnect the negative battery cable..
CAUTION:
Always disconnect the negative battery cable before performing the cargo
compartment light bulb removal. Otherwise, the circuit may be shorted resulting
in damage to the related parts such as the rear body control module (RBCM).
...
Seat Precaution
WARNING
Make sure the adjustable components of a seat are locked in place:
Adjustable seats and seatbacks that are not securely locked are dangerous. In a
sudden stop or collision, the seat or seatback could move, causing injury. Make
sure the adjustable components of the seat are locked in pl ...
