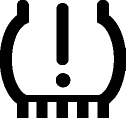
Mazda CX-5 Service & Repair Manual: Tire Pressure Monitoring System Warning Light
Purpose, Function
-
The tire pressure monitoring system warning light notifies the driver that it was determined that a tire pressure has decreased below the specified value based on the initialization.
-
The tire pressure monitoring system warning light notifies the driver that a malfunction has occurred in the tire pressure monitoring system.
Construction, Operation
-
The tire pressure monitoring system warning light is built into the instrument cluster.
-
The tire pressure monitoring system warning light illuminates/flashes based on the DSC HU/CM command.
-
The tire pressure monitoring system warning light illuminates if a tire pressure decreases below the specified value based on the initialization.
-
The tire pressure monitoring system warning light flashes for 1 min if a malfunction is detected in the tire pressure monitoring system, and then it illuminates.
-
If the tire pressure monitoring system warning light has illuminated, it will turn off by performing the initialization. If the initialization is not performed, the light will illuminate again when the ignition is switched from off to ON.
Fail-safe
-
Function not equipped.
 Tcs/DSC Indicator Light
Purpose/Function
The TCS/DSC indicator light, built into the instrument cluster, informs the
driver of the following vehicle conditions.
TCS is operating. (Drive wheel is slippi ...
 Turn And Hazard Indicator Alarm
Purpose
The turn and hazard indicator alarm notifies the driver that a turn light
or the hazard warning lights are flashing.
Function
When the instrument cluster receives the tu ...
Other materials:
Light Switch Inspection
Light Switch
1. Disconnect the negative battery cable..
2. Remove the column cover..
3. Remove the light switch..
4. Verify that the continuity between the light switch terminals is as indicated
in the table.
Vehicles without auto light system
Vehicles with auto light system
...
Front Sash Molding Installation
WARNING:
Using a utility knife with bare hands can cause injury. Always wear gloves
when using a utility knife.
NOTE:
Double-sided adhesive tape has already been attached to the new front sash
molding.
1. When installing a new front sash molding, follow the procedur ...
Upper Panel Removal/Installation
1. Disconnect the negative battery cable..
2. Remove the following parts:
a. Front console box.
b. Shift lever knob (MTX).
c. Shift panel.
3. Open the console lid.
4. Remove the button, then open the fastener.
5. Take the shaded area shown in the figure, and remove the upper panel ...
