Mazda CX-5 Service & Repair Manual: Switch Panel Removal/Installation
1. Disconnect the negative battery cable..
2. Remove the car-navigation unit. (with car-navigation system).
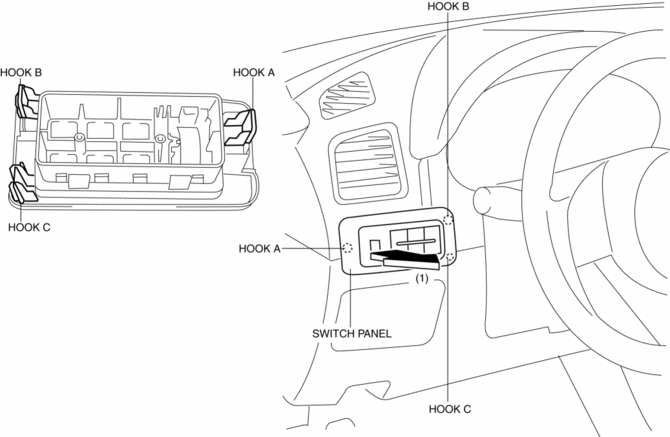
3. Insert your hand from the lower side of the lower panel (without car-navigation system) or the area where the car-navigation unit was installed (with car-navigation system), press the switch panel in the direction of the arrow (1) shown in the figure and remove it while detaching hook A and B and hook C.
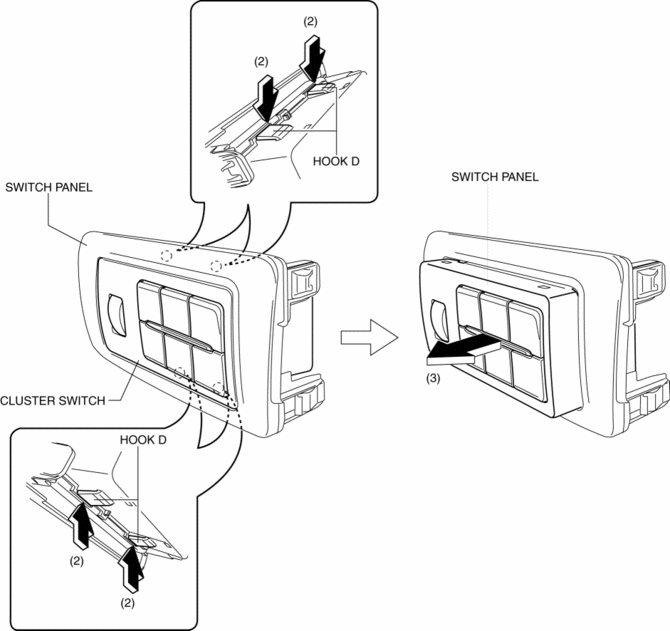
4. Disconnect the cluster switch connector.
5. Remove the cluster switch in the direction of the arrow (3) while detaching hooks D in the direction of the arrow (2).
6. Install in the reverse order of removal.
 Side Wall Removal/Installation
1. Pull the side wall in the direction of the arrow in the order of (1), (2)
and remove it while detaching hooks A and clip B.
2. Pull the side wall in the direction of the arrow (3) and remov ...
 Upper Panel Removal/Installation
1. Disconnect the negative battery cable..
2. Remove the following parts:
a. Front console box.
b. Shift lever knob (MTX).
c. Shift panel.
3. Open the console lid.
4. Remove the button, th ...
Other materials:
Bluetooth® Audio
Applicable Bluetooth® specification Ver. 2.0 or higher
Response profile
• A2DP (Advanced Audio Distribution Profile)
Ver. 1.0/1.2
• AVRCP (Audio/Video Remote Control Profile)
Ver. 1.0/1.3/1.4
A2DP is a profile which transmits only audio to the Bluetooth® unit. If your
Bluetooth® aud ...
Generator Disassembly/Assembly [Skyactiv G 2.0]
CAUTION:
Melt the solder quickly, otherwise the diodes (rectifier) and regulator will
be damaged by excessive heat.
1. Disassemble in the order indicated in the table.
2. Assemble in the reverse order of disassembly.
1
Rotor component
...
Rear Door Checker Removal/Installation
1. Fully close the rear door glass.
2. Disconnect the negative battery cable..
3. Remove the rear door trim..
4. Remove the rear door speaker..
5. Remove bolt.
6. Remove nuts.
7. Pull out the rear door checker from the rear speaker installation hole.
8. Install in the reverse ...
