Mazda CX-5 Service & Repair Manual: Upper Panel Removal/Installation
1. Disconnect the negative battery cable..
2. Remove the following parts:
a. Front console box.
b. Shift lever knob (MTX).
c. Shift panel.
3. Open the console lid.
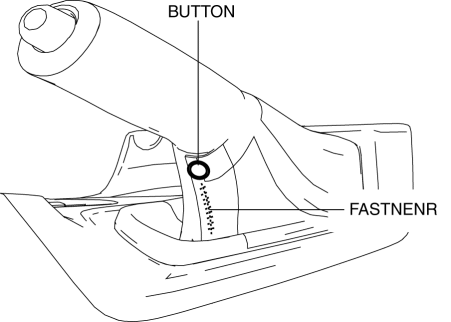
4. Remove the button, then open the fastener.
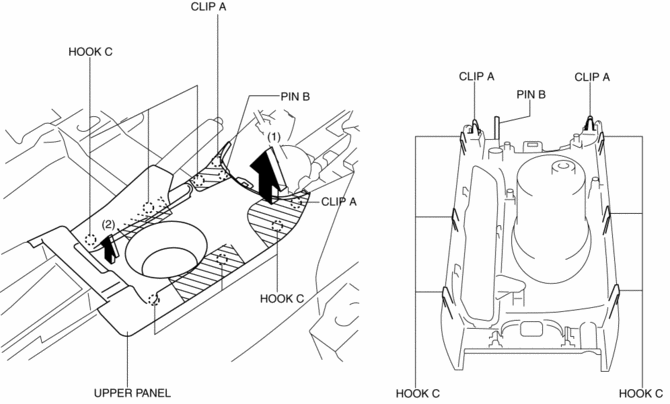
5. Take the shaded area shown in the figure, and remove the upper panel in the direction of the arrow in the order of (1), (2) while detaching clips A, pin B, hooks C.
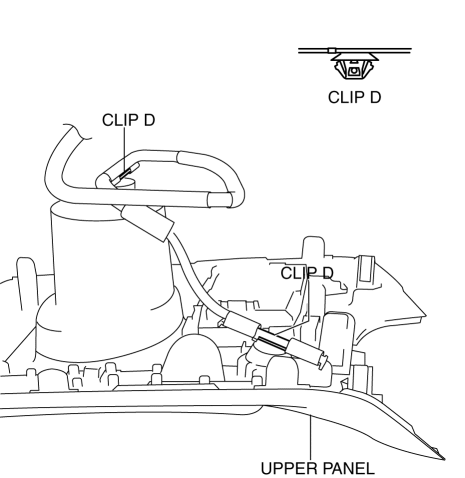
6. Remove clips D.
7. Install in the reverse order of removal.
 Switch Panel Removal/Installation
1. Disconnect the negative battery cable..
2. Remove the car-navigation unit. (with car-navigation system).
3. Insert your hand from the lower side of the lower panel (without car-navigation
sys ...
 Amenities
...
Other materials:
Replace Electrical Battery
If the buttons on the transmitter are inoperable and the operation indicator
light does not flash, the battery may be dead.
Replace with a new battery before the transmitter becomes unusable.
CAUTION
● Make sure the battery is installed correctly.
Battery leakage could occur if it is no ...
Battery
WARNING
Wash hands after handling the battery and related accessories:
Battery posts, terminals and related accessories contain lead and lead compounds,
chemicals known to the State of California to cause cancer and reproductive harm.
Read the following precautions carefully before using the ...
Emission System
Purpose, Outline
A single-nano catalyst has been adopted for the under-floor, three-way catalyst
to improve emission gas purification efficiency.
Structural View
Engine compartment side
Exhaust system side
2WD
AWD
Fuel tank side
U.S.A. and CANADA (2WD)
U.S.A. a ...
