Mazda CX-5 Service & Repair Manual: Side Garnish Installation
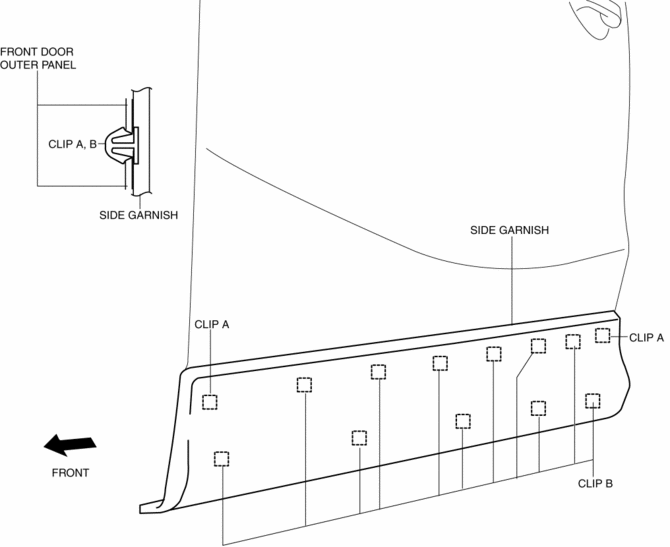
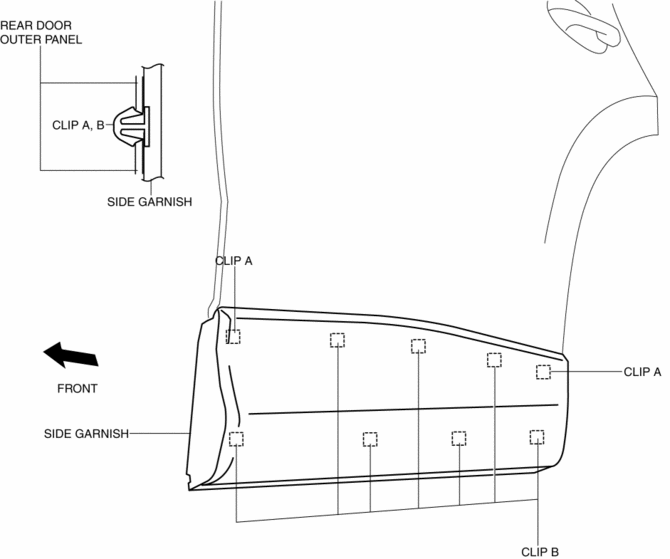
1. Install clip A.
Front

Rear

2. Install clip B to the vehicle from the front side.
 Set Plate Removal/Installation
1. Disconnect the negative battery cable..
2. Remove the seal board upper..
3. Remove the front bumper..
4. Remove fasteners A.
5. Remove the set plate in the direction of the arrow shown ...
 Side Garnish Removal
Front
1. Insert a tape-wrapped flathead screwdriver in the position shown in the figure,
move it in the direction of the arrow (1) to remove the clip A.
2. Slide the side garnish in the direc ...
Other materials:
Bumper Stiffener Lower Removal/Installation
1. Disconnect the negative battery cable..
2. Remove the following parts:
a. Seal board upper.
b. Front bumper.
c. Seal plate.
d. Front under cover No.1.
3. Remove bolts A.
4. Pull the bumper stiffener lower in the direction of the arrow (1), (2) shown
in the figure, detach hooks ...
Torque Converter Clutch (TCC) Control [Fw6 A EL, Fw6 Ax EL]
Outline
For TCC control, a newly developed, full range TCC control has been adopted.
The TCC range has been significantly widened by having the smoothness unique
to the torque converter during acceleration from a stop take precedence and
actively controlling TCC directly after accele ...
Brake System/ABS Warning Light
Purpose/Function
The brake system/ABS warning light is built into the instrument cluster.
If a malfunction is detected in the system with the parking brake released,
the warning light illuminates to notify the driver.
Construction/Operation
When the DSC system and CAN l ...
