Mazda CX-5 Service & Repair Manual: Rear Side Frame Removal [Panel Replacement]
Symbol Mark

Removal Procedure
NOTE:
-
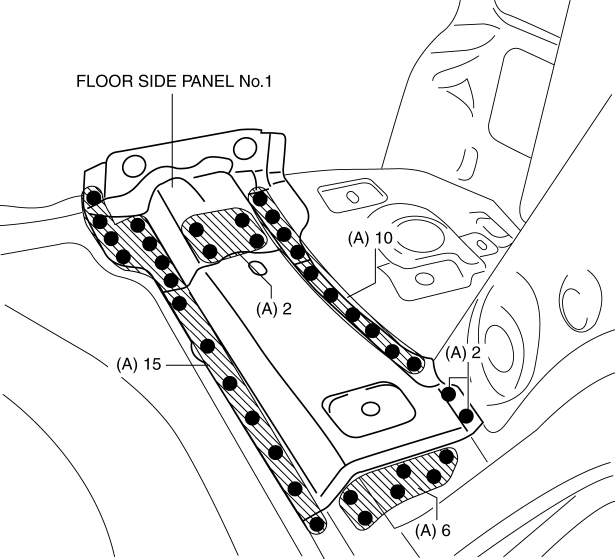
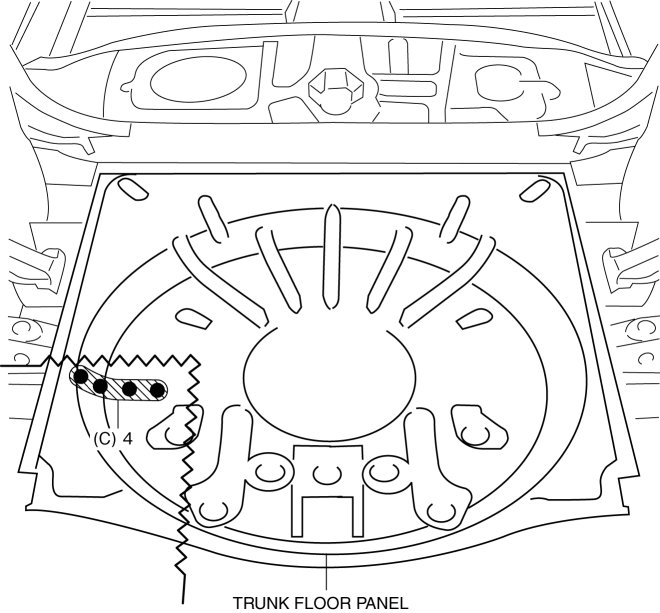
When drilling the 35 locations indicated by (A) and 4 locations indicated by (C) shown in the figure, do not drill a hole all the way through or there could be a problem when installing the new part.
1. Drill the 35 locations indicated by (A) shown in the figure, then remove the floor side panel No.1.

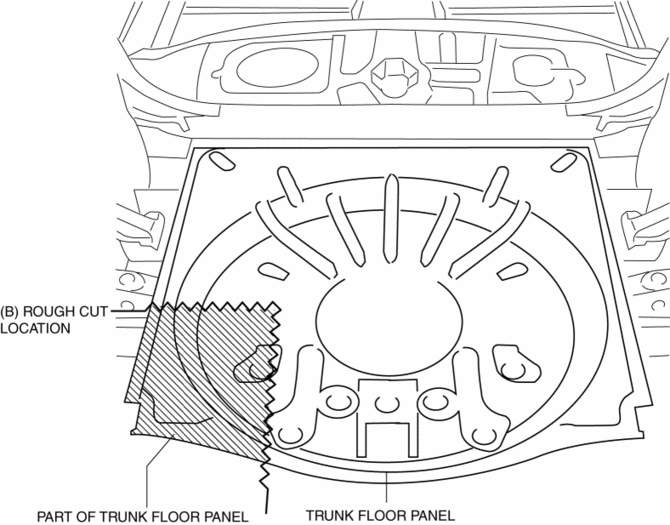
2. Rough cut area location indicated by (B) shown in the figure.

3. Drill the 4 locations indicated by (C) shown in the figure, then remove the part of trunk floor panel.

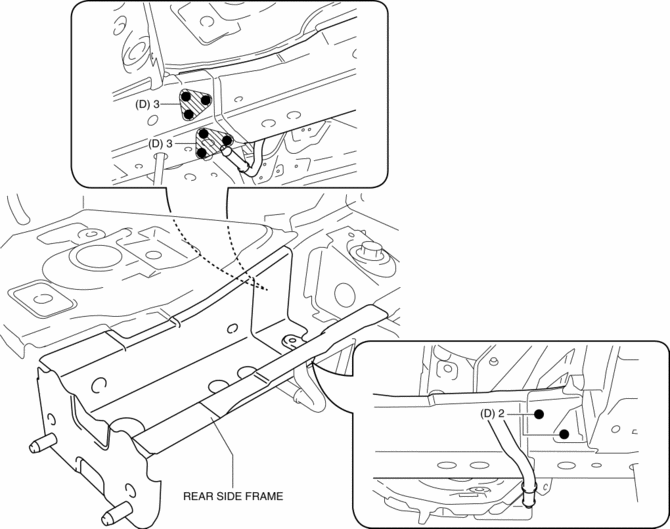
4. Drill the 8 locations indicated by (D) shown in the figure.

5. Remove the rear side frame.
 Rear Side Frame Installation [Panel Replacement]
Symbol Mark
Installation Procedure
1. When installing new parts, measure and adjust the body as necessary to conform
with standard dimensions.
2. Drill holes for the plug welding before inst ...
 Room Straight Line Dimensions (1) [Dimensions]
Point symbol
Designation
Hole diameter or bolt or nut size mm {in}
A
Front pillar inner datum hole
?7 {0.3}
...
Other materials:
Thermostat Inspection
1. Remove the thermostat..
2. Visually check that the thermostat valve is closed.
3. Place the thermostat in water.
WARNING:
During inspection, the thermostat and water are extremely hot and can cause
severe burns. Do not touch the thermostat and water.
4. Heat the water and c ...
Lift Motor Inspection
WARNING:
Handling a side air bag improperly can accidentally operate (deploy) the
air bag, which may seriously injure you. Read the service warnings/cautions
in the Workshop Manual before handling the front seat (side air bag integrated)..
1. Disconnect the negative battery cable ...
Air Fuel Ratio (A/F) Sensor Inspection
A/F Sensor Inspection
1. Connect the M-MDS to the DLC?2.
2. Switch the ignition ON (engine on).
3. Warm up the engine to normal operating temperature.
4. Access the following PIDs using the M-MDS..
VSS (Vehicle speed)
RPM (Engine speed)
O2S11 (A/F sensor output current ...
