Mazda CX-5 Service & Repair Manual: Power Window Main Switch Removal/Installation
1. Disconnect the negative battery cable..
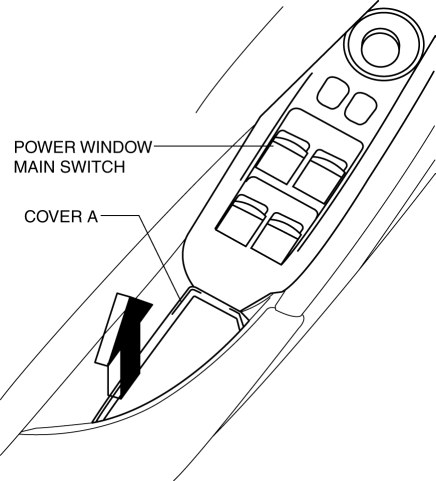
2. Remove the cover A.
3. Insert a tape-wrapped fastener remover shown in the figure and remove the tab B in the direction of arrow (1).
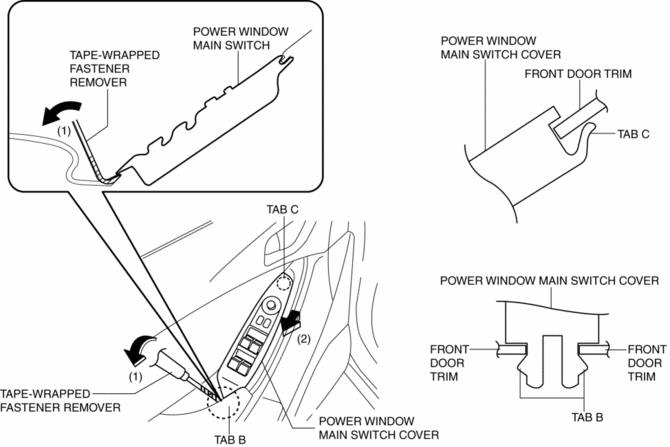
4. Slide the power window main switch cover in the direction of the arrow (2) shown in the figure and remove the tab C.
5. Disconnect the power window main switch connector.
6. Pull the edge of power window main switch cover in the direction of arrow (3) and detach tabs D.
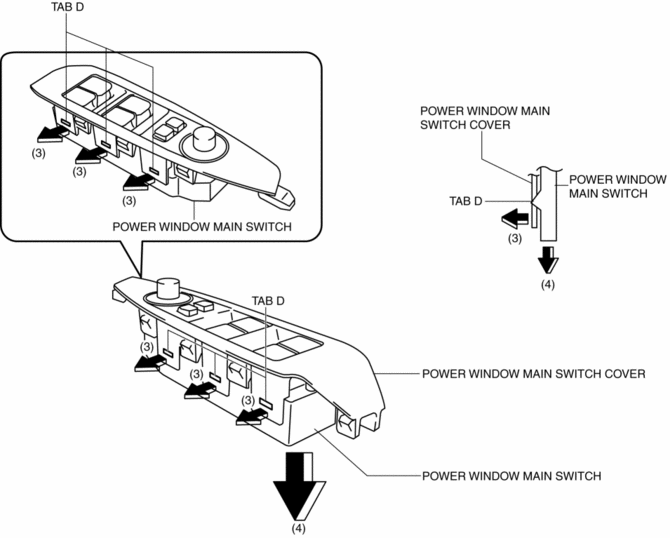
7. Remove the power window main switch in the direction of arrow (4) shown in the figure.
8. Install in the reverse order of removal.
 Power Window Main Switch Inspection
1. Disconnect the negative battery cable..
2. Remove the following parts:
a. Inner garnish. (driver's side).
b. Front door trim. (driver's side).
c. Power window main switch.
3. Conn ...
 Power Window Motor
Purpose
The power window motor transmits rotation force to the power window regulator
to open/close the door glass.
Function
The power window motor rotates clockwise/counterclockwise when it rece ...
Other materials:
Automatic Transaxle Shift Mechanism [Fw6 A EL, Fw6 Ax EL]
Outline
A sport AT-type shift mechanism has been adopted for all models.
An electric shift-lock system has been adopted to prevent driver mis-operation.
A manual shift-lock release system has been adopted to ensure emergency bypass
if shifting operations cannot be performed ...
Outer Mirror Glass Installation
1. Connect the mirror heater connectors. (with heated outer mirror)
2. Connect the blind spot monitoring (BSM) warning indicator light connector
(with blind spot monitoring system).
NOTE:
Lightly pull the blind spot monitoring (BSM) warning indicator light connector
and verify t ...
Heated Oxygen Sensor (HO2 S) Heater Control
Outline
Based on the control of the HO2S heater, a stabilized oxygen concentration
is detected even at low exhaust temperatures, and feedback control of fuel injection
even at cold engine start is made possible for improved cold temperature exhaust
emission performance.
Both ...
