
Mazda CX-5 Service & Repair Manual: Passenger Side Air Bag Module [Standard Deployment Control System]
Purpose
-
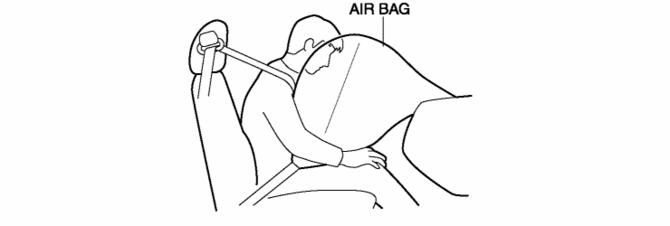
When the passenger-side air bag module receives an impact from a frontal or frontal offset collision, the operation (deployment) of the air bag mediates the impact to the head and face of the front passenger.
Function
-
When the passenger-side air bag module receives an impact from a frontal or frontal offset collision, the air bag is operated (deployed) by the operation signal sent from the SAS control module.
Construction
-
The passenger-side air bag module is installed to the instrument panel.
Operation
-
The passenger-side air bag module operates (deploys) the air bag by activating the internal inflator.
-
The inflator operates (deploys) in the following order:
1. When an operation (deployment) signal is received from the SAS control module, the igniter built into the inflator generates heat and ignites the ignition agent.
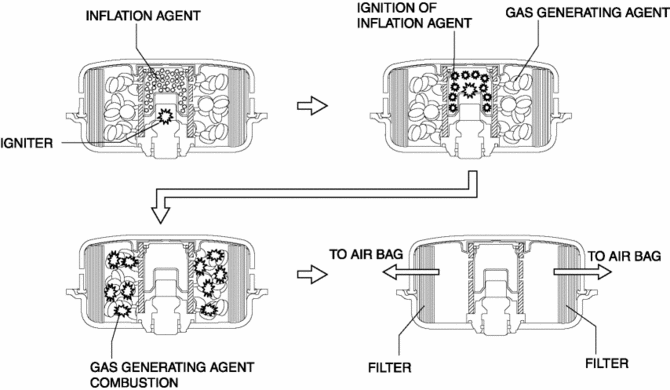
2. The ignition of the ignition agent causes the combustion of a gas generating agent which forms nitrogen gas.
3. The nitrogen gas is cooled at the filter and the filtrate is injected into the air bag.
Fail-safe
-
Function not equipped.
 Passenger Side Air Bag Module Removal/Installation [Two Step Deployment Control
System]
Passenger Side Air Bag Module Removal/Installation [Two Step Deployment Control
System]
WARNING:
Handling the air bag module improperly can accidentally deploy the air bag
module, which may seriously injure you. Read the air bag system service warnings
and cautions before h ...
 Passenger Side Air Bag Module [Two Step Deployment Control System]
Purpose
When the passenger-side air bag module receives an impact from a frontal
or frontal offset collision, the operation (deployment) of the air bag mediates
the impact to the head and ...
Other materials:
DSC HU/CM
Outline
A high reliability, reduced size and weight DSC HU/CM, integrating both the
DSC HU and the DSC CM, has been adopted.
DSC HU Part Purpose/Function
According to DSC CM signals, the DSC HU controls (on/off) each solenoid valve
and the pump motor, adjusts fluid pr ...
B Pillar Upper Trim Removal/Installation
1. Remove the following parts:
a. Front scuff plate.
b. Rear scuff plate.
c. B-pillar lower trim.
d. Adjuster anchor cover.
e. Upper anchor installation bolts on the front seat belt.
2. Partially peel back the seaming welt.
3. Take the shaded area shown in the figure, and pull the B-pi ...
Torque Converter Clutch (TCC) Control [Fw6 A EL, Fw6 Ax EL]
Outline
For TCC control, a newly developed, full range TCC control has been adopted.
The TCC range has been significantly widened by having the smoothness unique
to the torque converter during acceleration from a stop take precedence and
actively controlling TCC directly after accele ...
