Mazda CX-5 Service & Repair Manual: License Plate Light Bulb Removal/Installation
1. Disconnect the negative battery cable..
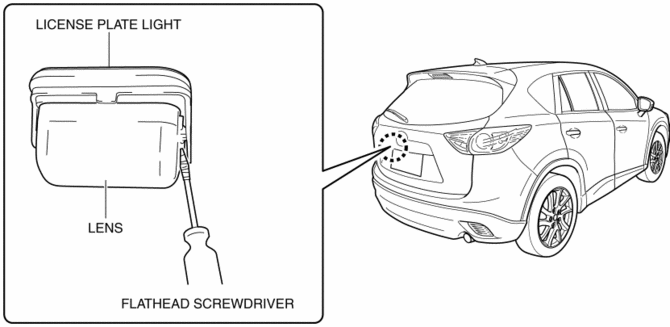
2. Insert a tape-wrapped flathead screwdriver into the clearance between the lens and license plate light shown in the figure.

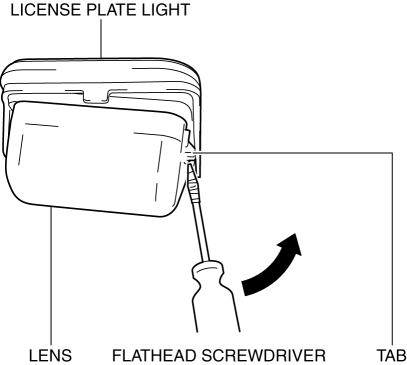
3. Move the flathead screwdriver in the direction of the arrow shown in the figure, pull out the lens from the license plate light, and detach the lens tab and license plate light.

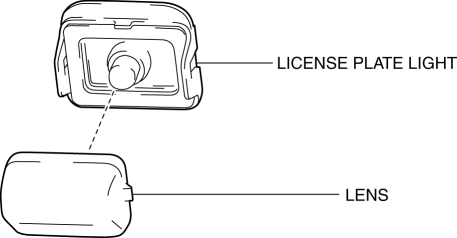
4. Remove the lens.

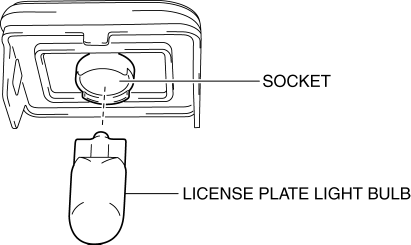
5. Remove the license plate light bulb.

6. Install in the reverse order of removal.
 License Plate Light
Purpose
The license plate lights shine light on the license plate during nighttime
driving.
Function
The license plate lights illuminate in conjunction with the operation of
...
 License Plate Light Removal/Installation
1. Disconnect the negative battery cable..
2. Remove the following parts:
a. Liftgate upper trim.
b. Liftgate side trim.
c. Liftgate lower trim.
3. Disconnect the connector.
4. While p ...
Other materials:
Intake Air Temperature (Iat) Sensor Inspection
IAT Sensor No.1
Resistance inspection
NOTE:
Because the IAT sensor No.1 is integrated in the MAF sensor, replacing the
IAT sensor No.1 includes replacement of the MAF sensor/IAT sensor No.1.
1. Disconnect the negative battery cable..
2. Disconnect the MAF sensor/IAT sensor No.1 ...
Center Accessory Socket Removal/Installation
1. Disconnect the negative battery cable..
2. Remove the upper console..
3. Insert a tape-wrapped flathead screwdriver into the gap between the cap tab
and socket.
4. Move the flathead screwdriver in the direction of the arrow (1) shown in the
figure, press the center accessory socket ...
Glass Antenna
Purpose, Function
The RDS (Radio Data System) converts radio broadcast waves to electric signals
and sends the signals to the audio unit.
Construction
An antenna with excellent noise resistance has been adopted to the rear window
glass.
Fail-safe
Function n ...
