Mazda CX-5 Service & Repair Manual: License Plate Light Removal/Installation
1. Disconnect the negative battery cable..
2. Remove the following parts:
a. Liftgate upper trim.
b. Liftgate side trim.
c. Liftgate lower trim.
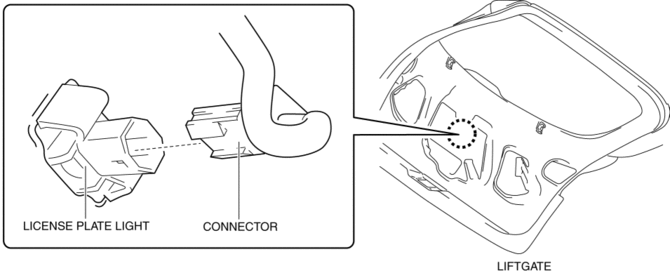
3. Disconnect the connector.
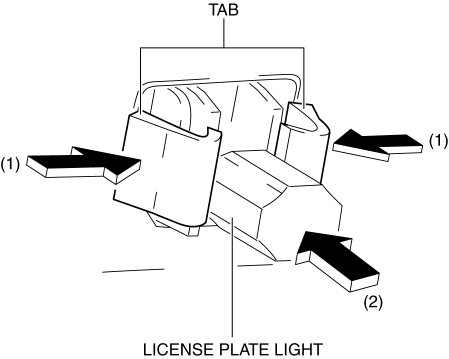
4. While pressing the license plate light tab in the direction of arrow (1) shown in the figure, press the license plate light in the direction of arrow (2) to detach the license plate light tab and liftgate.
CAUTION:
-
If the license plate light is removed from the liftgate, the license plate light may fall off and be damaged. When removing the license plate light from the liftgate, hold the license plate light on lens side with a hand during servicing.
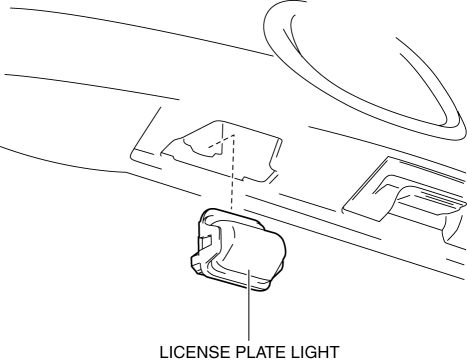
5. Remove the license plate light.
6. Install in the reverse order of removal.
 License Plate Light Bulb Removal/Installation
1. Disconnect the negative battery cable..
2. Insert a tape-wrapped flathead screwdriver into the clearance between the
lens and license plate light shown in the figure.
3. Move the flathead ...
 PID/Data Monitor Inspection [Adaptive Front Lighting System (Afs)]
1. Connect the M-MDS to the DLC-2.
2. After the vehicle is identified, select the following items from the initialization
screen of the M-MDS.
a. Select “DataLogger”.
b. Select “Modulesâ ...
Other materials:
Supplier Identification Procedure [Audio]
NOTE:
The unit supplier can vary. When asking the supplier (service center) for
repair or replacement, identify the supplier and fill in the Audio Repair Order
Form using the following procedures.
Verification procedure using label or inscribed lettering
1. Disconnect the negati ...
Relay And Fuse Block Middle Cover Disassembly/Assembly
1. Insert a tape-wrapped flathead screwdriver into the service hole in the position
shown in the figure.
2. While pressing the relay and fuse block middle cover tab in the direction
of arrow (1) shown in the figure, pull out the bracket in the direction of arrow
(2) to detach the relay a ...
Coil Antenna
Purpose
Sends the ID data programmed to the electronic transmission device (transponder)
in the remote transmitter to the start stop unit.
Function
A magnetic field occurs around the push button start.
Construction, Operation
The coil antenna built into the push b ...
