Mazda CX-5 Service & Repair Manual: Heater Hose Removal/Installation
With Water Temperature Sensor
1. Remove the battery..
2. Drain the engine coolant..
3. Remove the insulator.
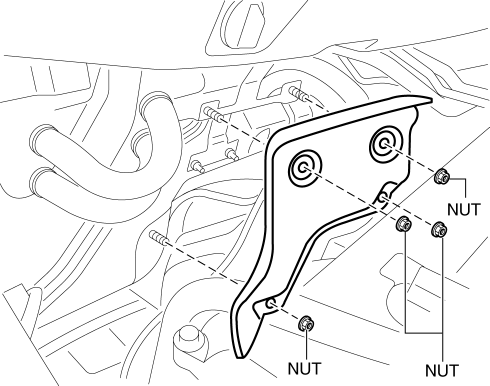
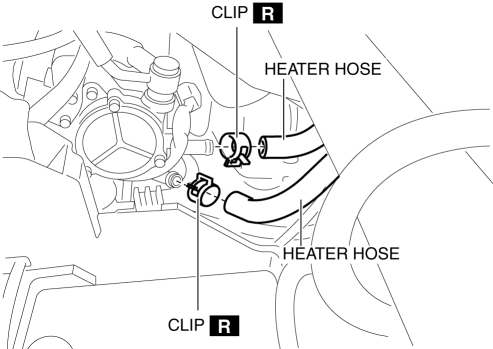
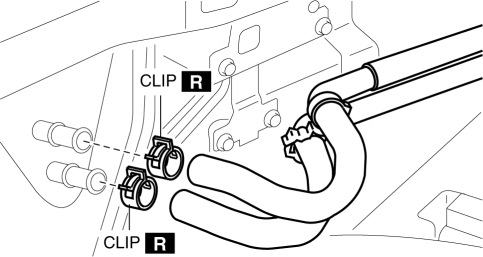
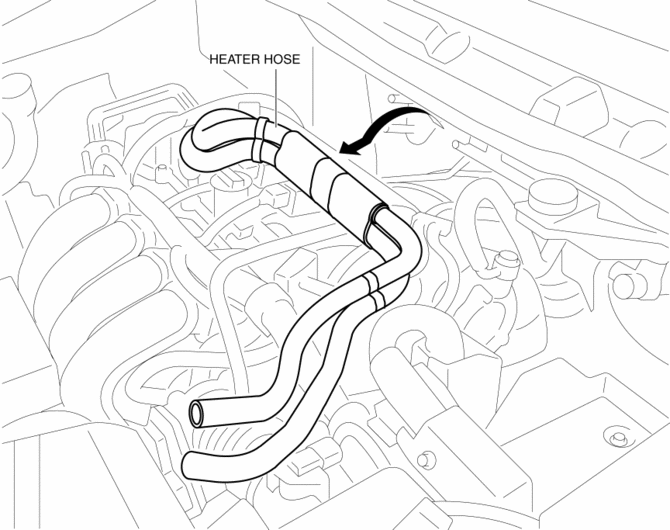
4. Remove the clips and remove the heater hose.

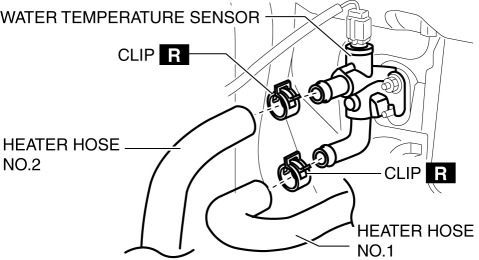
5. Remove the heater hose.
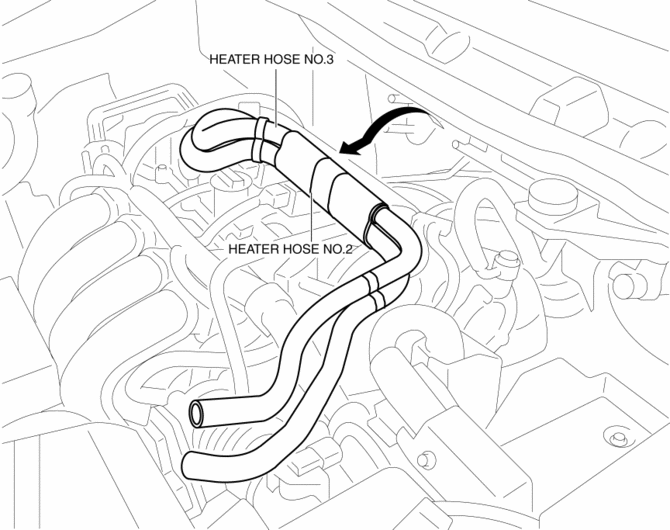
6. Install in the reverse order of the removal.
7. Inspect for engine coolant leakage..
Without Water Temperature Sensor
1. Remove the battery..
2. Drain the engine coolant..
3. Remove the insulator.
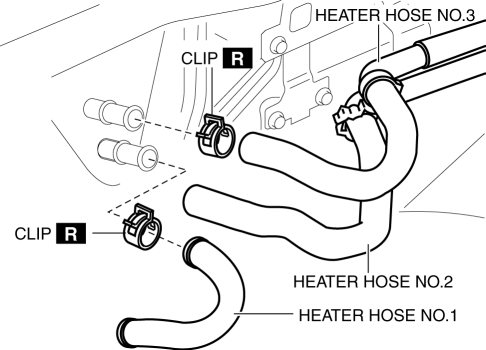
4. Remove the clips and remove the heater hose.
5. Install in the reverse order of the removal.
6. Inspect for engine coolant leakage..
 Heater Core Inspection
1. Inspect the heater core for damage, cracks, and water leakage.
If there is any malfunction, replace the heater core.
2. Visually inspect the fins for bending.
If there is any ...
 Rear Heat Duct Removal/Installation
1. Disconnect the negative battery cable..
2. Remove the following parts:
a. Decoration panel.
b. Shift lever knob (MTX).
c. Front console box.
d. Shift panel.
e. Upper panel.
f. Rear co ...
Other materials:
High Mount Brake Light Removal/Installation
1. Disconnect the negative battery cable..
2. Remove the liftgate upper trim..
3. Remove the rear spoiler..
4. Disconnect the connector.
5. While pressing the high-mount brake light tab in the direction of arrow (1)
shown in the figure, press the high-mount brake light in the direction ...
Center Pillar Removal [Panel Replacement]
Symbol Mark
Removal Procedure
CAUTION:
Remove the curtain air bag module to prevent damage before servicing.
Front-side
Rear-side
CAUTION:
Avoid cutting with a blowtorch or similar tools as the insulator (shaded
area) is flammable.
1. Rough cut the ...
Tie Rod End Replacement
1. Remove the snap pin.
2. Loosen the tie-rod end locknut.
3. Detach the tie-rod end from the steering knuckle using the SST.
4. Remove the tie-rod end locknut.
5. Place alignment marks as shown in the figure for proper installation.
6. Remove the tie-rod end.
7. Align th ...
