Mazda CX-5 Service & Repair Manual: Front Power Window Regulator Removal/Installation
1. Perform the front door glass preparation..
2. Disconnect the negative battery cable..
3. Remove the following parts:
a. Inner garnish.
b. Front door trim.
c. Front door glass.
d. Front door speaker.
e. Front power window motor.
4. Remove bolt A.
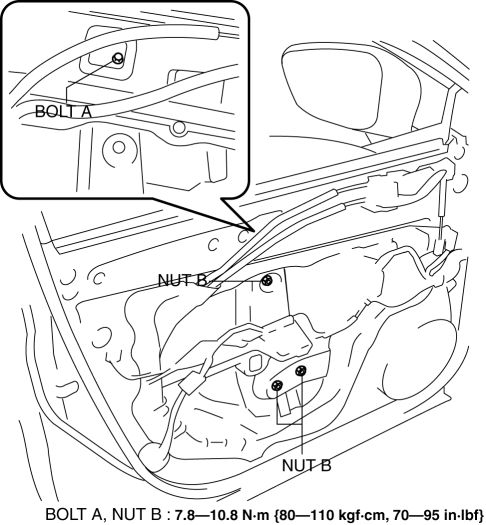
5. Remove nuts B.
6. Insert a hand through the speaker installation hole, rotate the drum housing in the direction shown in the figure to detach tabs from the front door module panel.
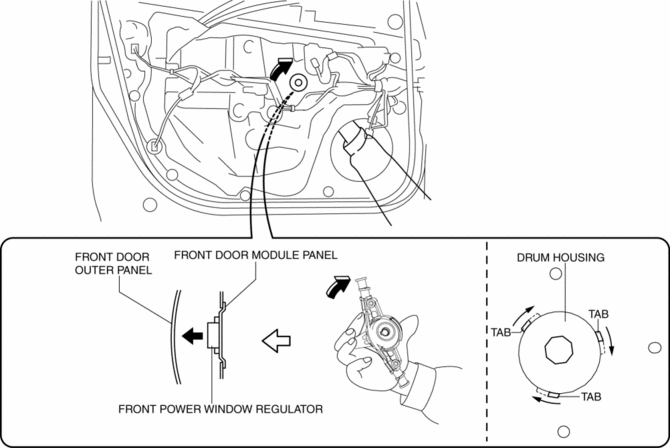
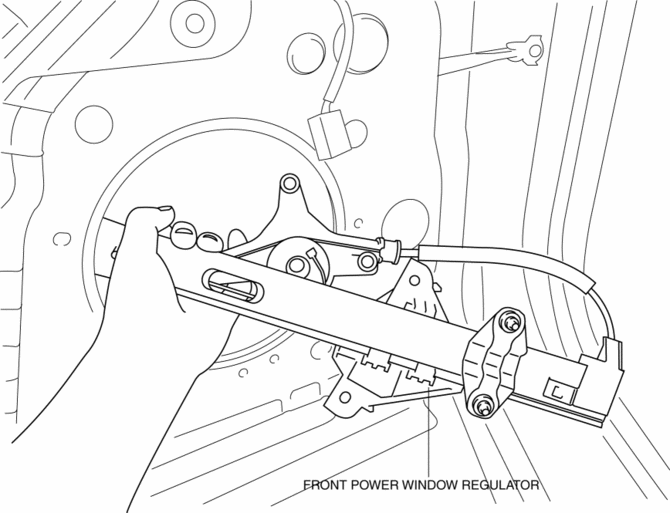
7. Remove the front power window regulator through the speaker installation hole.
CAUTION:
-
When removing the front power window regulator, the front power window regulator may contact the front door speaker installation hole, and the coating film of the front door inner panel and the front power window regulator could be damaged. Remove the front power window regulator while verifying that the front power window regulator and the front door speaker installation hole do not contact each other.
8. Install in the reverse order of removal.
 Front Door Glass Removal/Installation
1. Perform the front door glass preparation..
NOTE:
Before removing the front door glass, the removal procedure for the front
door glass installation bolt can be facilitated by adjusting ...
 Glass Antenna
Purpose, Function
The RDS (Radio Data System) converts radio broadcast waves to electric signals
and sends the signals to the audio unit.
Construction
An antenna with excellent ...
Other materials:
Differential Oil Temperature Sensor Inspection
WARNING:
Hot differential oil may cause severe burns. Do not perform maintenance while
differential oil is hot.
1. Disconnect the negative battery cable.
2. Disconnect the differential oil temperature sensor connector and remove the
differential oil temperature sensor.
3. Wrap ...
Seat Belt Extender
If your seat belt is not long enough, even when fully extended, a seat belt extender
may be available to you at no charge from your Authorized Mazda Dealer.
This extender will be only for you and for the particular vehicle and seat. Even
if it plugs into other seat belts, it may not hold in the ...
Passenger Side Air Bag Module [Two Step Deployment Control System]
Purpose
When the passenger-side air bag module receives an impact from a frontal
or frontal offset collision, the operation (deployment) of the air bag mediates
the impact to the head and face of the front passenger.
Function
When the passenger-side air bag module receives ...
