Mazda CX-5 Service & Repair Manual: Front Fender Panel Removal/Installation
1. Disconnect the negative battery cable..
2. Remove the following parts:
a. Front bumper.
b. Front combination light.
c. Front bumper slider.
d. Front over fender.
3. Remove bolts A and fasteners B.
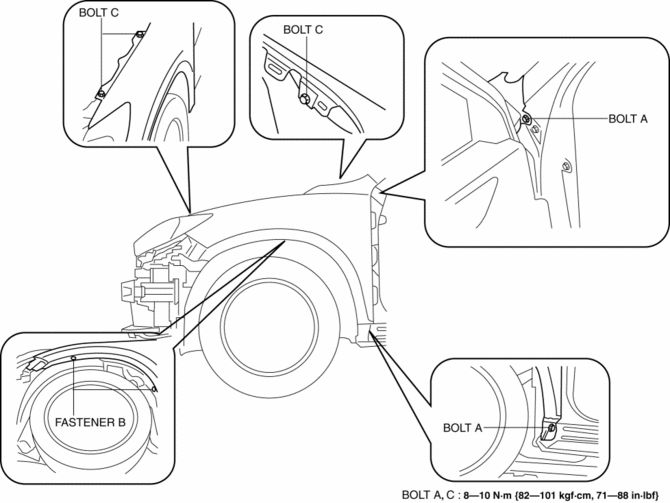
4. Remove bolts C.
5. Remove the front fender panel.
6. Install in the reverse order of removal.
7. Adjust the headlight aiming..
 Front Fender Junction Removal [Panel Replacement]
Symbol Mark
Removal Procedure
1. Drill the 3 locations shown in the figure.
2. Remove the front fender junction. ...
 Front Over Fender Removal/Installation
1. Remove fastener A.
2. Pull the front over fender lower in the direction of the arrow (1) while removing
hook B and pin C.
3. Remove fasteners D.
4. Pull the front over fender upper ...
Other materials:
Planetary Gear [Fw6 A EL, Fw6 Ax EL]
Purpose/Function
The planetary gear is a mechanism which shifts the drive force from the engine.
The planetary gear consists of multiple gears which rotate individually while
revolving. By controlling the individual rotation and revolving of the gears,
the transaxle performs gear shi ...
Rear Beltline Molding Removal/Installation
CAUTION:
Affix protective tape to the position shown in the figure.
1. Fully open the rear door glass.
2. Insert a tape-wrapped flathead screwdriver and then detach the clip A in the
direction of arrow (1) shown in the figure.
3. Pull up the rear belt line molding in the di ...
Tire Pressure Monitoring System
Tire Pressure Monitoring System
• The Tire Pressure Monitoring System (TPMS)
monitors the air pressure of all four wheels. If the air pressure of one or more
tires is too low, the system warns the driver by indicating the tire pressure monitoring
system warning light in the instrument clust ...
