Mazda CX-5 Service & Repair Manual: Front Fender Junction Removal [Panel Replacement]
Symbol Mark

Removal Procedure
1. Drill the 3 locations shown in the figure.
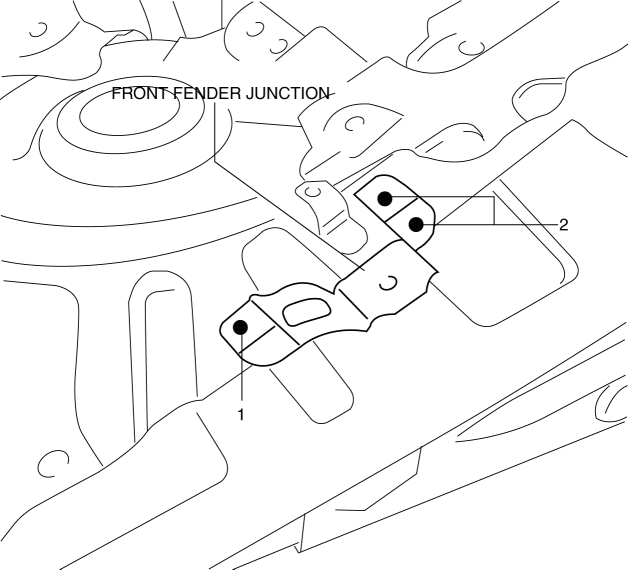
2. Remove the front fender junction.
 Front Fender Junction Installation [Panel Replacement]
Symbol Mark
Installation Procedure
1. When installing new parts, measure and adjust the body as necessary to conform
with standard dimensions.
2. Drill holes for the plug welding before inst ...
 Front Fender Panel Removal/Installation
1. Disconnect the negative battery cable..
2. Remove the following parts:
a. Front bumper.
b. Front combination light.
c. Front bumper slider.
d. Front over fender.
3. Remove bolts A and f ...
Other materials:
Seat Belt Extender
If your seat belt is not long enough, even when fully extended, a seat belt extender
may be available to you at no charge from your Authorized Mazda Dealer.
This extender will be only for you and for the particular vehicle and seat. Even
if it plugs into other seat belts, it may not hold in the ...
Washer Tank Removal/Installation
With Washer Fluid-level Sensor
1. Disconnect the negative battery cable..
2. Set the front over fender aside..
3. Set the mudguard (RH) aside..
4. Remove the front bumper..
5. Remove the bracket.
6. Disconnect the washer motor connector.
7. Disconnect the washer fluid-level sensor c ...
ABS Wheel Speed Sensor And ABS Sensor Rotor
Purpose/Function
The ABS wheel-speed sensor and ABS sensor rotor detect the rotation condition
of each wheel and transmit this information to the DSC HU/CM.
The signal from the ABS wheel-speed sensor is the primary signal that the
DSC HU/CM uses when carrying out control.
...
