Mazda CX-5 Service & Repair Manual: Front Door Trim Disassembly/Assembly
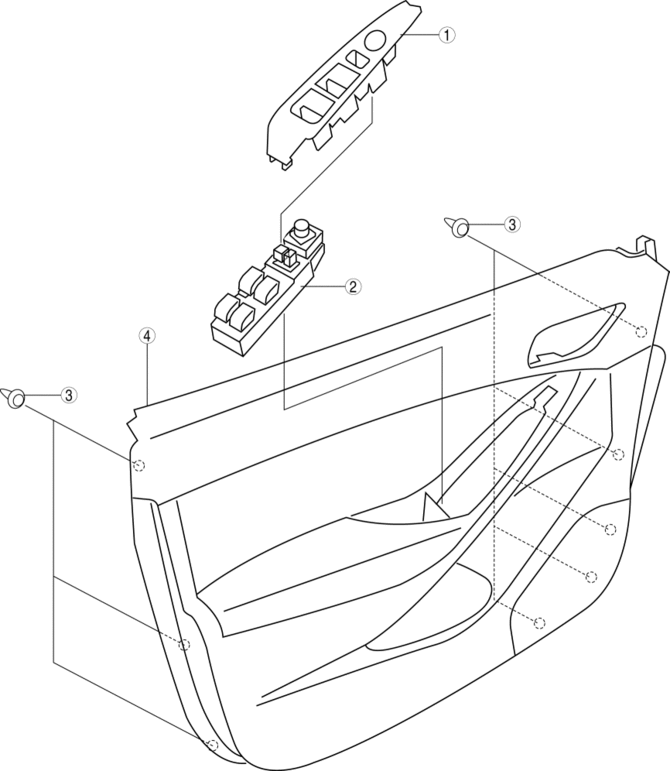
Driver-side
1. Disassemble in the order shown in the figure.
|
1 |
Switch panel cover |
|
2 |
Power window main switch (See Power Window Main Switch, Power Window Subswitch And Lock Switch Removal Note.) |
|
3 |
Fastener |
|
4 |
Front door trim |
2. Assemble in the reverse order of disassembly.
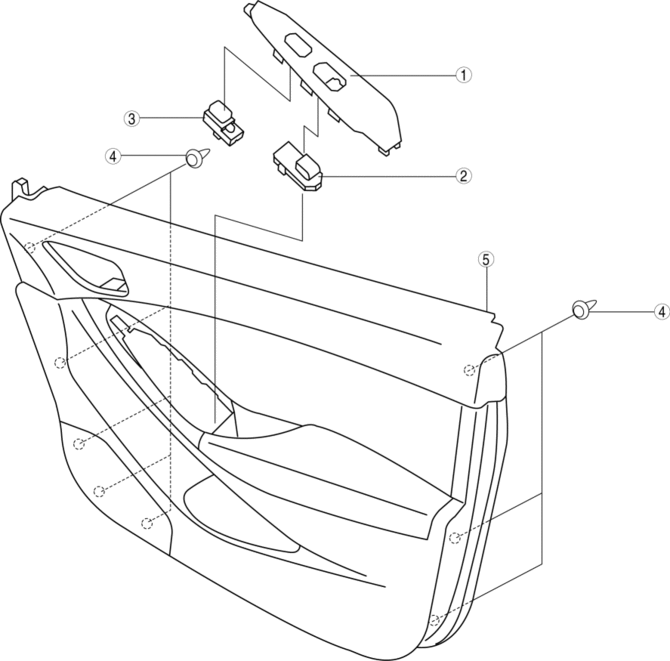
passenger-side
1. Disassemble in the order shown in the figure.
|
1 |
Switch panel cover |
|
2 |
Power subswitch (See Power Window Main Switch, Power Window Subswitch And Lock Switch Removal Note.) |
|
3 |
Lock switch (See Power Window Main Switch, Power Window Subswitch And Lock Switch Removal Note.) |
|
4 |
Fastener |
|
5 |
Front door trim |
2. Assemble in the reverse order of disassembly.
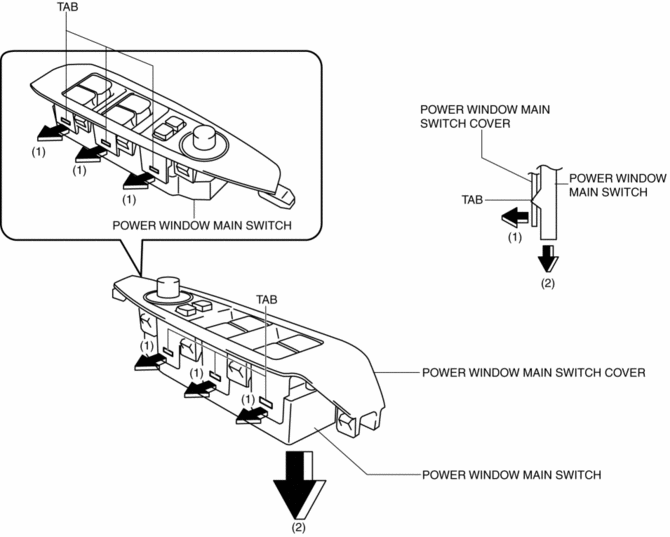
Power Window Main Switch, Power Window Subswitch And Lock Switch Removal Note
1. Pull the edge of power window main switch or subswitch cover in the direction of arrow (1) and detach tabs.
Driver-side
Passenger-side
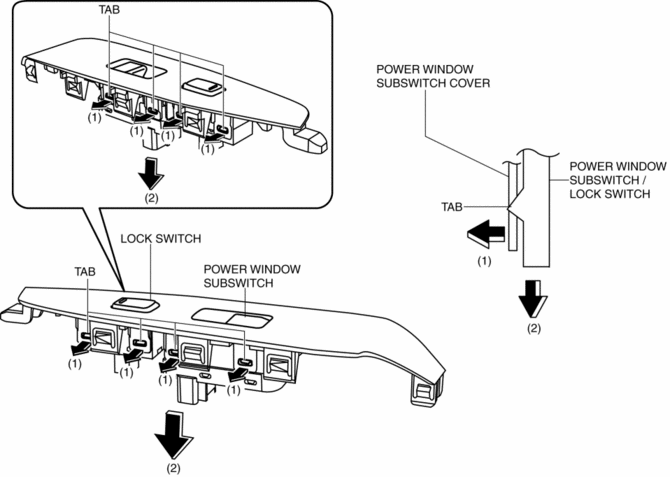
2. Remove the power window main switch, power window subswitch or lock switch in the direction of arrow (2) shown in the figure.
 Rear Door Latch And Lock Actuator Inspection
The following actuator and switch are integrated with the rear door latch
and lock actuator.
From the actuator/switch name and operation in the following table, select
the actu ...
 Front Door Trim Removal/Installation
1. Disconnect the negative battery cable..
2. Remove the inner garnish..
3. Insert a tape-wrapped flathead screwdriver in the position indicated by the
arrow (1) in the figure and remove the inn ...
Other materials:
Air Bag Module And Pre Tensioner Seat Belt Deployment Procedures [Two Step Deployment
Control System]
WARNING:
A live (undeployed) air bag module, pre-tensioner seat belt or lap pre-tensioner
seat belt may accidentally operate (deploy) when it is disposed of and cause
serious injury. Do not dispose of a live (undeployed) air bag module, pre-tensioner
seat belt or lap pre-tensioner s ...
PCM Inspection
Without Using the M-MDS
NOTE:
Because the PCM uses a waterproof connector, the inspection for the voltage/wave
pattern cannot be performed. The following values are for reference.
Terminal voltage table (Reference)
Terminal
Signal
C ...
Electric Variable Valve Timing Motor/Driver Inspection
WARNING:
A hot engine can cause severe burns. Turn off the engine and wait until it
is cool before servicing.
CAUTION:
Do not disassemble the electric variable valve timing motor/driver because
it is a precision unit.
Do not apply excessive force when rotating the ...
