Mazda CX-5 Service & Repair Manual: Front Accessory Socket Removal/Installation
1. Disconnect the negative battery cable..
2. Remove the front console..
3. Insert a tape-wrapped flathead screwdriver into the gap between the cap tab and socket.

4. Move the flathead screwdriver in the direction of the arrow (1) shown in the figure, press the front accessory socket in the direction of the arrow (2) shown in the figure, and detach the cap tab from the socket.
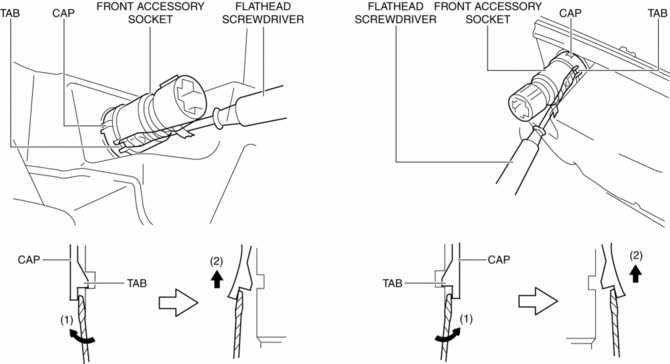
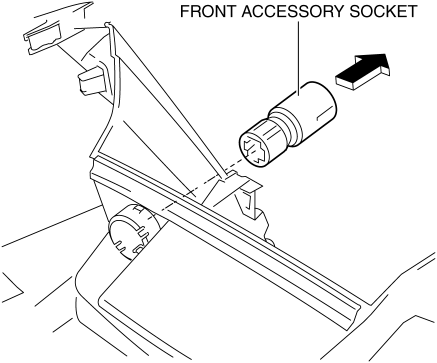
5. Pull the front accessory socket in the direction of the arrow shown in the figure and remove it.
6. While pressing the cap tabs in the direction of arrows (3) shown in the figure, press the cap in the direction of arrow (4) to detach the cap tabs from the front console.
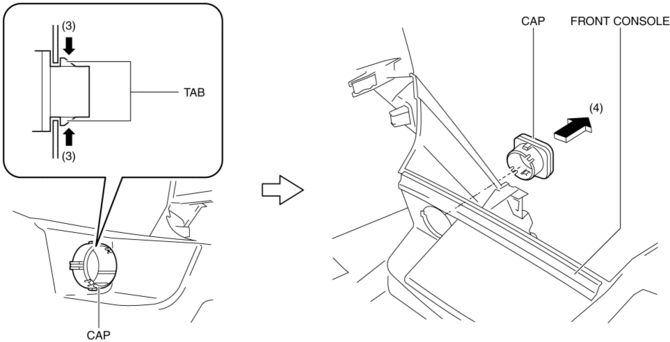
7. Remove the cap.
8. Install in the reverse order of removal.
 Front Accessory Socket Inspection
1. Remove the front accessory socket..
2. Connect the tester probe to the position shown in the figure and verify that
there is continuity.
If it cannot be verified, replace the front ...
 Rear Accessory Socket Inspection
1. Remove the rear accessory socket..
2. Connect the tester probe to the position shown in the figure and verify that
there is continuity.
If it cannot be verified, replace the rear ac ...
Other materials:
Rear Body Straight Line Dimensions (1) [Dimensions]
Point symbol
Designation
Hole diameter or bolt or nut size mm {in}
A
Liftgate hinge installation hole
?12 {0.47}
B
Liftgate stay damper installation hole
?10 {0.39}
...
Curtain Air Bag Module Removal/Installation [Standard Deployment Control System]
WARNING:
Handling the air bag module improperly can accidentally deploy the air bag
module, which may seriously injure you. Read the air bag system service warnings
and cautions before handling the air bag module..
1. Switch the ignition to off.
2. Disconnect the negative batte ...
Glass Antenna
Purpose, Function
The RDS (Radio Data System) converts radio broadcast waves to electric signals
and sends the signals to the audio unit.
Construction
An antenna with excellent noise resistance has been adopted to the rear window
glass.
Fail-safe
Function n ...
