Mazda CX-5 Service & Repair Manual: Engine SST
1: Mazda SST number
2: Global SST number
Example
|
1:49 UN20 5072 2:205–072 Holder |
|
|
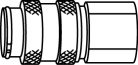
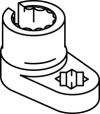
1:– 2:AKS042808 Adapter |
|
1: 49 UN20 5072 2: 205–072 Holder |
|
1: 49 B011 105 2: – Adapter |
|
|
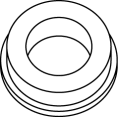
1: 49 E033 101 2: – Dust cover installer |
|
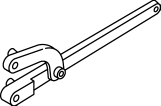
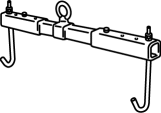
1: 49 UN30 3050 2: 303–050 Engine lifting bracket |
|
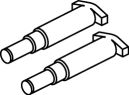
1: 49 C017 5A0 2: – Engine support set |
|
|
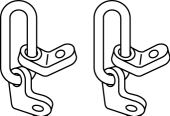
1: 49 L017 5A0 2: – Support hanger |
|
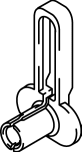
1: 49 G028 205 2: – Oil seal installer |
|
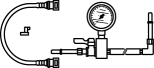
1: 49 D019 908 2: – Gauge (Part of 49 D019 9A2) |
|
|
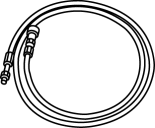
1: 49 D019 909 2: – Hose (Part of 49 D019 9A2) |
|
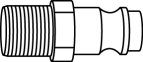
1: 49 D019 910 2: – Adapter (Part of 49 D019 9A2) |
|
1: 49 D019 911 2: – Adapter (Part of 49 D019 9A2) |
|
|
1: 49 N013 103A 2: – Remover (Part of 49 N013 1A0D) |
|
1: 49 N013 1A0D 2: – Fuel pressure gauge set |
|
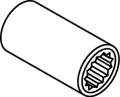
1: 49 D013 1A0 2: – Injector seal installer set |
|
|
1:49 D015 001 2:– Box wrench |
|
1:49 L018 001 2:– O2 sensor wrench |
|
— |
|


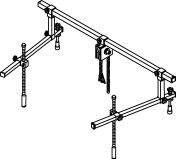


 Engine Removal/Installation
WARNING:
A hot engine can cause severe burns. Turn off the engine and wait until it
is cool before servicing.
Fuel vapor is hazardous. It can very easily ignite, causing serious inj ...
 Engine Transaxle Integration Control [Fw6 A EL, Fw6 Ax EL]
Outline
The TCM controls engine output torque and reduces transaxle output shaft
torque fluctuation during auto shifting, and reduces shock occurring from the
vehicle during shifting.
...
Other materials:
Units
Electric current
A (ampere)
Electric power
W (watt)
Electric resistance
ohm
Electric voltage
V (volt)
Length
mm (millimeter)
in (inch)
...
Rear Seat Back Striker Removal/Installation
1. Disconnect the negative battery cable..
2. Press the push knob to fold the rear seat back.
3. Remove the following parts:
a. Trunk board.
b. Trunk end trim.
c. Rear scuff plate.
d. Trunk side trim.
4. Remove the bolts.
5. Remove the rear seat back striker.
6. Install in the ...
Non Return Valve
Purpose, Function
Assures safety by preventing fuel from returning to the fuel filler opening.
Construction
The non-return valve cannot be removed as it is installed inside the fuel
tank.
2WD
AWD
A single valve type has been adopted for the non-return v ...
