Mazda CX-5 Service & Repair Manual: Energy Absorbing Form Removal/Installation
1. Disconnect the negative battery cable..
2. Remove the seal board upper..
3. Remove the front bumper..
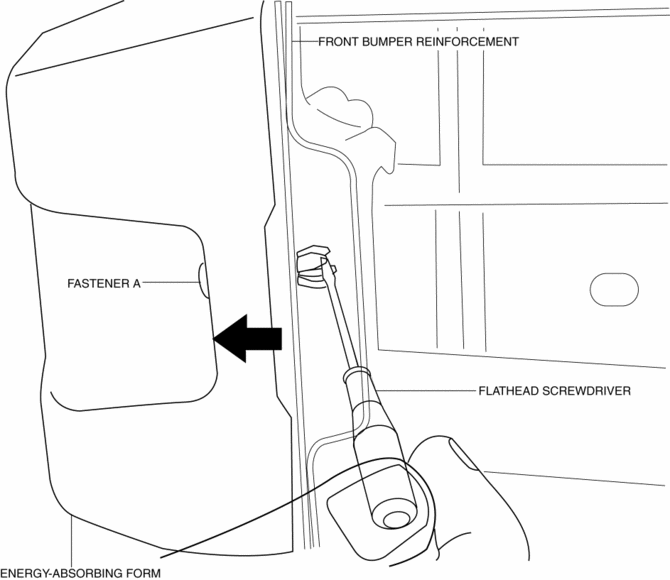
4. Insert the flathead screwdriver shown in the figure, push fasteners A for back side of front bumper reinforcement arrow shown in the figure.
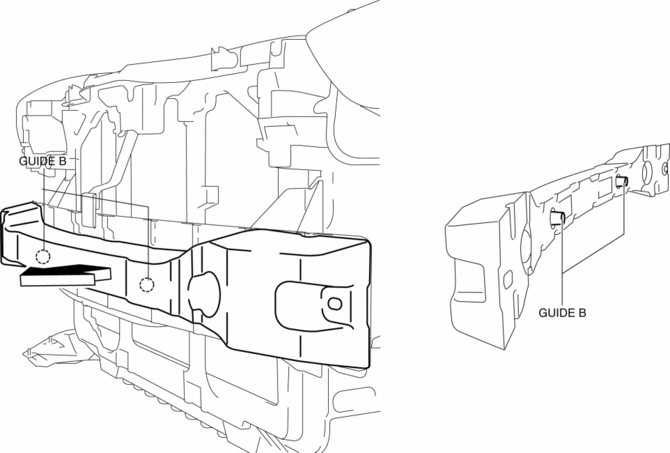
5. Pull the energy-absorbing form in the direction of the arrow shown in the figure while detaching guides B
6. Install in the reverse order of removal.
 Efficient Removal Of Body Panels
Body Measurements
Before removal or rough?cutting, first measure the body at and around the
damaged area against the standard reference dimension specifications. If there
is deformation, ...
 Exterior Trim
Outline
Exterior is equipped with the under cover on the vehicles under-surface.
Structure View
...
Other materials:
Low Engine Coolant Temperature Indicator Light (Blue)/High Engine Coolant Temperature
Warning Light (Red)
Purpose
Low engine coolant temperature indicator light (blue)
The low engine coolant temperature indicator light (blue) notifies the driver
that the engine coolant temperature is low and vaporization of the fuel is difficult.
High engine coolant temperature warning light (red)
...
Rain Sensor
Outline
The rain sensor detects the amount of rainfall and calculates the wiper operation
speed, and outputs a windshield wiper control signal to the front body control
module (FBCM) to perform automatic wiper operation (auto wiper system) according
to the amount of rainfall.
...
Air Bag System Warning Light [Two Step Deployment Control System]
Purpose
The air bag system warning light notifies the driver of a malfunction in
the SRS air bag system.
Function
If a malfunction occurs in the SRS air bag system, the air bag system warning
light illuminates or flashes.
Construction
LEDs (light-emitting d ...
