Mazda CX-5 Service & Repair Manual: Clock Spring Adjustment [Two Step Deployment Control System]
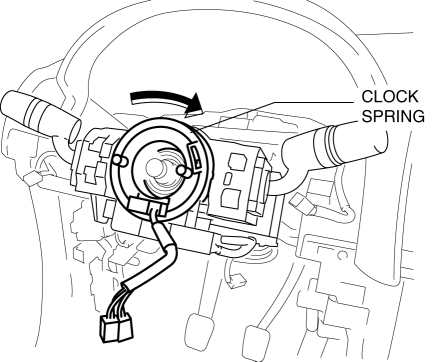
1. Set the front wheels straight ahead.
CAUTION:
-
The clock spring will break if over?wound. Do not forcibly turn the clock spring.
2. Turn the clock spring clockwise until it stops.
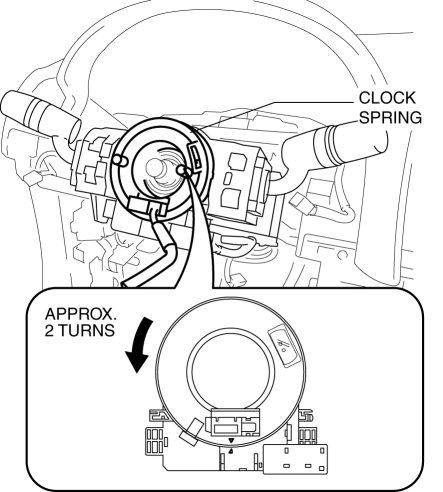
3. Turn the clock spring counterclockwise approx. 2 turns
.
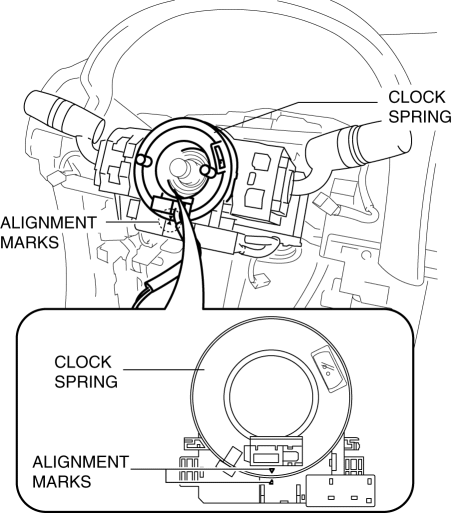
4. Align the mark on the clock spring with the mark on the outer housing.
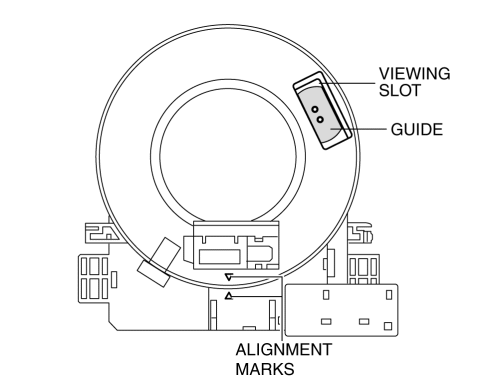
NOTE:
-
After adjusting the alignment marks, the guides can be verified in the viewing slots shown in the figure.
 Clock Spring Adjustment [Standard Deployment Control System]
1. Set the front wheels straight ahead.
CAUTION:
The clock spring will break if over?wound. Do not forcibly turn the clock
spring.
2. Turn the clock spring clockwise until it stops. ...
 Clock Spring Inspection [Standard Deployment Control System]
1. Disconnect the negative battery cable and wait for 1 min or more..
2. Remove the driver?side air bag module..
3. Remove the steering wheel..
4. Remove the column cover..
5. Remove the cloc ...
Other materials:
A/C Unit
Outline
The A/C unit which integrates the cooling and heater units has been adopted.
Construction
The A/C unit consists of the following parts.
Operation
Air Mix Door Operation
The air mix door, installed in the A/C unit, controls HOT or COLD position,
depend ...
Rear Coil Spring Removal/Installation
WARNING:
Be careful not to allow the coil spring to fly off when removing/installing
the coil spring. Otherwise, the coil spring could fly off and cause serious
injury or death, or damage to the vehicle.
1. When working on the left side of the vehicle, disconnect the auto lev ...
Instrumentation/Driver Info. Personalization Features Setting Procedure
1. Connect the M-MDS to the DLC-2.
2. After vehicle identification, select the following from the M-MDS initialization
screen.
a. “Module programming“
b. “Programmable Parameters”
3. Select menu in the “IC”.
4. Select an item name, and than select option.
Instrument cluster ...
