Mazda CX-5 Service & Repair Manual: Clock Spring Adjustment [Standard Deployment Control System]
1. Set the front wheels straight ahead.
CAUTION:
-
The clock spring will break if over?wound. Do not forcibly turn the clock spring.
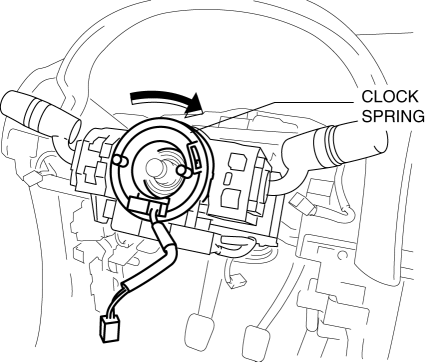
2. Turn the clock spring clockwise until it stops.

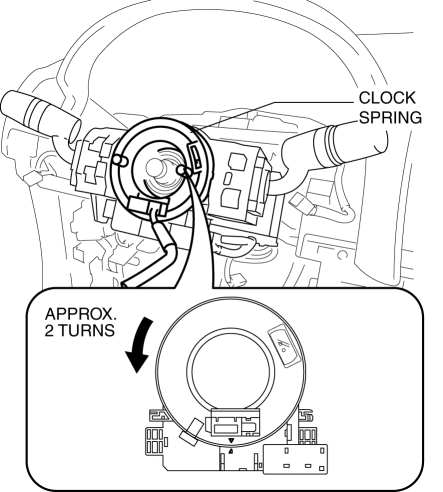
3. Turn the clock spring counterclockwise approx. 2 turns
.

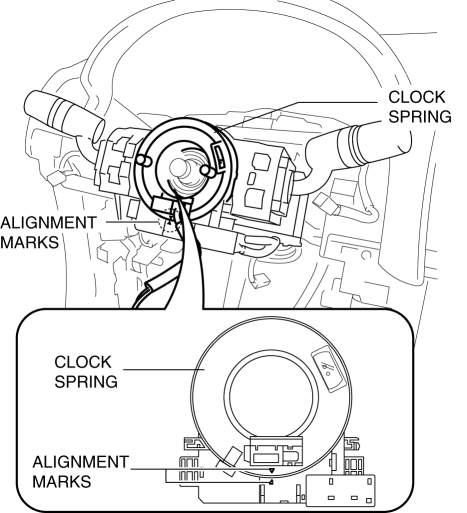
4. Align the mark on the clock spring with the mark on the outer housing.


NOTE:
-
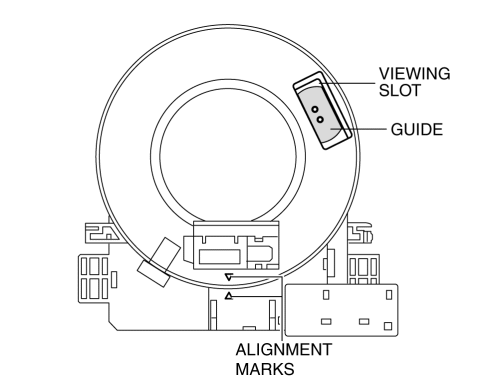
After adjusting the alignment marks, the guides can be verified in the viewing slots shown in the figure.
 Clock Removal/Installation
1. Disconnect the negative battery cable..
2. Remove the following parts:
a. Shift lever knob (MTX).
b. Front console box.
c. Shift panel.
d. Upper panel.
e. Rear console.
f. Side wall. ...
 Clock Spring Adjustment [Two Step Deployment Control System]
1. Set the front wheels straight ahead.
CAUTION:
The clock spring will break if over?wound. Do not forcibly turn the clock
spring.
2. Turn the clock spring clockwise until it stops. ...
Other materials:
Turbine/Input Shaft Speed Sensor, Output Shaft Speed Sensor [Fw6 A EL, Fw6 Ax
EL]
Purpose/Function
The turbine/input shaft speed sensor detects the rotation speed of the input
shaft (low clutch drum).
The output shaft speed sensor detects the rotation speed of the output shaft
(primary gear).
The turbine/input shaft speed sensor and output shaft speed ...
Wiper Blades
CAUTION
●Hot waxes applied by automatic car washers
have been known to affect the wiper's ability to clean windows.
● To prevent damage to the wiper blades,
do not use gasoline, kerosene, paint thinner, or other solvents on or near them.
● When the wiper lever is in the ...
PID/Data Monitor Inspection [Blind Spot Monitoring (Bsm)]
1. Connect the M-MDS to the DLC-2.
2. After the vehicle is identified, select the following items from the initialization
screen of the M-MDS.
a. Select “DataLogger”.
b. Select “Modules”.
c. Select “BSML” or “BSMR”.
3. Select the applicable PID from the PID table.
4. Ve ...
