Mazda CX-5 Service & Repair Manual: Charcoal Canister Inspection
U.S.A. And CANADA
Leakage inspection
1. Perform the following procedures:
-
Do not operate CV solenoid valve.
-
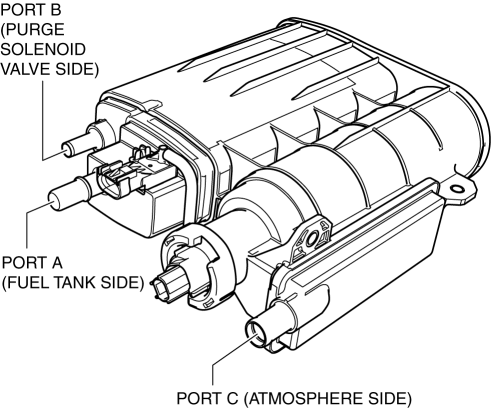
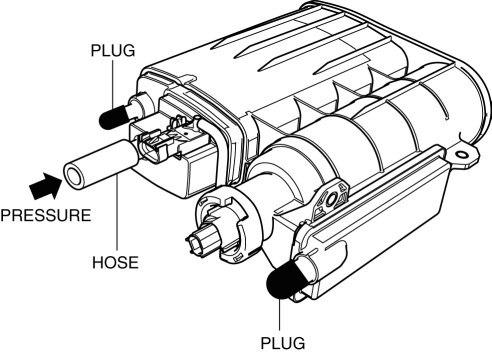
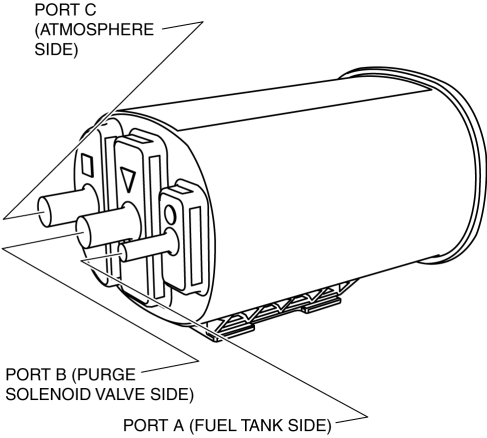
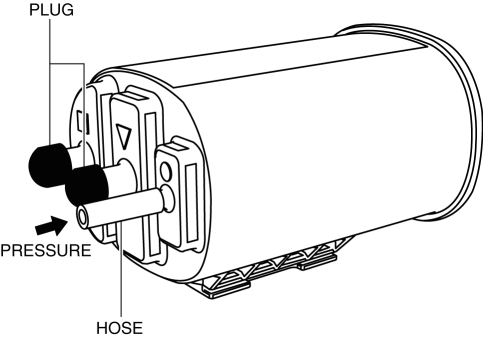
Assemble the hose used for inspection to port A.
-
Cover ports B and C with the caps.
CAUTION:
-
Do not apply a pressure 20 kPa {150 mmHg, 5.91 inHg} or more to the charcoal canister for 1 min. or more. Doing so will damage the charcoal canister.
2. Apply pressure (19.6 kPa {147 mmHg, 5.79 inHg}
) through the hose, and verify that air does not leak from the charcoal canister.
-
If there is airflow, replace the charcoal canister..
-
If there is no airflow, perform the following “Airflow Inspection”..
Airflow inspection
1. Perform the following procedure to verify the charcoal canister airflow.
-
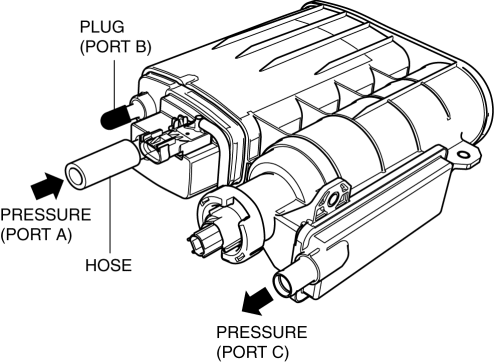
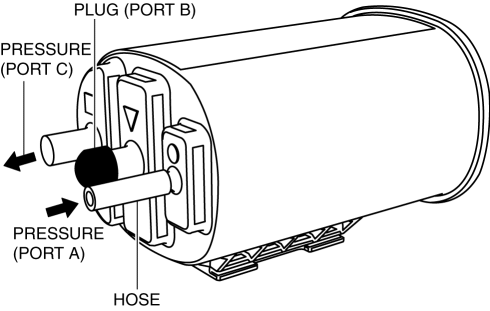
Between port A and port C
-
Plug the port B.
-
Apply a pressure of 1.8 kPa {14 mmHg, 0.53 inHg}
to port A.
-
Verify that there is airflow from port C.
-
If there is no airflow, replace the charcoal canister..
-
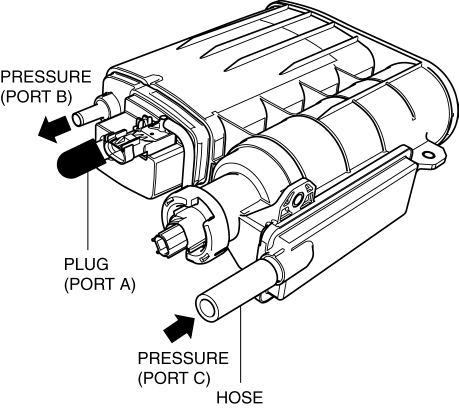
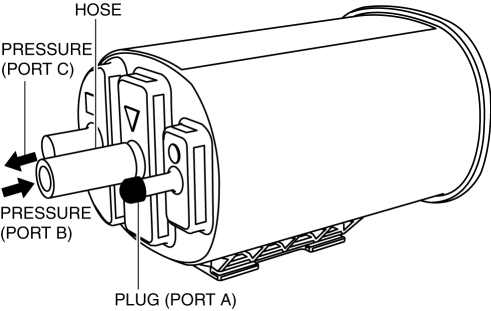
Between port B and port C
-
Plug the port A.
-
Apply a pressure of 2.0 kPa {15 mmHg, 0.59 inHg}
to port C.
-
Verify that there is airflow from port B.
-
If there is no airflow, replace the charcoal canister..
Except U.S.A. And CANADA
Leakage inspection
1. Perform the following procedures:
-
Assemble the hose used for inspection to port A.
-
Cover ports B and C with the caps.
CAUTION:
-
Do not apply a pressure 20 kPa {150 mmHg, 5.91 inHg} or more to the charcoal canister for 1 min. or more. Doing so will damage the charcoal canister.
2. Apply pressure (19.6 kPa {147 mmHg, 5.79 inHg}
) through the hose, and verify that air does not leak from the charcoal canister.
-
If there is airflow, replace the charcoal canister..
-
If there is no airflow, perform the following “Airflow Inspection”..
Airflow inspection
1. Perform the following procedure to verify the charcoal canister airflow.
-
Between port A and port C
-
Plug the port B.
-
Apply a pressure of 0.98 kPa {7.4 mmHg, 0.29 inHg}
to port A.
-
Verify that there is airflow from port C.
-
If there is no airflow, replace the charcoal canister..
-
Between port B and port C
-
Plug the port A.
-
Apply a pressure of 0.98 kPa {7.4 mmHg, 0.29 inHg}
to port C.
-
Verify that there is airflow from port B.
-
If there is no airflow, replace the charcoal canister..
 Catch Tank
Purpose, Function
Suppresses pulsation occurring before evaporative gas is inducted into the
intake manifold.
Construction
The catch tank is installed in the engine compartment. ...
 Charcoal Canister Removal/Installation
U.S.A. And CANADA
1. Disconnect the negative battery cable..
2. Remove the floor under cover..
3. Remove in the order indicated in the table.
1
Quick release connect ...
Other materials:
Instrument Cluster Disassembly/Assembly
CAUTION:
If the instrument cluster is hit forcefully during disassembly such as by
being dropped, it could get damaged and the system may not operate normally.
When disassembling the instrument cluster, perform the procedure on a workbench
on clean clothes being careful not to drop ...
Push-Starting
Do not push-start your Mazda.
WARNING
Never tow a vehicle to start it:
Towing a vehicle to start it is dangerous. The vehicle being towed could surge
forward when its engine starts, causing the two vehicles to collide. The occupants
could be injured.
CAUTION
Do not push-start a vehicle that ...
Emission System
Purpose, Outline
A single-nano catalyst has been adopted for the under-floor, three-way catalyst
to improve emission gas purification efficiency.
Structural View
Engine compartment side
Exhaust system side
2WD
AWD
Fuel tank side
U.S.A. and CANADA (2WD)
U.S.A. a ...
