Mazda CX-5 Service & Repair Manual: Center Accessory Socket Removal/Installation
1. Disconnect the negative battery cable..
2. Remove the upper console..
3. Insert a tape-wrapped flathead screwdriver into the gap between the cap tab and socket.
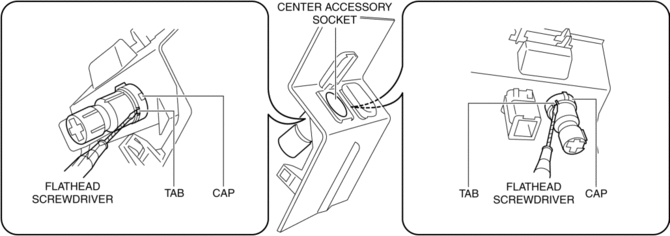
4. Move the flathead screwdriver in the direction of the arrow (1) shown in the figure, press the center accessory socket in the direction of the arrow (2) shown in the figure, and detach the cap tab from the socket.
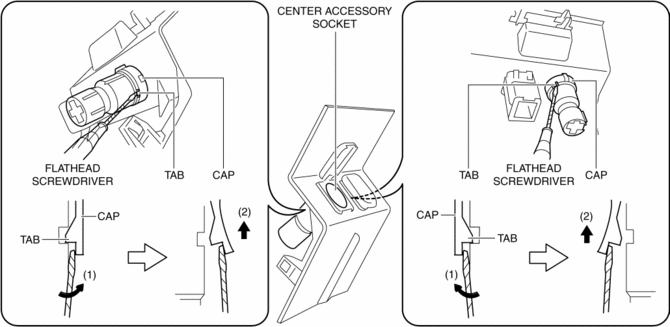
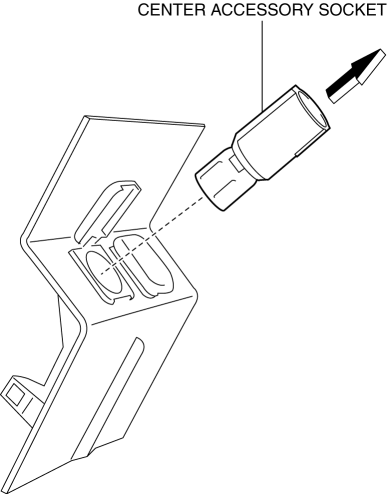
5. Pull the center accessory socket in the direction of the arrow shown in the figure and remove it.
6. While pressing the clip tabs in the direction of arrows (3) shown in the figure, press the cap in the direction of arrow (4) to detach the cap tabs from the upper console.
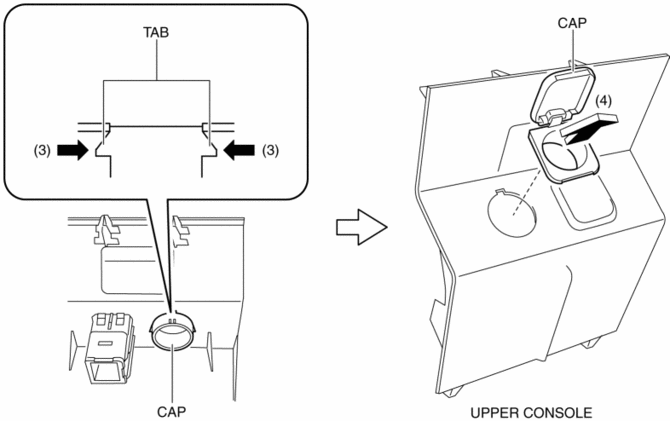
7. Remove the cap.
8. Install in the reverse order of removal.
 Center Accessory Socket Inspection
1. Remove the center accessory socket..
2. Connect the tester probe to the position shown in the figure and verify that
there is continuity.
If it cannot be verified, replace the cente ...
 Front Accessory Socket Inspection
1. Remove the front accessory socket..
2. Connect the tester probe to the position shown in the figure and verify that
there is continuity.
If it cannot be verified, replace the front ...
Other materials:
Tire Maintenance
Improper or inadequate vehicle maintenance can cause tires to wear abnormally.
Here are some important maintenance points:
Tire Inflation Pressure
Inspect all tire pressure monthly (including the spare) when the tires are cold.
Maintain recommended pressures for the best ride, top handling, an ...
Windshield Wiper Motor And Link Removal/Installation
1. Disconnect the negative battery cable..
2. Remove the following parts:
a. Windshield wiper arm and blade.
b. Cowl grille.
CAUTION:
Always affix protective tape to the windshield end. If the windshield wiper
motor and link contacts the windshield, it could damage the windshield. ...
Brake/Taillight Bulb Removal/Installation
1. Disconnect the negative battery cable..
2. Insert a tape-wrapped flathead screwdriver into the service hole in the position
shown in the figure.
3. Move the flathead screwdriver in the direction of the arrow (1) shown in the
figure, pull out the service hole cover, and detach the serv ...
