Mazda CX-5 Service & Repair Manual: Auto Dimming Mirror Removal/Installation
1. Disconnect the negative battery cable..
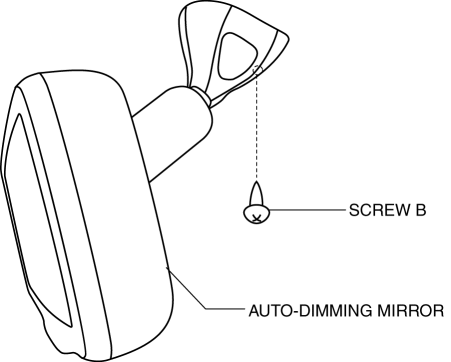
2. Remove the screw B.
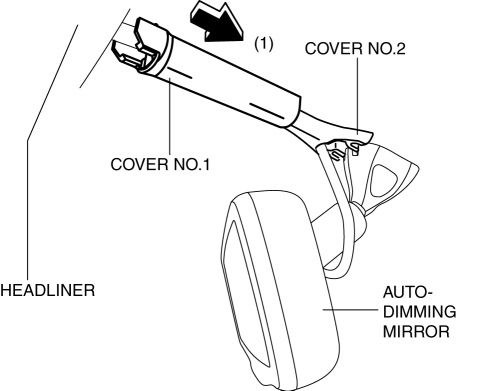
3. Remove the auto-dimming mirror in the direction of arrow (1) shown in the figure.
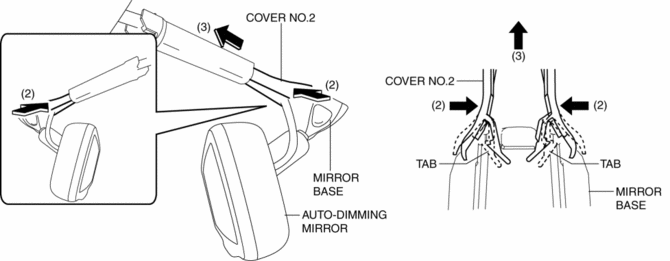
4. Detach tabs while push the cover No.2 in the direction of the arrow (2) shown in the figure, then remove the cover No.2 in the direction of the arrow (3).
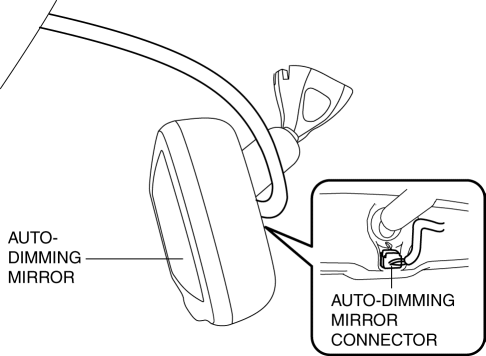
5. Disconnect the auto-dimming mirror connector.
6. Remove the auto-dimming mirror in the direction of arrow (4) from the mirror base.
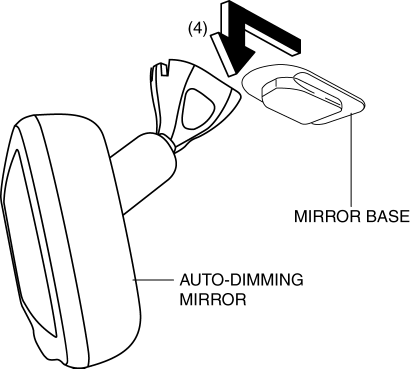
7. Install in the reverse order of removal.
 Auto Dimming Mirror Inspection
1. Measure the voltage at each terminal.
If the voltage is not as specified in the Terminal Voltage Table (Reference),
inspect the parts under “Inspection item (s)” and related wiring h ...
 Filament Inspection
1. Switch the ignition ON (engine off).
2. Turn the rear window defroster switch on.
CAUTION:
Directly touching the rear window defroster filament with the lead of the
tester could ...
Other materials:
Front Wheel Hub Bolt Replacement
1. Remove the brake calliper component from the steering knuckle and suspend
it out of the way using a cable.
2. Remove the disc plate.
3. Remove the wheel hub bolt using the SST as shown in the figure.
4. Place a new wheel hub bolt in the wheel hub.
5. Install the wheel hub by placi ...
Manual Transaxle Removal/Installation [C66 M R]
Removal
1. Disconnect the negative battery cable..
2. Remove the plug hole plate..
3. Remove the front under cover No.2..
4. Remove the front under cover No.1..
5. Remove the splash shield..
6. Drain the manual transaxle oil..
7. Disconnect and/or remove the following parts in the engin ...
Seat Precaution
WARNING
Make sure the adjustable components of a seat are locked in place:
Adjustable seats and seatbacks that are not securely locked are dangerous. In a
sudden stop or collision, the seat or seatback could move, causing injury. Make
sure the adjustable components of the seat are locked in pl ...
