Mazda CX-5 Service & Repair Manual: Airflow Mode Actuator Removal/Installation [Full Auto Air Conditioner]
1. Disconnect the negative battery cable..
2. Remove the following parts:
a. Dashboard under cover.
b. Glove compartment.
3. Disconnect the airflow mode actuator connector.
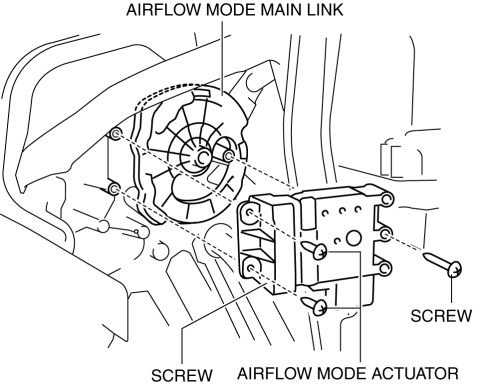
4. Remove the screw.
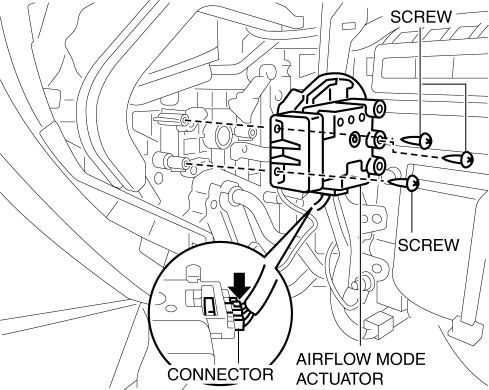
5. Remove the airflow mode actuator.
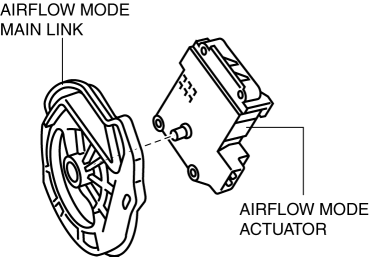
6. Remove the airflow mode main link.
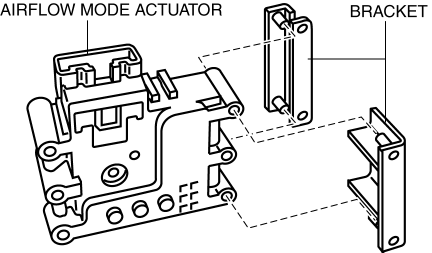
7. Remove the bracket.
8. Install in the reverse order of removal..
Airflow Mode Actuator Installation Note
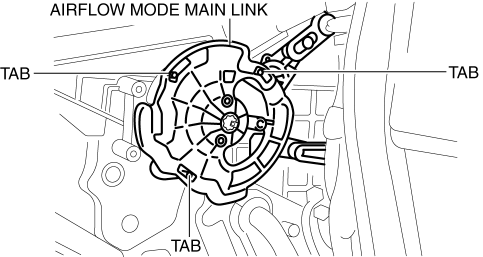
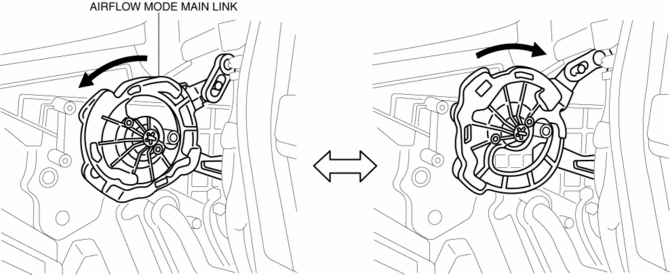
1. Align the airflow mode main link and the airflow mode sub link projection as shown in the figure.
2. When lightly pressing the airflow main link to rotate it in the direction of the arrow, verify that the airflow mode door switches to the position for each mode.
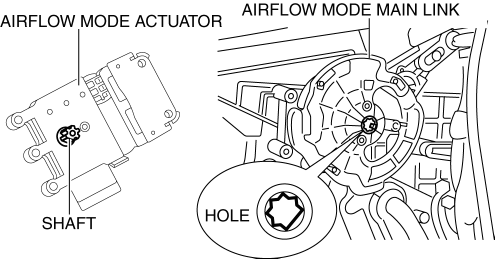
3. Align the airflow mode main link installation hole with the shape of the airflow mode actuator shaft, and install while holding the airflow mode main link.
 Airflow Mode Actuator Inspection [Full Auto Air Conditioner]
CAUTION:
If the lever position exceeds the operation range shown in the figure, the
circuit in the actuator could be damaged. Always perform an actuator operation
inspection with the lev ...
 Airflow Mode Actuator [Full Auto Air Conditioner]
Purpose
The airflow mode actuator moves the mode door in the A/C unit to switch the
air vent.
Function
Door open/close function
The airflow mode actuator drives the motor based ...
Other materials:
Rear Side Marker Light Bulb Removal/Installation
1. Disconnect the negative battery cable..
2. Insert a tape-wrapped flathead screwdriver into the service hole in the position
shown in the figure.
3. Move the flathead screwdriver in the direction of the arrow (1) shown in the
figure, pull out the service hole cover, and detach the serv ...
Rear View Monitor
Rear View Monitor
The rear view monitor is a visual assist system when reversing the vehicle that
provides images from the rear of the vehicle.
WARNING
Always drive carefully confirming the safety of the rear and the surrounding
conditions by looking directly with your eyes:
Reversing the ve ...
HomeLink Wireless Control System
NOTE
HomeLink and HomeLink house are registered trademarks of Johnson Controls.
The HomeLink system replaces up to 3 hand-held transmitters with a single builtin
component in the auto-dimming mirror.
Pressing the HomeLink button on the auto-dimming mirror activates garage doors,
gates and oth ...
