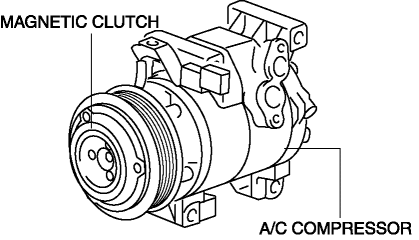
Mazda CX-5 Service & Repair Manual: A/C Compressor
Purpose
-
The A/C compressor circulates the refrigerant in the refrigerant cycle.
-
The A/C compressor compresses the gaseous refrigerant atomized by the evaporator, and by pressurizing the gaseous refrigerant, liquification by the condenser is facilitated.
Function
-
The A/C compressor compresses the gaseous refrigerant by driving the piston in the compressor using the drive force from the engine. In addition, it sends the compressed refrigerant to the condenser.
Construction
-
The A/C compressor has adopted a swash plate type compressor.
-
The A/C compressor consists of the following parts:
-
Shaft
-
Swash plate
-
Cylinder
-
Piston
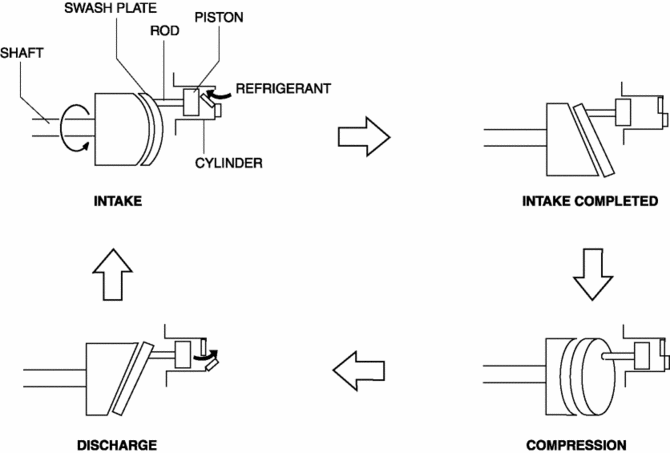
Operation
-
When the drive force from the engine is transmitted to the compressor shaft by the operation of the magnetic clutch, the A/C compressor rotates the swash plate in the compressor. The rotation of the swash plate generates compression in the cylinder by the reciprocating movement of the piston.
1. When the piston moves downward, the suction valve opens and the refrigerant is discharged to the cylinder.
2. When the piston reaches the BDC, refrigerant charging is completed and the suction valve is closed.
3. When the piston moves upward, the refrigerant in the cylinder is compressed.
4. The compressed refrigerant presses open the discharge valve, and the high-temperature, highly pressurized refrigerant from the cylinder is discharged.
Fail-safe
-
Function not equipped.
 A/C
A/C
...
 A/C Compressor Control [Full Auto Air Conditioner]
Purpose
The A/C compressor control switches the A/C compressor on/off according to
the vehicle environment.
Function
The A/C compressor control turns the A/C compressor on/off b ...
Other materials:
Electric Power Steering System
Outline
A column assist type EPS has been adopted for all models.
EPS provides smooth handling from low to high speeds as a result of the excellent
steering feel provided by the electronic control and the vehicle-speed responsive
control.
EPS does not require a power ste ...
Sas Control Module Configuration (Using Read/Write Function) [Standard Deployment
Control System]
NOTE:
When performing configuration, it is necessary to read the vehicle specification
information from the SAS control module before replacing it. Connect the M-MDS
to the vehicle and perform vehicle identification before removing the SAS control
module. The vehicle specification i ...
Front Sash Molding Installation
WARNING:
Using a utility knife with bare hands can cause injury. Always wear gloves
when using a utility knife.
NOTE:
Double-sided adhesive tape has already been attached to the new front sash
molding.
1. When installing a new front sash molding, follow the procedur ...
