Mazda CX-5 Owners Manual: Replace Electrical Battery
If the buttons on the transmitter are inoperable and the operation indicator light does not flash, the battery may be dead.
Replace with a new battery before the transmitter becomes unusable.
CAUTION
● Make sure the battery is installed correctly. Battery leakage could occur if it is not installed correctly.
● When replacing the battery, be careful not to touch any of the internal circuitry and electrical terminals, bend the electrical terminals, or get dirt in the transmitter as the transmitter could be damaged.
● There is the danger of explosion if the battery is not correctly replaced.
● Dispose of used batteries according to the following instructions.
● Insulate the plus and minus terminals of the battery using cellophane or equivalent tape.
● Never disassemble.
● Never throw the battery into fire or water.
● Never deform or crush.
● Replace only with the same type battery (CR2025 or equivalent).
The following conditions indicate that the battery power is low:
• The KEY indicator light (green) flashes in the instrument cluster for about 30 seconds after the engine is turned off (for vehicles with a type A meter, messages are displayed in the instrument cluster).
• The system does not operate and the operation indicator light on the transmitter does not flash when the buttons are pressed.
• The system's operational range is reduced.
Replacing the battery at an Authorized Mazda Dealer is recommended to prevent damage to the key. If replacing the battery by yourself, follow the instruction below.
Replacing the key battery
1. Pull out the auxiliary key.
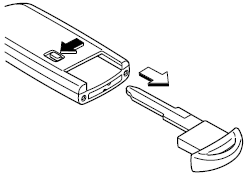
2. Insert a small, flathead screwdriver into the groove shown in the figure and rotate the screwdriver to open the cover slightly.
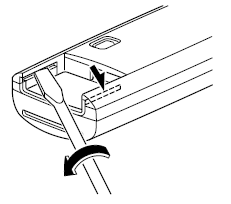
3. Insert the small, flathead screwdriver into the gap between the cover and the transmitter, and then rotate the screwdriver to detach the cover.
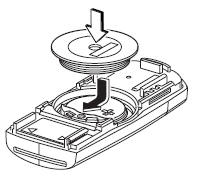
4. Remove the battery cap, then remove the battery.
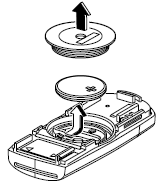
5. Insert a new battery with the positive pole facing up, and then cover the battery with the battery cap.
6. Close the cover.
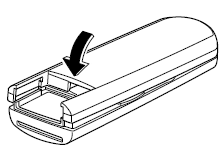
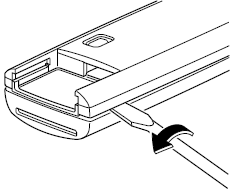
7. Reinsert the auxiliary key.
CAUTION
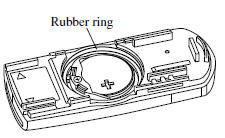
●Be careful not to allow the rubber ring shown in the figure to be scratched or damaged.
● If the rubber ring detaches, reattach it before inserting a new battery.
 Battery
WARNING
Wash hands after handling the battery and related accessories:
Battery posts, terminals and related accessories contain lead and lead compounds,
chemicals known to the State of California ...
 Tires
Tires
For reasons of proper performance, safety, and better fuel economy, always maintain
recommended tire inflation pressures and stay within the recommended load limits
and weight distribution.
WARNI ...
Other materials:
Entertainment System
Outline
The following entertainment system has been adopted.
Audio system (with audio system)
Car-navigation system (with car-navigation system)
Park assist system (with park assist system)
Bluetooth system (with Bluetooth system)
...
Vanity Mirror Illumination Bulb Removal/Installation
1. Disconnect the negative battery cable..
2. Insert a tape-wrapped flathead screwdriver into the service hole in the position
shown in the figure.
3. Move a flathead screwdriver in the direction of the arrow (1) shown in the
figure and detach the lens tab and sunvisor.
4. Detach a ...
Upper Cowl Side Reinforcement Installation [Panel Replacement]
Symbol Mark
Installation Procedure
1. When installing new parts, measure and adjust the body as necessary to conform
with standard dimensions.
2. Drill holes for the plug welding before installing the new parts.
3. After temporarily installing new parts, make sure the related parts fit p ...
