Mazda CX-5 Service & Repair Manual: Rear Side Marker Light Bulb Removal/Installation
1. Disconnect the negative battery cable..
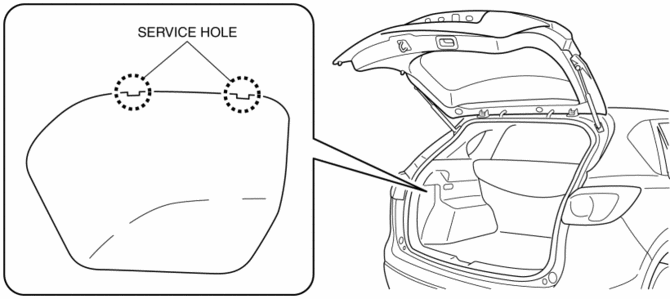
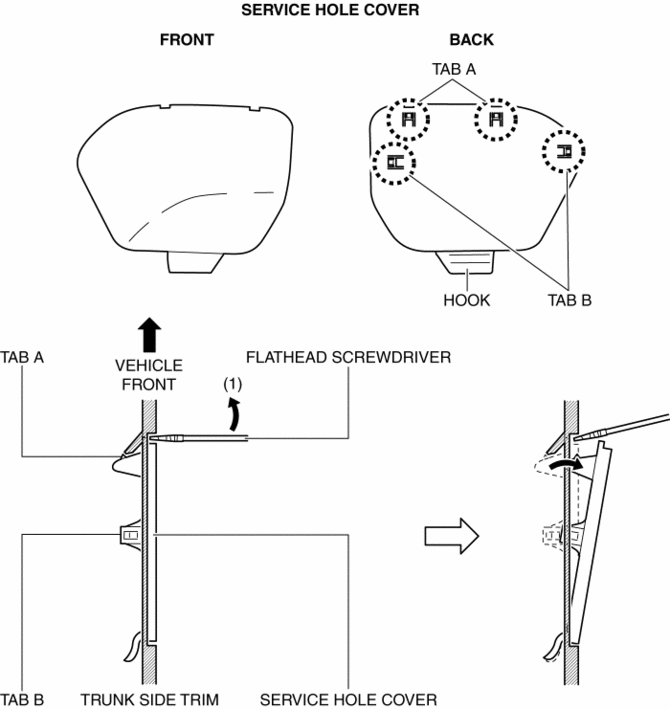
2. Insert a tape-wrapped flathead screwdriver into the service hole in the position shown in the figure.
3. Move the flathead screwdriver in the direction of the arrow (1) shown in the figure, pull out the service hole cover, and detach the service hole cover tab and trunk side trim.
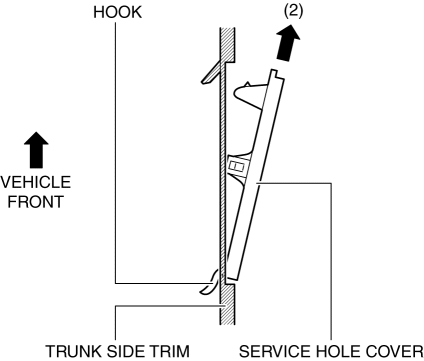
4. Pull out the service hole cover in the direction of the arrow (2) shown in the figure and pull out the service hole cover hook from the trunk side trim.
5. Remove the service hole cover.
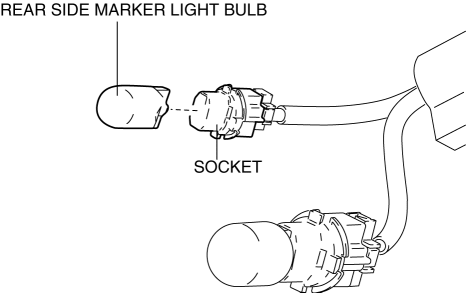
6. Rotate the socket in the direction of the arrow (3) shown in the figure and remove it from the rear combination light in the direction of the arrow (4) shown in the figure.
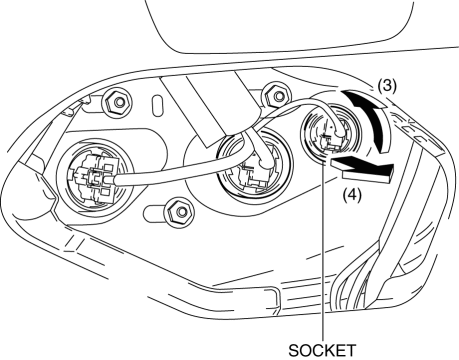
7. Remove the rear side marker light bulb.
8. Install in the reverse order of removal.
 Rear Combination Light Removal/Installation
NOTE:
Fogging or condensation on the inside of the rear combination lights may
occur due to a natural phenomenon occurring as a result of a temperature difference
between the interior an ...
 Taillight Bulb Removal/Installation
1. Disconnect the negative battery cable..
2. Insert a tape-wrapped flathead screwdriver into the service hole in the position
shown in the figure.
3. Move the flathead screwdriver in the di ...
Other materials:
Windshield Washer Nozzle Adjustment
CAUTION:
If the nozzle is adjusted by inserting a stick-like object into the nozzle,
it could deform the injection nozzle and the washer fluid may not spray normally.
When adjusting the nozzle, do not insert objects into the injection nozzle.
1. Insert a tape-wrapped precision fl ...
DSC Control
Outline
While a vehicle normally turns safely in response to steering operation,
there are instances when the limits of tire lateral grip is surpassed due to
road surface conditions or vehicle speed, and the influence of evasive steering
to avoid an accident or similar situations.
...
Radiator
Purpose, Function
The radiator disperses the engine coolant heat flowing internally by receiving
against the vehicle while it is driven or air flow produced by the cooling fan.
Construction
The radiator is installed to the front of the engine compartment.
Four mounting ...
