Mazda CX-5 Service & Repair Manual: Passenger Compartment Temperature Sensor Removal/Installation [Full Auto Air Conditioner]
1. Disconnect the negative battery cable..
2. Remove the following parts:
a. Front scuff plate (driver-side).
b. Front side trim (driver-side).
c. Switch panel.
d. Decoration panel.
e. Shift lever knob (MTX).
f. Front console box.
g. Shift panel.
h. Upper panel.
i. Rear console.
j. Side wall.
k. Front console.
l. Hood release lever from the lower panel.
m. Lower panel (driver-side).
3. Remove the aspirator..
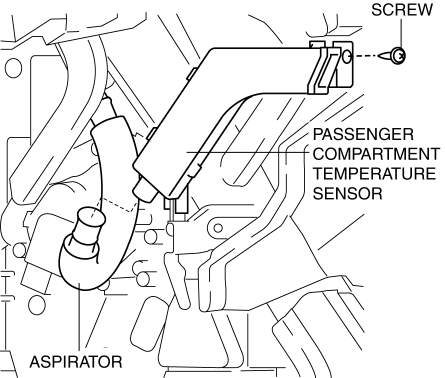
4. Remove the screw.
5. Disconnect the connector.
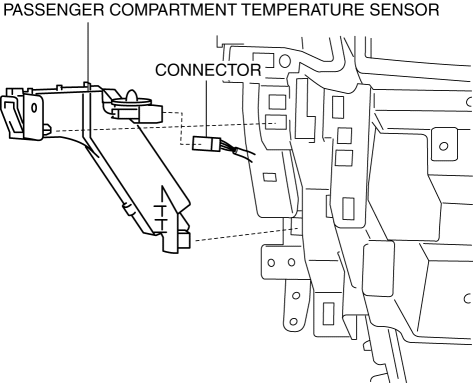
6. Remove the passenger compartment temperature sensor.
7. Install in the reverse order of removal.
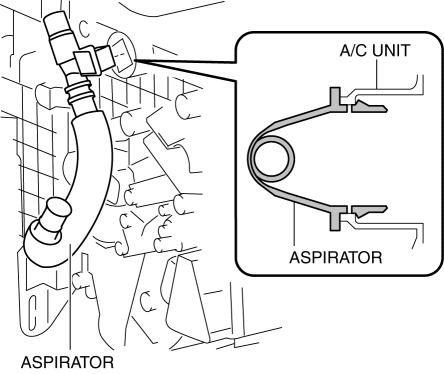
Aspirator Removal Note
1. Remove the aspirator as shown in the figure.
 Passenger Compartment Temperature Sensor Inspection [Full Auto Air Conditioner]
1. Measure the temperature around the passenger compartment temperature sensor
and measure the resistance between passenger compartment temperature sensor terminals
A and B.
If the charact ...
 Passenger Compartment Temperature Sensor [Full Auto Air Conditioner]
Purpose
The passenger compartment temperature sensor detects the cabin temperature.
Function
The passenger compartment temperature sensor converts the detected temperature
to an ...
Other materials:
Shift Solenoid No.1 [Fw6 A EL, Fw6 Ax EL]
Purpose/Function
Shift solenoid No.1 adjusts the hydraulic pressure in the low clutch circuit
based on the current demand from the TCM according to the vehicle conditions.
Construction
Shift solenoid No.1 is installed to the solenoid control valve body.
Shift solenoid ...
Clock Spring Adjustment [Two Step Deployment Control System]
1. Set the front wheels straight ahead.
CAUTION:
The clock spring will break if over?wound. Do not forcibly turn the clock
spring.
2. Turn the clock spring clockwise until it stops.
3. Turn the clock spring counterclockwise approx. 2 turns.
4. Align the mark on the clo ...
Rear Crossmember Removal/Installation [Awd]
WARNING:
Verify that the crossmember is securely supported by a jack. If the rear
crossmember falls off, it can cause serious injury or death, and damage to the
vehicle.
CAUTION:
Performing the following procedures without first removing the rear ABS wheel-speed
sensor ...
