Mazda CX-5 Service & Repair Manual: Master Warning Light
Purpose
-
The master warning light warns the driver that any of the following malfunctions is occurring.
-
Brake switch malfunction
-
Engine oil solenoid valve malfunction
-
Automatic configuration malfunction
Function
-
The instrument cluster illuminates the master warning light based on the following CAN signals:
-
Brake switch No.1 error signal, brake switch No.2 error signal, engine oil solenoid valve error signal, and automatic configuration error signal sent from the PCM
-
The instrument cluster flashes the master warning light based on the master warning light flash request signal sent from the PCM as a CAN signal.
-
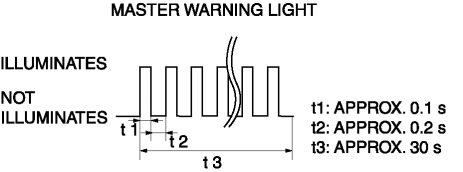
The master warning light flashing pattern is as indicated in the figure.
Construction
-
The instrument cluster microcomputer controls the illumination/flashing/turning off of the master warning light based on each error signal sent from the PCM.
-
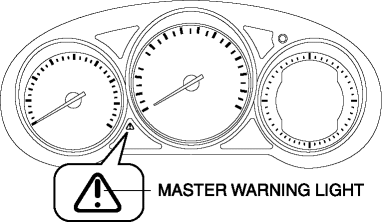
The master warning light is set in the instrument cluster.
Operation
-
When the ignition is switched ON (engine off or on), the instrument cluster receives (1) each error signal or a master warning light flash request signal from the PCM.
-
The instrument cluster turns the transistor on (2) intermittently for flashing and continuously for illumination based on each signal.
-
The master warning light flashes (3) when the transistor is turned on intermittently, and it illuminates (3) when the transistor is turned on continuously.

Fail-safe
-
Function not equipped.
 Low Fuel Warning Light
Purpose
The low fuel warning light warns the driver that the remaining fuel level
is low.
Function
The instrument cluster calculates the fuel quantity based on the following
...
 Panel Light Control Indicator Alarm
Purpose
The panel light control indicator alarm notifies the driver that the panel
light brightness is either at maximum or minimum.
Function
If the panel light control switch i ...
Other materials:
Direct Fuel Injection System
Purpose, Outline
Engine output has been improved through the direct injection of fuel into
the combustion chamber.
High response can be because there is no time lag from when the fuel injection
starts until the fuel is provided to the combustion chamber.
Structure
...
Control Valve Body Removal/Installation [Fw6 A EL, Fw6 Ax EL]
On-Vehicle Removal
WARNING:
A hot transaxle and ATF can cause severe burns. Turn off the engine and wait
until they are cool.
Using compressed air can cause dirt and other particles to fly out, causing
injury to the eyes. Wear protective eyeglasses whenever using compressed ai ...
How the SRS Air Bags Work
Your Mazda is equipped with the following types of SRS air bags. SRS air bags
are designed to work together with the seat belts to help to reduce injuries during
an accident.
The SRS air bags are designed to provide further protection for passengers in
addition to the seat belt functions. Be ...
