
Mazda CX-5 Service & Repair Manual: Engine Coolant Temperature (ECT) Sensor
Purpose/Function
-
Detects the ECT as basic information for mainly determining the fuel injection amount.
-
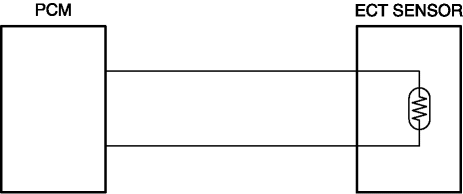
Detects the ECT and inputs it to the PCM as an ECT signal.
-
The ECT sensor No.2 is only used for OBD.
Construction
ECT sensor No.1
-
Installed to the water outlet case.
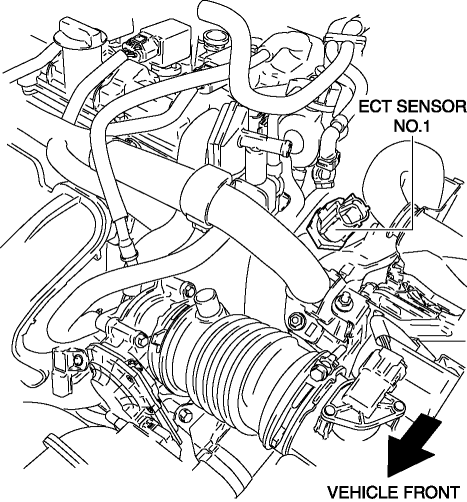
-
A thermistor has been adopted as the detecting element for detecting the ECT.
ECT sensor No.2
-
Installed on the water pipe.
-
A thermistor has been adopted as the detecting element for detecting the ECT.
Operation
-
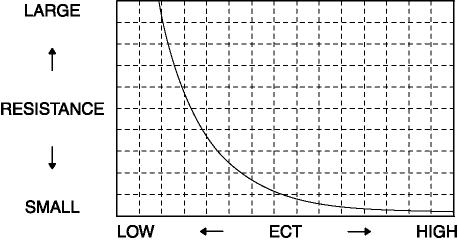
Inputs the signal, which fluctuates according to the ECT, to the PCM.
ECT sensor characteristic
Fail-safe
ECT sensor No.1
|
DTC No. |
Fail-safe function |
|
P0117:00 |
|
|
P0118:00 |
|
ECT sensor No.2
-
Function not equipped.
 Engine Coolant Temperature (ECT) Sensor Removal/Installation
WARNING:
When the engine is hot, it can badly burn. Turn off the engine and wait until
it is cool before removing the ECT sensor.
ECT Sensor No.1
1. Disconnect the negative battery c ...
 Heated Oxygen Sensor (HO2 S) Heater Control
Outline
Based on the control of the HO2S heater, a stabilized oxygen concentration
is detected even at low exhaust temperatures, and feedback control of fuel injection
even at cold engine ...
Other materials:
Main Fuse
Purpose
If electric current of the specified value or more flows to each fuse, the
fuse melts due to heat generation to protect the systems and parts downstream
of the fuse.
Function
If electric current to each fuse is the specified value or more, the fuse
melts due to h ...
Headliner Removal/Installation
1. Disconnect the negative battery cable..
2. Remove the following parts:
a. Sunroof seaming welt (with sunroof system).
b. A-pillar trim.
c. Front map light.
d. Sunvisor.
e. Front scuff plate.
f. Rear scuff plate.
g. B-pillar lower trim.
h. Adjust anchor cover.
i. Upper anchor i ...
Rear Stabilizer Removal/Installation [Awd]
WARNING:
Verify that the rear crossmember is securely supported by a jack. If the
rear crossmember falls off, it can cause serious injury or death, and damage
to the vehicle.
CAUTION:
Performing the following procedures without first removing the rear ABS wheel-speed
s ...
