Mazda CX-5 Service & Repair Manual: Brake/Taillight Bulb Removal/Installation
1. Disconnect the negative battery cable..
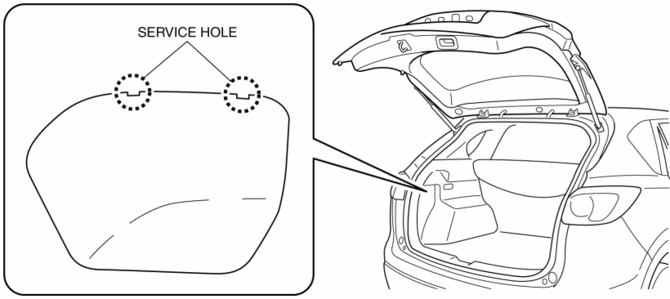
2. Insert a tape-wrapped flathead screwdriver into the service hole in the position shown in the figure.
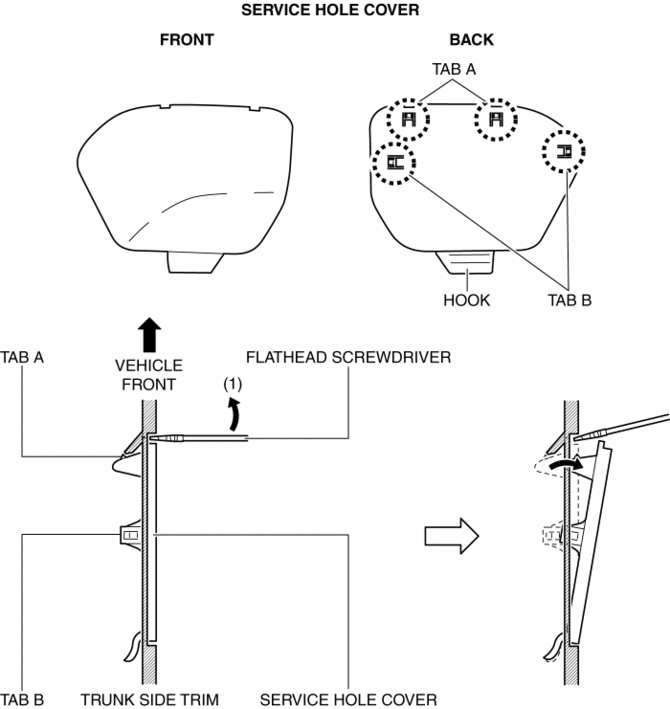
3. Move the flathead screwdriver in the direction of the arrow (1) shown in the figure, pull out the service hole cover, and detach the service hole cover tab and trunk side trim.
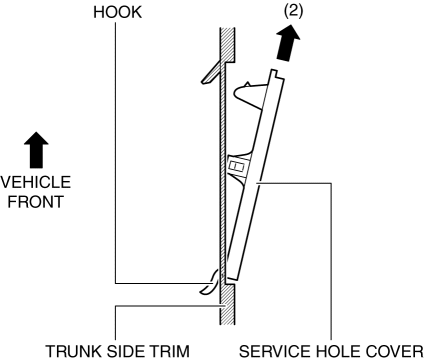
4. Pull out the service hole cover in the direction of the arrow (2) shown in the figure and pull out the service hole cover hook from the trunk side trim.
5. Remove the service hole cover.
6. Rotate the socket in the direction of the arrow (3) shown in the figure and remove it from the rear combination light in the direction of the arrow (4) shown in the figure.
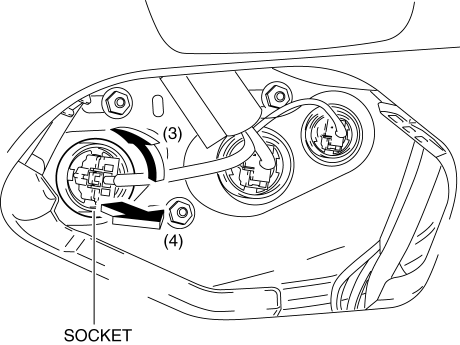
7. Remove the brake/taillight bulb.
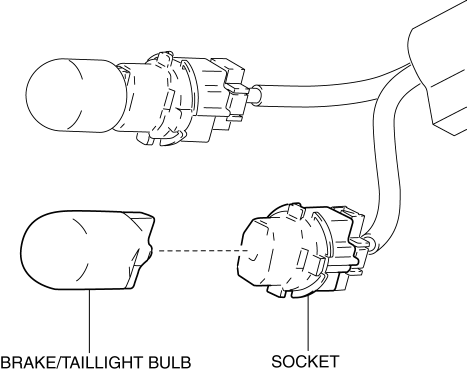
8. Install in the reverse order of removal.
 Back Up Light Bulb Removal/Installation
1. Disconnect the negative battery cable..
2. Insert a tape-wrapped flathead screwdriver into the service hole in the position
shown in the figure.
3. Move the flathead screwdriver in the di ...
 DRL (Daytime Running Light) Bulb Removal/Installation
1. Disconnect the negative battery cable..
2. Disconnect the connector.
3. Rotate the DRL bulb in the direction of the arrow (1) shown in the figure
and remove it from the front combination ...
Other materials:
Passenger Compartment Temperature Sensor [Full Auto Air Conditioner]
Purpose
The passenger compartment temperature sensor detects the cabin temperature.
Function
The passenger compartment temperature sensor converts the detected temperature
to an electric signal.
Construction
A thermistor-type passenger compartment temperature sens ...
Positive Crankcase Ventilation (PCV) Valve Removal/Installation
1. Disconnect the negative battery cable..
2. Remove the intake manifold..
3. Remove in the order indicated in the table.
4. Install in the reverse order of removal.
1
PCV hose
2
Oil separator
3
Retainer
( ...
Slide Motor Inspection
WARNING:
Handling a side air bag improperly can accidentally operate (deploy) the
air bag, which may seriously injure you. Read the service warnings/cautions
in the Workshop Manual before handling the front seat (side air bag integrated)..
CAUTION:
When performing the pro ...
