Mazda CX-5 Service & Repair Manual: A Pillar Trim Removal/Installation
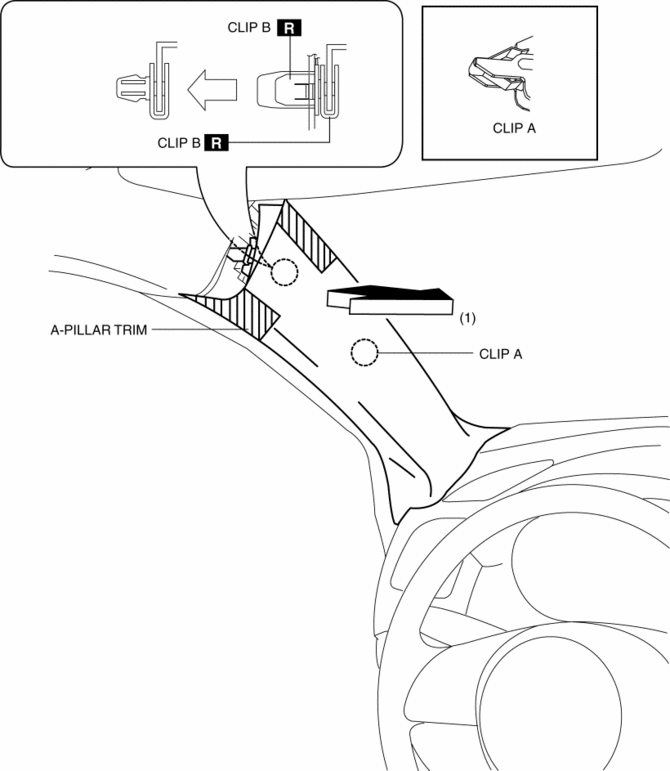
1. Partially peel back the seaming welt.
2. Take the shaded area shown in the figure, and pull the A-pillar trim in the direction of the arrow (1) while detaching clip A, clips B.
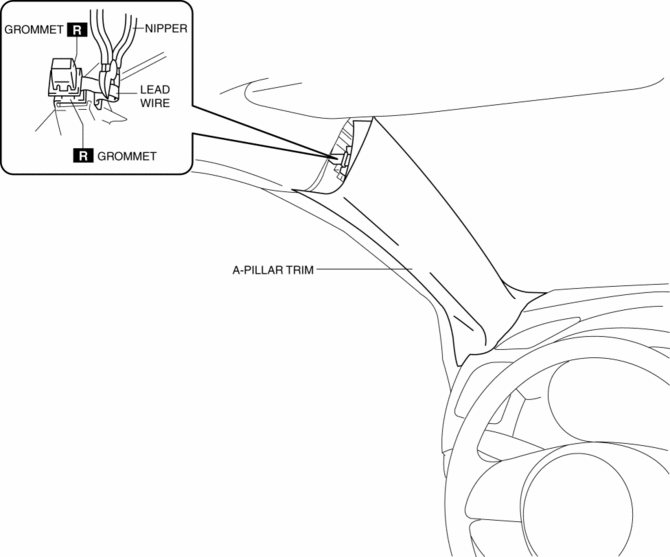
3. Cut the lead wire connecting clips B and grommet using a nipper.
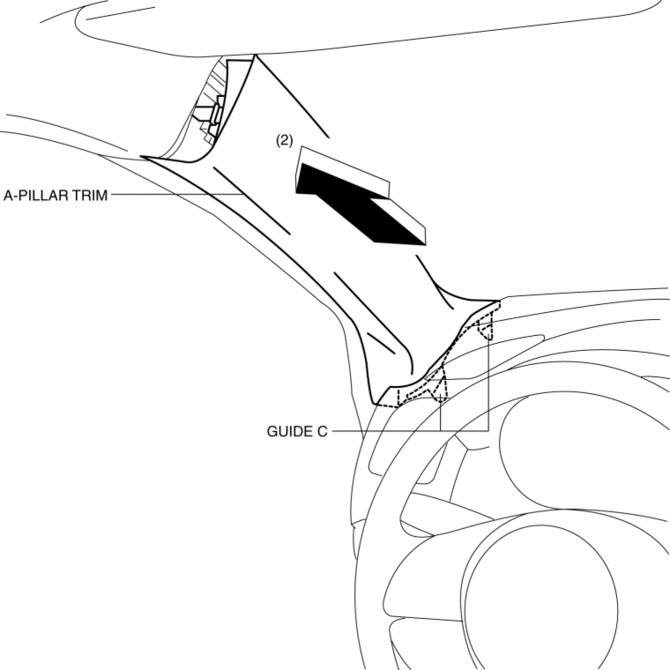
4. Pull the A-pillar trim in the direction of the arrow in the order of (2) and remove the A-pillar trim while detaching guides C.
5. Move the hook in the direction of arrows (3) and (4) shown in the figure using a tape-wrapped flathead screwdriver and detach it from the front pillar inner panel.
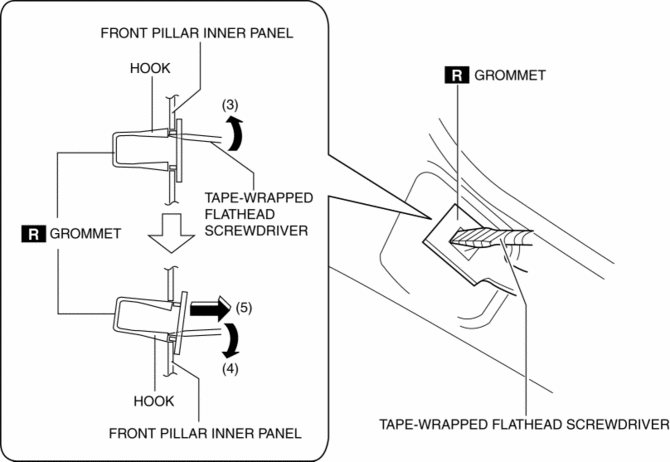
6. Remove the grommet in the direction of the arrow (5) shown in the figure.
7. When installing the A-pillar, install new clips B and grommet to the A-pillar trim in advance.
8. Install in the reverse order of removal.
 General
...
 Anticorrosion, Sound Insulation, And Vibration Insulation
Body Sealing
Apply body sealer where necessary.
For locations where application of body sealer is difficult after installation,
apply it before installation.
Application of ...
Other materials:
Shift Pressure Control (Learning Control) [Fw6 A EL, Fw6 Ax EL]
Outline
The TCM optimizes the hydraulic pressure for clutch engagement and disengagement
through learning correction of the clutch engagement pressure.
NOTE:
The clutch engagement pressure learning value stored in the TCM is not cleared
even if the negative battery termina ...
Fuel Gauge Sender Unit Removal/Installation [Awd]
WARNING:
Always keep sparks and flames away from fuel when servicing the fuel system.
Fuel can be easily ignited which could cause serious injury or death, and damage
to equipment.
Fuel line spills and leakage from the pressurized fuel system are dangerous.
Fuel can ignite a ...
Differential Oil Temperature Sensor
Purpose, Function
The differential oil temperature sensor detects the rear differential oil
temperature based on the resistance of the thermistor, and inputs it to the
AWD CM.
Construction
The differential oil temperature sensor is installed in the rear differential
carr ...
