Mazda CX-5 Service & Repair Manual: Starter Interlock Switch Removal/Installation [C66 M R]
1. Disconnect the negative battery cable..
2. Disconnect the starter interlock switch connector.
3. Remove the starter interlock using the following procedure:
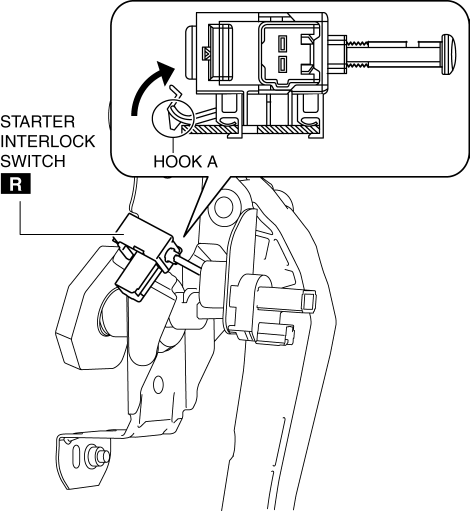
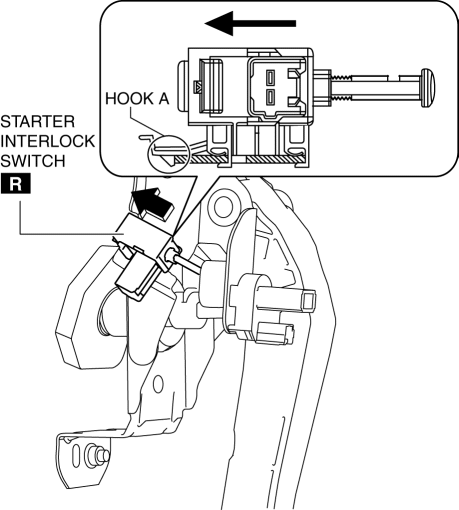
a. Detach hook A in the direction of the arrow shown in the figure.
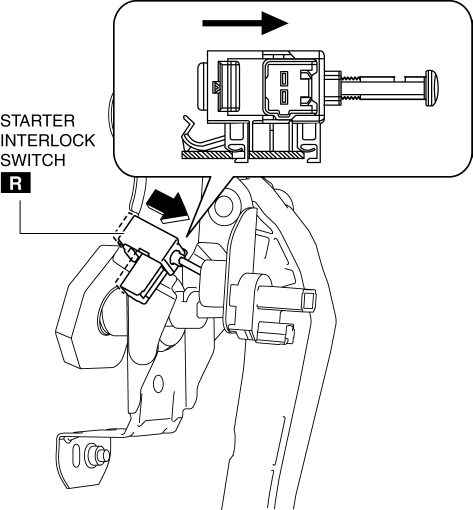
b. Slide the starter interlock switch in the direction of the arrow shown in the figure.
c. Remove the starter interlock switch from the clutch pedal.
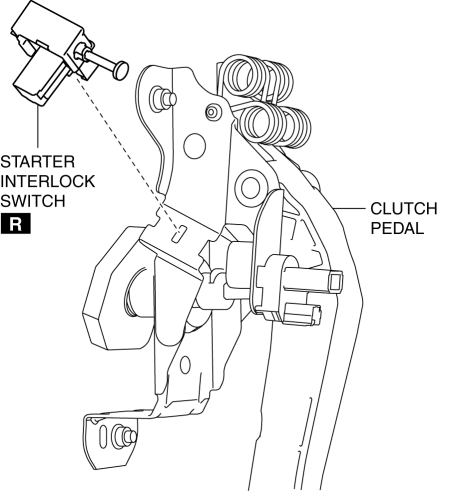
4. Install the starter interlock using the following procedure:
a. Insert hook B of the starter interlock switch into the clutch pedal hole.
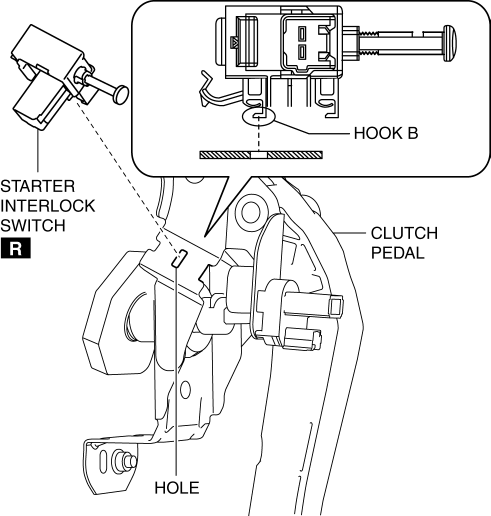
b. While pressing the starter interlock switch against the clutch pedal, slide the starter interlock switch until hook A is locked in the direction of the arrow shown in the figure.
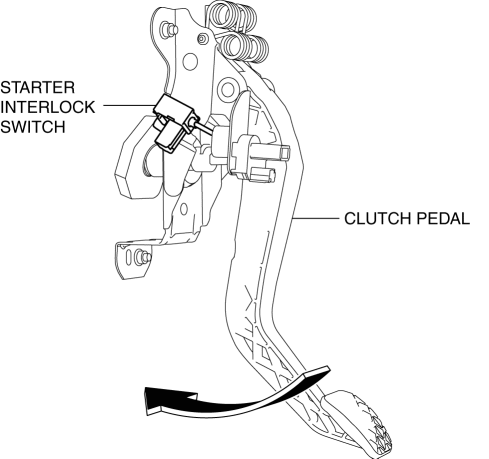
5. Fully depress the clutch pedal in the direction of arrow, and verify that a click sound from the starter interlock switch is heard.
6. Install in the reverse order of removal.
7. Fully depress the clutch pedal, and verify that the engine starts.
 Starter Interlock Switch Inspection [Skyactiv G 2.0]
CAUTION:
Do not reuse the starter interlock switch if it is removed from the vehicle
even once. Replace with a new starter interlock switch when installing.
1. Disconnect the negative ...
 Starter Interlock Switch [Skyactiv G 2.0]
Purpose, Function
The starter interlock switch mechanism prevents vehicle surge when the engine
is started, enhancing safety. The engine cannot be started unless the clutch
is depressed.
...
Other materials:
Tire Pressure Monitoring System Set Switch
Purpose
The tire pressure monitoring system set switch is used to initialize the
tire pressure monitoring system.
Construction, Operation
The tire pressure monitoring system set switch is installed to the instrument
panel.
The tire pressure monitoring sy ...
Clutch Fluid Leakage Inspection [C66 M R]
CAUTION:
Do not allow clutch fluid to get on a painted surface. Clutch fluid contains
properties which can dissolve the paint. If clutch fluid gets on a painted surface,
wash it off with water immediately and wipe the area off completely.
1. Verify reserve tank cap is on tight.
...
Ion Sensor Inspection
DTC Inspection
1. Connect the M-MDS to the DLC?2.
2. Perform the DTC inspection using the M-MDS..
If any DTC related to the ignition coil/ion sensor is present, repair the
malfunctioning location according to the applicable DTC troubleshooting..
Visual Inspection
NOTE:
B ...
