Mazda CX-5 Service & Repair Manual: Rear Spoiler Removal/Installation
Removal
WARNING:
-
Using a utility knife with bare hands can cause injury. Always wear gloves when using a utility knife.
1. Remove the liftgate upper trim.
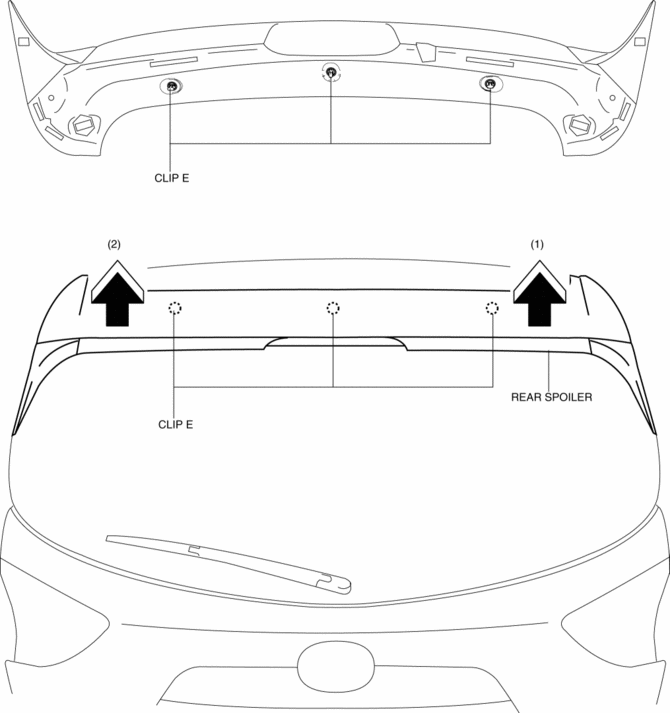
2. Remove caps A.
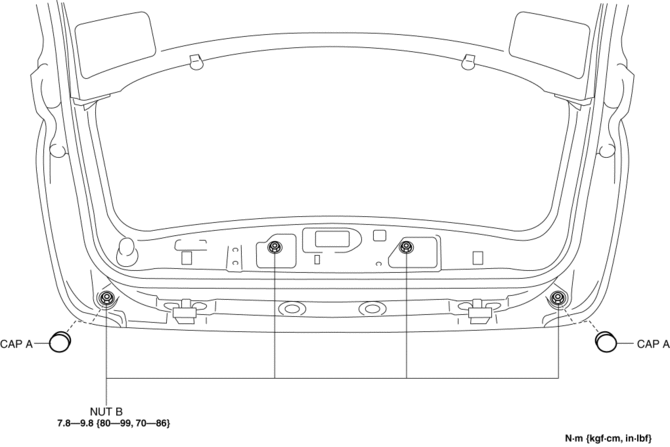
3. Remove nuts B.
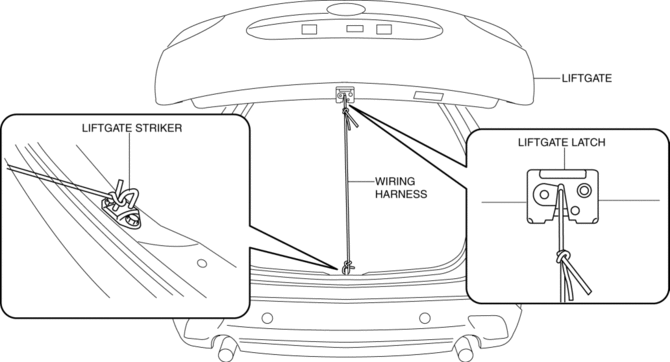
4. Attach a piece of wire between the liftgate striker and liftgate latch to hold the liftgate in the half-opened position as shown below.
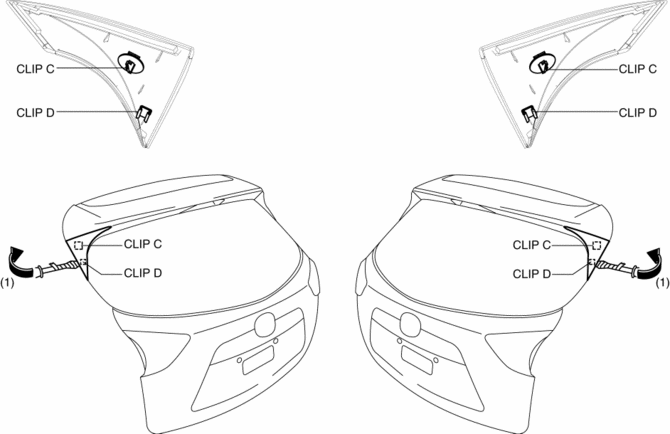
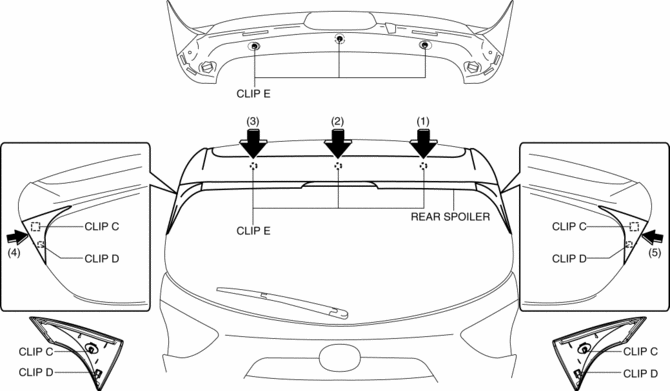
5. Insert a tape-wrapped flathead screwdriver in the locations shown below to remove clips C and D in the direction of the arrow (1).
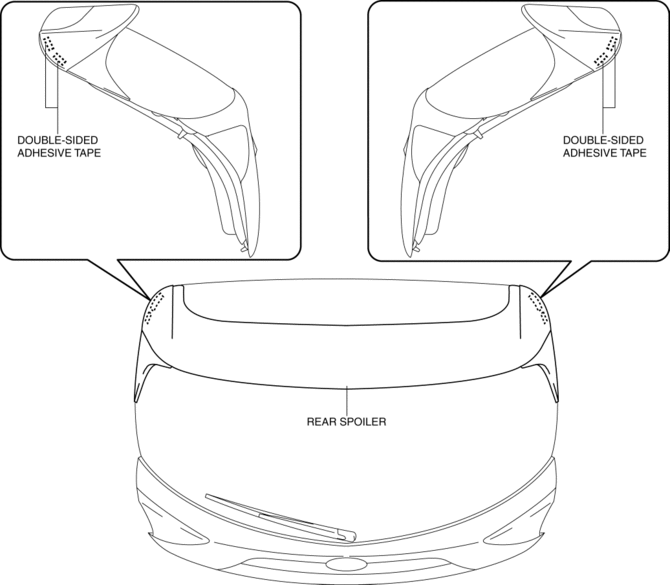
6. Using a utility knife, carefully remove the double-sided adhesive tape in the locations shown below.
CAUTION:
-
Be careful not the damage the vehicle's paint during tape removal.
7. Pull the rear spoiler in the direction of the arrows in the order of (1), (2) and remove it while detaching clips E.
CAUTION:
-
When removing the rear spoiler clips E, the rear spoiler may fall and be damaged. Perform the rear spoiler clip removal using two people.
Installation
NOTE:
-
To facilitate the procedure after rear spoiler installation, peel the protective tape adhered during removal before installing the rear spoiler.
1. When a rear spoiler is to be reused, perform the following procedure:
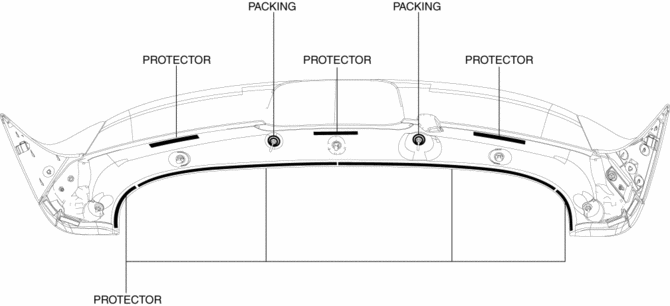
a. Remove the packing and protector remaining on the rear spoiler after removal.
b. Remove any grease and dirt from the packing and protector affixing area.
c. Affix packing and protector to the position shown in the figure.
d. If the protector is damaged, replace the part that is damaged with a new protector.
2. Push the rear spoiler in the direction of the arrows in the order of (1), (2), (3), (4), (5) and install the rear spoiler while install clips C, D and E.
3. Install nuts B.
4. Install caps A.
5. Install the liftgate upper trim.
 Rear Side Panel Removal [Panel Replacement]
Symbol Mark
Removal Procedure
1. Drill the 11 locations shown in the figure.
2. Remove the rear side panel. ...
 Repairable Range Of Polypropylene Bumpers [Plastic Body Parts]
The three types of damaged bumpers shown below are considered repairable. Although
a bumper which has been damaged greater than this could also be repaired, it should
be replaced with a new one be ...
Other materials:
Front Fender Junction Installation [Panel Replacement]
Symbol Mark
Installation Procedure
1. When installing new parts, measure and adjust the body as necessary to conform
with standard dimensions.
2. Drill holes for the plug welding before installing the new parts.
3. After temporarily installing new parts, make sure the related parts fit p ...
Rear Stabilizer Removal/Installation [Awd]
WARNING:
Verify that the rear crossmember is securely supported by a jack. If the
rear crossmember falls off, it can cause serious injury or death, and damage
to the vehicle.
CAUTION:
Performing the following procedures without first removing the rear ABS wheel-spee ...
Tire Labeling
Federal law requires tire manufacturers to place standardized information on
the sidewall of all tires. This information identifies and describes the fundamental
characteristics of the tire and also provides a tire identification number for safety
standard certification and in case of a recall ...
