
Mazda CX-5 Service & Repair Manual: Rear Shock Absorber Removal/Installation
1. Remove in the order indicated in the table.
2. Install in the reverse order of removal.
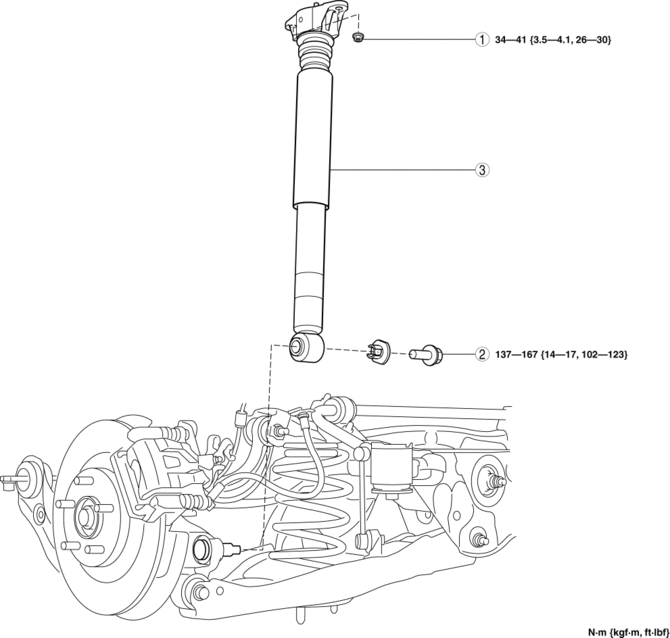
|
1 |
Rear shock absorber upper nut (See Rear Shock Absorber Upper nut Installation Note.) |
|
2 |
Rear shock absorber lower bolt |
|
3 |
Rear shock absorber |
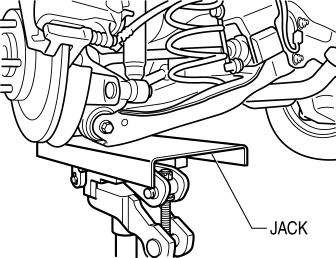
Rear Shock Absorber Upper nut Installation Note
1. Lift up the rear lower arm using a jack and install the rear shock absorber upper nuts.
 Rear Shock Absorber Inspection
1. Remove the rear shock absorber..
2. Inspect for damage and oil leakage.
3. Compress and extend the shock piston at least three times. Verify that the
operational force does not change and tha ...
 Rear Stabilizer Control Link Inspection
1. Remove the rear stabilizer control link..
2. Inspect for bending or damage. If there is any malfunction, replace the rear
stabilizer control link.
3. Rotate the ball joint stud 10 times and s ...
Other materials:
Headlight High Beam Indicator Light
Purpose
Notifies the user that the headlights (HI) are illuminated.
Function
Illuminates when the headlight (HI) or parking illumination conditions are
met.
Construction
Displayed in the instrument cluster.
Operation
1. When the light switch is operat ...
Brake Hose (Front) Removal/Installation
1. Remove in the order indicated in the table.
2. Install in the reverse order of removal.
3. After installation, add brake fluid, bleed the air, and inspect for fluid
leakage..
1
Brake pipe
2
Clip
3
Bolt
...
Rear Wheel Hub Bolt Replacement
1. Remove the brake calliper component and suspend it out of the way using a
cable.
2. Remove the disc plate.
3. Remove the wheel hub bolt using the SST as shown in the figure.
4. Place a new wheel hub bolt in the wheel hub.
5. Install the wheel hub by placing a proper sized washer o ...
