Mazda CX-5 Service & Repair Manual: Rear Buckle Removal/Installation
1. Switch the ignition to off.
2. Disconnect the negative battery cable and wait for 1 min or more
..
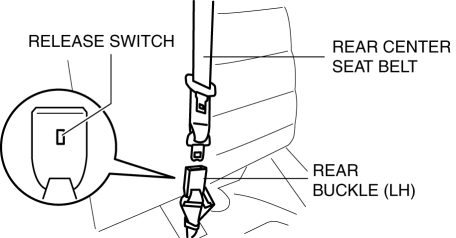
3. Press the release switch, then disconnect the rear center seat belt and rear buckle.

4. Fold down the rear seat back.
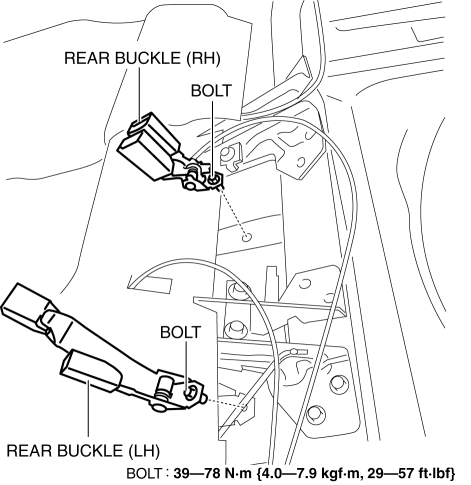
5. Remove the trunk board..
6. Remove the bolt.

7. Remove the rear buckle (RH) and rear buckle (LH).
8. Install in the reverse order of removal..
Rear Buckle Installation Note
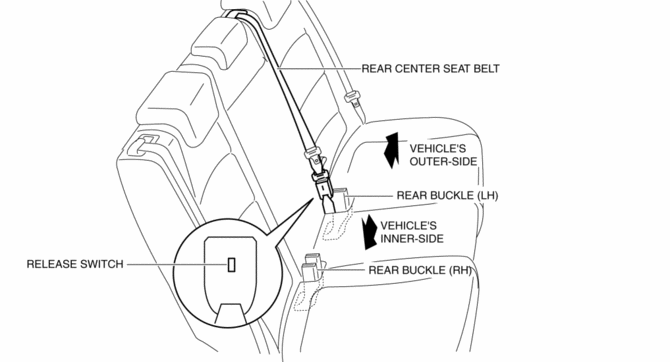
1. After installing the rear center seat belt, place the release switch of the rear buckle so that it faces the vehicle’s inner-side as shown in the figure.

 Pre Tensioner Seat Belt [Two Step Deployment Control System]
Purpose
The pre-tensioner seat belt retracts and tightens the seat belt webbing to
protect the front passengers during a collision.
Function
The pre-tensioner seat belts operate ...
 Rear Seat Belt Removal/Installation
CAUTION:
The ELR (emergency locking retractor) has a spring that will unwind if the
retractor cover is removed. The spring cannot be rewound by hand. If this occurs,
the ELR will not wor ...
Other materials:
Instrument Cluster
Outline
The instrument cluster centrally controls the speedometer, tachometer, odometer/tachometer,
fuel gauge, warning/indicator lights, trip computer, warning sounds and panel
lights.
Function
The instrument cluster displays the following information to notify the user
...
Climate Control Unit Inspection [Full Auto Air Conditioner]
1. Remove the climate control unit with the connector connected..
2. Switch the ignition ON (engine off or on).
3. Connect the negative (-) lead of the tester to body ground.
4. By inserting the positive (+) lead of the tester into each climate control
unit terminal, measure the voltage acco ...
Accelerator Pedal, Kickdown Switch [Skyactiv G 2.0]
Purpose, Function
The driver's intentions are transmitted to the PCM via the accelerator pedal.
Kickdown switch (ATX) (Applied VIN (assumed): JM3 KE2*E*D# 148107?)
If the accelerator pedal is depressed carelessly, kickdown control will be
implemented based on the accelera ...
