Mazda CX-5 Service & Repair Manual: Rear Beltline Molding Removal/Installation
CAUTION:
-
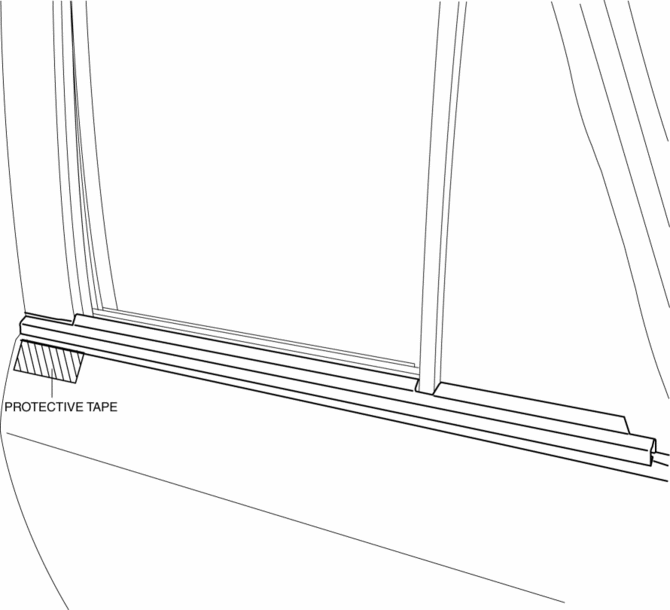
Affix protective tape to the position shown in the figure.

1. Fully open the rear door glass.
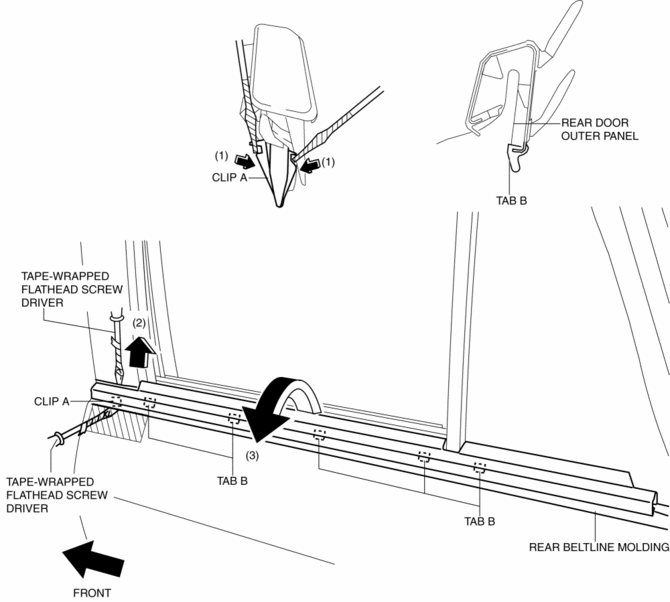
2. Insert a tape-wrapped flathead screwdriver and then detach the clip A in the direction of arrow (1) shown in the figure.
3. Pull up the rear belt line molding in the direction of arrow (2) shown in the figure.
4. Rotate the rear beltline molding in the direction of the arrow (3) shown in the figure and remove it while detaching tabs B.

5. Install in the reverse order of removal.
 Rear Bumper Disassembly/Assembly
1. Disassemble in the order indicated in the table.
1
Screw
2
Reflector
3
Rear bumper face
2. Assemble ...
Other materials:
Vehicle Loading
This section will guide you in the proper loading of your vehicle and/or trailer,
to keep your loaded vehicle weight within its design rating capability, with or
without a trailer.
Properly loading your vehicle will provide maximum return of vehicle design performance.
Before loading your vehi ...
Warm Up Three Way Catalytic Converter (Wu Twc) Inspection
CAUTION:
Perform the following procedures, DTC P0421:00 is indicated only.
1. Connect the M-MDS to the DLC-2.
2. Start the engine and warm it up to normal operating temperature.
3. Turn off the engine.
4. Verify that the engine compression is within the specification..
If ...
Transmission/Transaxle Features
Clutch and Manual Transaxle [C66M-R]
A newly developed, C6-type manual transaxle (SKYACTIV-MT) with 6 forward
gears and 1 reverse gear has been adopted.
Automatic Transaxle [FW6A-EL, FW6AX-EL]
A newly developed, FW6A(X)-EL-type electronically controlled automatic transaxle
...

