Mazda CX-5 Service & Repair Manual: Rain Sensor Removal/Installation
1. Disconnect the negative battery cable..
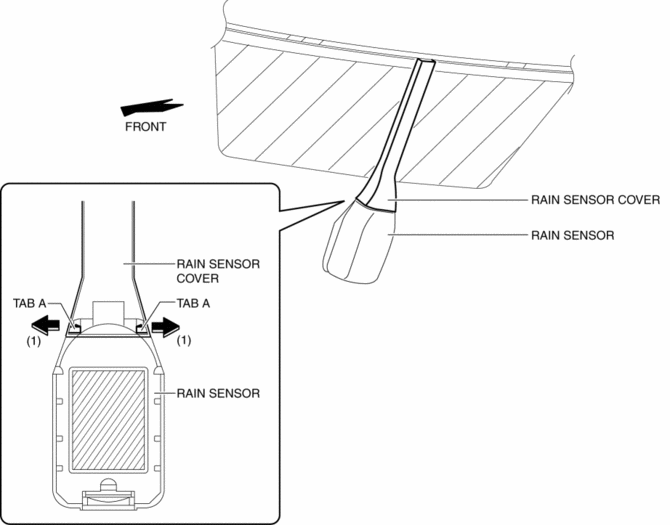
2. Spread open the rain sensor cover in the direction of the arrows (1) and disengage tabs A to remove it.
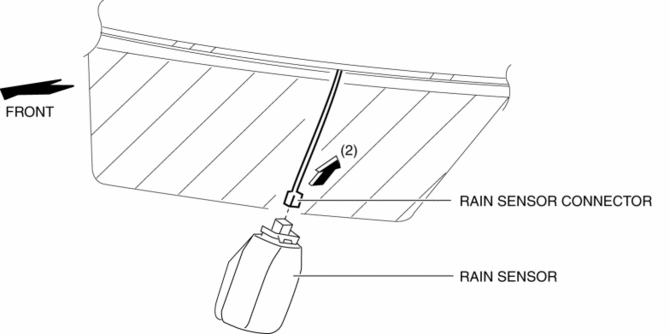
3. Disconnect the rain sensor connector in the direction of the arrow (2).
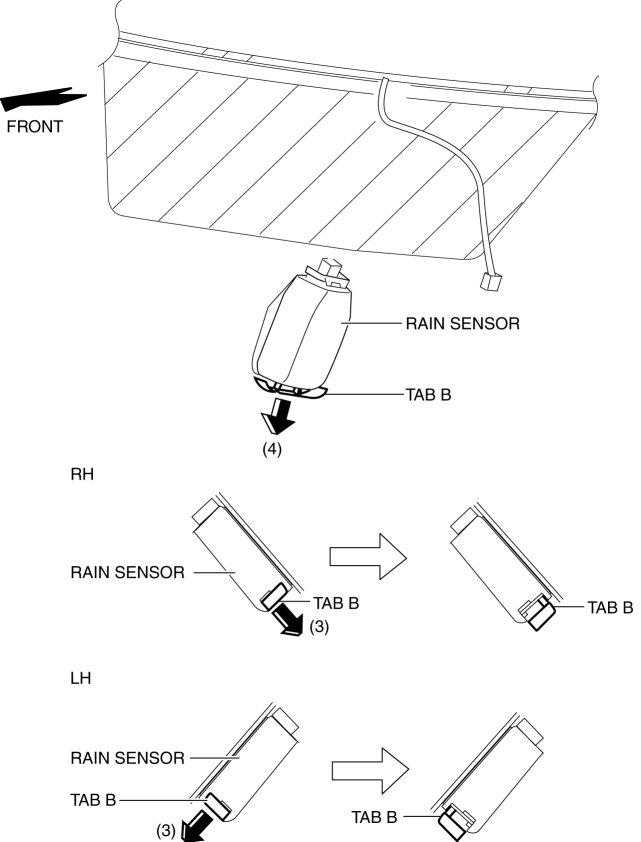
4. Slide rain sensor tabs B in the direction of the arrow (3) shown in the figure, detach the engagement, and pull tab B in the direction of the arrow (4).
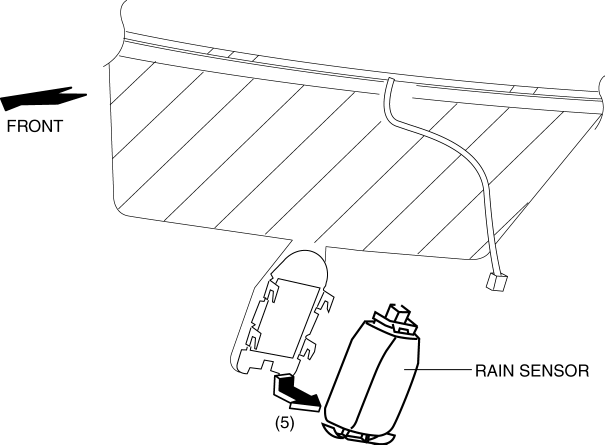
5. Remove the rain sensor in the direction of the arrow (5) shown in the figure.
6. Peel off the rain sensor protective sheet from the rain sensor.
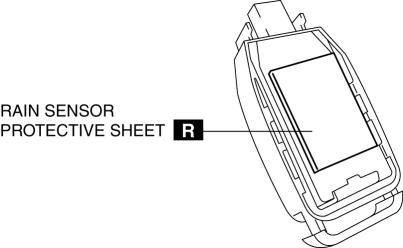
7. Install in the reverse order of removal..
8. Perform headlight auto light setting..
CAUTION:
-
If the rain sensor is replaced, the auto light system may not operate normally because the auto light sensitivity setting is initialized. If the rain sensor is replaced, perform the auto light sensitivity setting.
-
If the auto light sensitivity setting before replacing the rain sensor was "Medium", and the following sensitivity setting procedure is not performed, the sensor will be unable to detect the illumination level correctly and the auto light system will not operate normally. If the rain sensor is replaced, perform the following sensitivity setting procedure.
-
Except for "Medium" sensitivity setting.
-
Re-setting to "Medium".
Rain Sensor Installation Note
CAUTION:
-
If the rate at which the rain sensor reflects or transmits infrared light between the rain sensor and the windshield, or through the protective sheet is changed, the rain sensor will determine that there is a malfunction in the rain detection function and stop auto wiper system control. Be careful of the following when installing the rain sensor:
-
Do not reuse the rain sensor protective sheet
-
Do not touch the rain sensor lens, rain sensor protective sheet, and sensor installation area on windshield with your fingers
-
Verify that there is no air bubble after installing the rain sensor
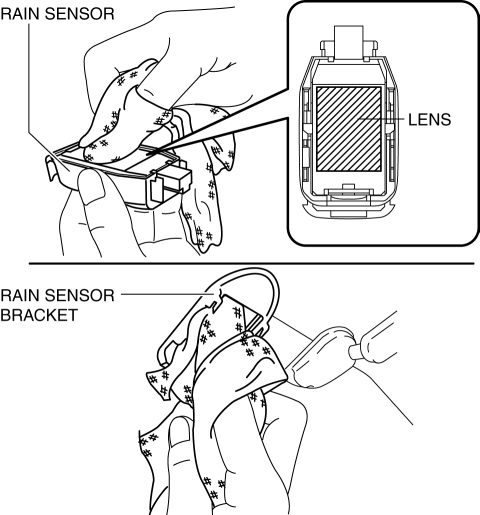
1. Wipe off any oil or dirt from the rain sensor lens and the windshield using a clean rag.
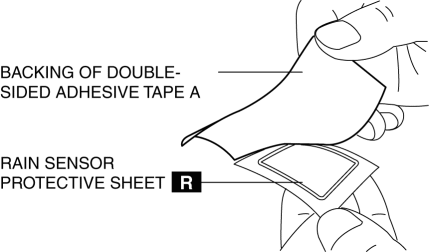
2. Peel off backing of double-sided adhesive tape A from the rain sensor protective sheet.
3. Adhere the rain sensor protective sheet to the rain sensor lens.
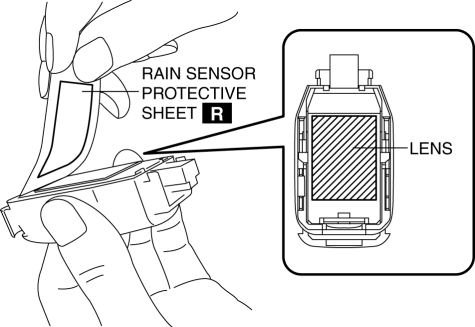
4. Peel off backing of double-sided adhesive tape B from the rain sensor protective sheet.
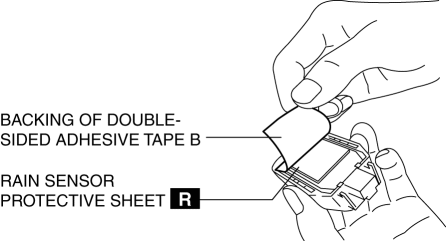
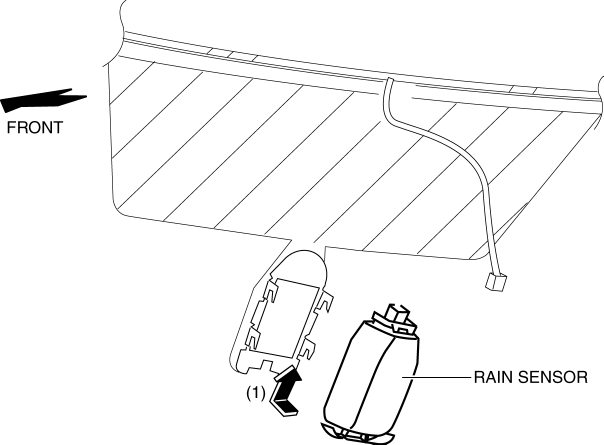
5. Install the rain sensor in the direction of the arrow (1).
6. Press the rain sensor in the direction (direction of arrow (2)) of the windshield and press out any air bubbles.
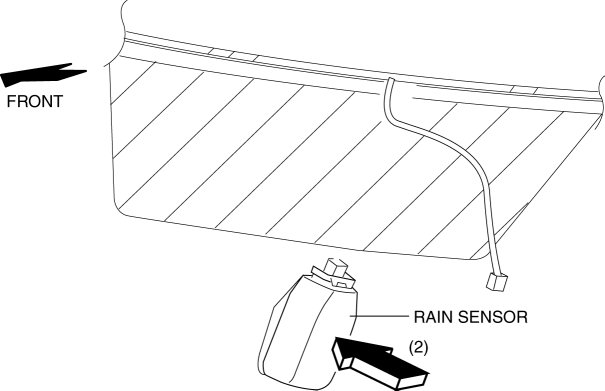
7. Verify that there is no air bubble between the rain sensor and the windshield.
 Rain Sensor
Outline
The rain sensor detects the amount of rainfall and calculates the wiper operation
speed, and outputs a windshield wiper control signal to the front body control
module (FBCM) to p ...
 Brakes
...
Other materials:
Rear Washer Nozzle Adjustment
CAUTION:
If the nozzle angle is adjusted with excessive force by strongly inserting
a needle or similar thin tool into the injection nozzle of rear washer nozzle,
it could damage the nozzle internally. When adjusting the nozzle, be careful
not to apply excessive force.
1. Inse ...
Blind Spot Monitoring (Bsm) Warning Alarm
Purpose
The Blind Spot Monitoring (BSM) warning alarm warns the driver of a possible
accident.
Function
If the instrument cluster receives a warning sound request signal from the
BSM control module (RH), it sounds the BSM warning alarm using the buzzer in
the instrument ...
A/C Unit Removal/Installation
1. Disconnect the negative battery cable..
2. Discharge the refrigerant..
3. Drain the engine coolant..
CAUTION:
If moisture or foreign material enters the refrigeration cycle, cooling ability
will be lowered and abnormal noise or other malfunction could occur. Always
plug open f ...
