
Mazda CX-5 Service & Repair Manual: Quarter Window Glass Removal
1. Disconnect the negative battery cable..
2. Remove the following parts:
a. Trunk board.
b. Trunk end trim.
c. Rear scuff plate.
d. Trunk side trim.
e. D-pillar trim.
f. C-pillar trim.
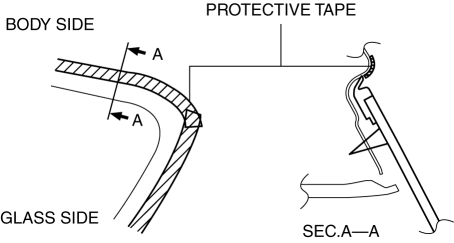
3. Apply protective tape along the edge of the body and the quarter window glass.
WARNING:
-
Using the piano wire with bare hands can cause injury. Always wear gloves when using the
piano wire.
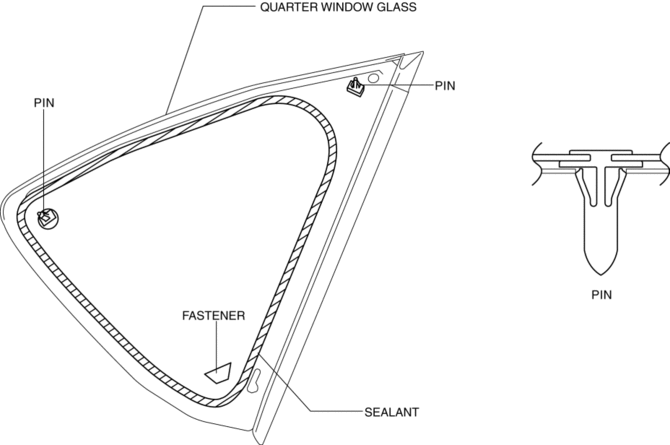
4. Avoiding pins on the inside of the vehicle, insert the piano wire which has been cut to sufficient length.
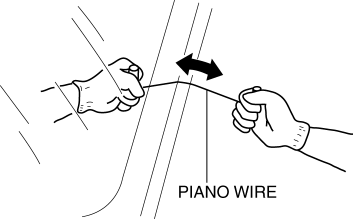
5. Wind each end of the piano wire around a bar.
NOTE:
-
Use a long sawing action to spread the work over the whole length of the piano wire to prevent it from breaking due to localized heating.
6. Secure one end of the piano wire, and while pulling the other end, cut the sealant around the quarter window glass.
7. Pull the quarter window glass outward and detach the pins from the body.
8. If a pins or fastener is damaged, remove it.
NOTE:
-
Before removing the pins or spacers from the quarter window glass, place alignment marks on the quarter window glass.
 Quarter Window Glass Installation
WARNING:
Using a razor with bare hands can cause injury. Always wear gloves when using
a razor.
CAUTION:
If a door is opened or closed when all the window glass is closed, the ...
 Rear Door Glass Removal/Installation
1. Fully lower the rear door glass.
2. Disconnect the negative battery cable..
3. Remove the following parts:
a. Rear door trim.
b. Rear door quarter glass.
c. Rear door speaker.
d. Rear p ...
Other materials:
Engine Oil Solenoid Valve Inspection
Engine Oil Solenoid Valve Operation Inspection
1. Remove the engine oil solenoid valve..
2. Verify that the battery is fully charged.
3. Connect the battery to the engine oil solenoid valve connector (2 terminals)
as shown in the figure.
4. Verify that there is an operation sound from t ...
Steering Abbreviations
AAS
Active Adaptive Shift
ABS
Antilock Brake System
ABDC
After Bottom Dead Center
ACC
Accessories
AFS
Adaptive Front Lighting System
ALC
...
Turn And Hazard Indicator Alarm
Purpose
The turn and hazard indicator alarm notifies the driver that a turn light
or the hazard warning lights are flashing.
Function
When the instrument cluster receives the turn signal/hazard warning indicator
light illumination request signal sent from the front body con ...
