Mazda CX-5 Service & Repair Manual: Outer Mirror Garnish Removal/Installation
1. Disconnect the negative battery cable..
2. Remove the outer mirror glass..
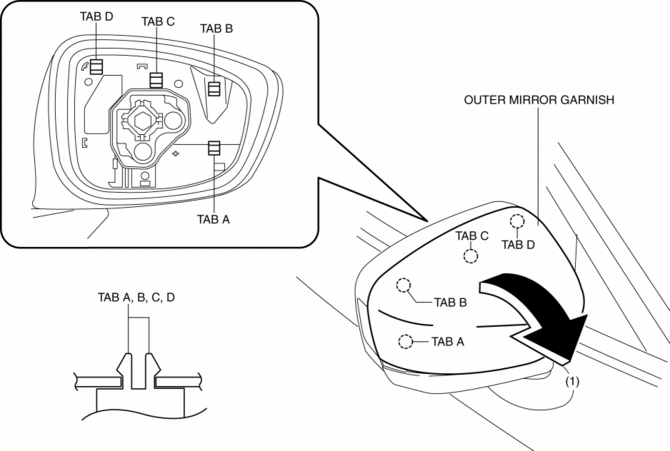
3. Insert a tape-wrapped flathead screwdriver into the upper outer mirror garnish and remove tab A, B, C, D in the direction of arrow (1).
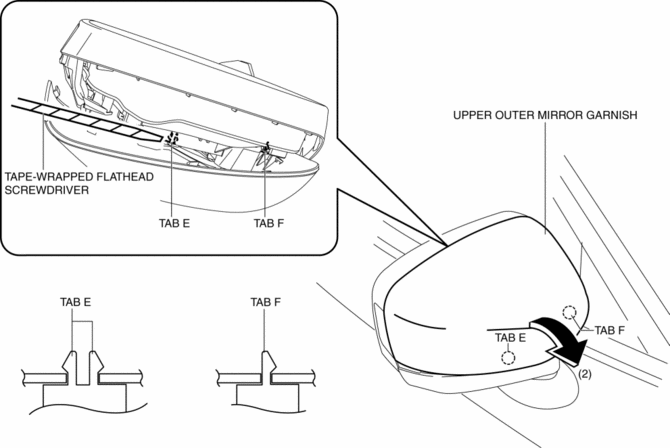
4. Insert a tape-wrapped flathead screwdriver into the upper outer mirror garnish and remove tab F, G in the direction of arrow (2).
5. Install in the reverse order of removal.
 Mirror Base Removal
1. Disconnect the negative battery cable..
2. Remove the rearview mirror. (without auto-dimming mirror).
3. Remove the auto-dimming mirror. (with auto-dimming mirror).
4. Wind each end of a wire ...
 Outer Mirror Glass Inspection
Heated Outer Mirror
1. Disconnect the negative battery cable..
2. Remove the outer mirror glass..
3. Verify that the resistance and continuity between the heated outer mirror
terminals is as in ...
Other materials:
Wheels And Tires
Outline
An adhesive-type balance weights has been adopted to the outer side of the
aluminum alloy wheels. Due to this, a stylish wheel design is realized.
In consideration of the environment, steel balance weights have been adopted
to reduce the use of lead in the vehicle.
...
Thermostat
Purpose, Function
When the engine coolant temperature is low, the thermostat blocks the engine
coolant passage between the radiator and engine. As a result, because engine
coolant cycles without passing through the radiator, warming is promoted.
Construction
The thermostat ...
Customer Assistance (Mexico)
Your complete and permanent satisfaction is our business. We are here to serve
you. All Authorized Mazda Dealers have the knowledge and the tools to keep your
Mazda vehicle in top condition.
If you have any questions or recommendations for improvement regarding the service
of your Mazda vehic ...
