
Mazda CX-5 Service & Repair Manual: Driver Side Air Bag Module [Standard Deployment Control System]
Purpose
-
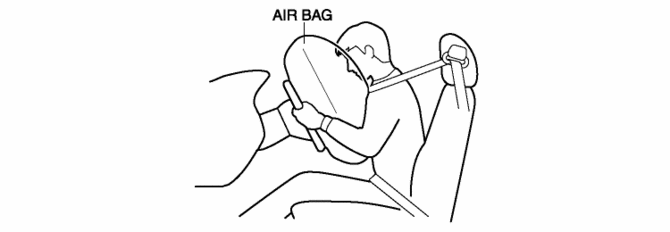
When the driver-side air bag module receives an impact from a frontal or frontal offset collision, the operation (deployment) of the air bag mediates the impact to the head and face of the driver.
Function
-
When the driver-side air bag module receives an impact from a frontal or frontal offset collision, the air bag is operated (deployed) by the operation signal sent from the SAS control module.
Construction
-
The driver-side air bag module is installed to the center area of the steering wheel.
Operation
Inflator operation
-
The driver-side air bag module operates (deploys) the air bag by activating the internal inflator.
-
The inflator operates (deploys) in the following order:
1. When an operation (deployment) signal is received from the SAS control module, the igniter built into the inflator generates heat and ignites the ignition agent.
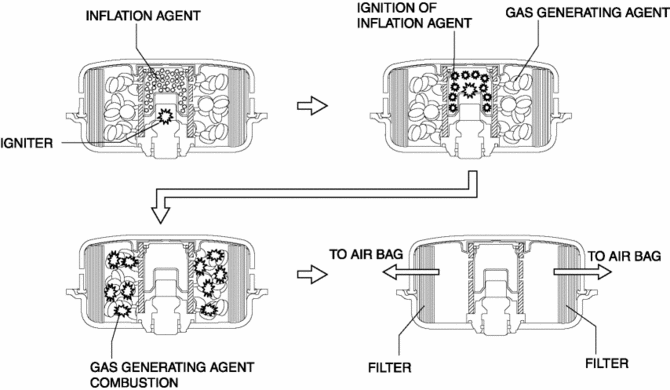
2. The ignition of the ignition agent causes the combustion of a gas generating agent which forms nitrogen gas.
3. The nitrogen gas is cooled at the filter and the filtrate is injected into the air bag.
Fail-safe
-
Function not equipped.
 Driver Side Air Bag Module Removal/Installation [Standard Deployment Control
System]
Driver Side Air Bag Module Removal/Installation [Standard Deployment Control
System]
WARNING:
Handling the air bag module improperly can accidentally deploy the air bag
module, which may seriously injure you. Read the air bag system service warnings
and cautions before h ...
 Electric Variable Valve Timing Control
Outline
The PCM determines the optimum intake valve timing according to the engine
operation conditions, and sends the motor drive signals to the electric variable
valve timing driver. Wi ...
Other materials:
Camshaft Position (CMP) Sensor Inspection
Intake CMP Sensor
Visual inspection
CAUTION:
When replacing the CMP sensor, make sure there is no foreign material on
it such as metal shavings. If it is installed with foreign material, the sensor
output signal will malfunction resulting from fluctuation in magnetic flux and
caus ...
Fuel Gauge Sender Unit Removal/Installation [2 Wd]
WARNING:
Always keep sparks and flames away from fuel when servicing the fuel system.
Fuel can be easily ignited which could cause serious injury or death, and damage
to equipment.
Fuel line spills and leakage from the pressurized fuel system are dangerous.
Fuel can ignite a ...
Back Up Light Bulb Removal/Installation
1. Disconnect the negative battery cable..
2. Insert a tape-wrapped flathead screwdriver into the service hole in the position
shown in the figure.
3. Move the flathead screwdriver in the direction of the arrow (1) shown in the
figure, pull out the service hole cover from the liftgate, a ...
