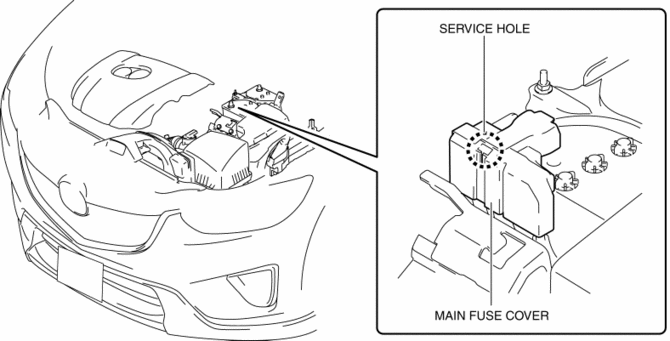
Mazda CX-5 Service & Repair Manual: Main Fuse Removal/Installation
1. Disconnect the negative battery cable..
2. Insert a tape-wrapped flathead screwdriver into the service hole in the position shown in the figure.
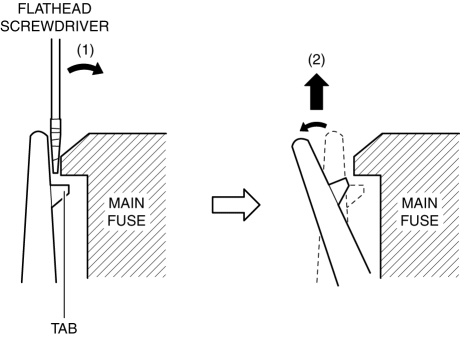
3. Move the flathead screwdriver in the direction of the arrow (1) shown in the figure, pull up the main fuse cover in the direction of the arrow (2) shown in the figure, and detach the main fuse cover tab from the main fuse.
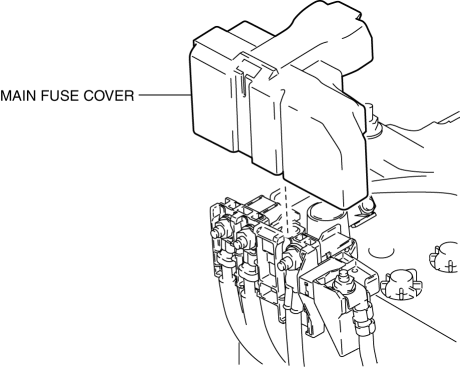
4. Remove the main fuse cover.
5. Remove the nuts.
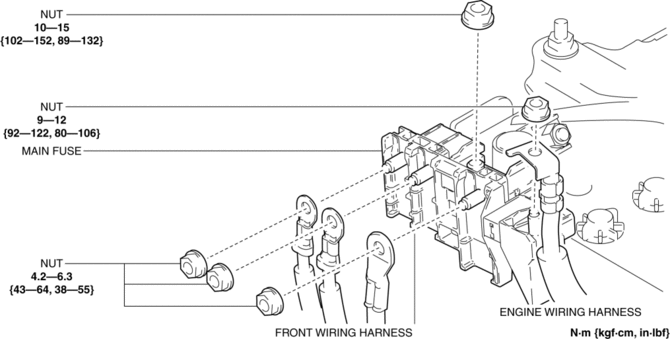
6. Remove the main fuse.
7. Install in the reverse order of removal.
 Main Fuse
Purpose
If electric current of the specified value or more flows to each fuse, the
fuse melts due to heat generation to protect the systems and parts downstream
of the fuse.
Functio ...
 Main Relay [Skyactiv G 2.0]
Purpose/Function
Supplies power to each part.
Supplies battery voltage to each part based on the signals from the PCM even
though the ignition is switched on or off.
Constructi ...
Other materials:
Remote Transmitter Battery Voltage Inspection
NOTE:
Because the remote transmitter battery power cannot be determined using the
battery itself, determine by the remote transmitter battery low warning operation
conditions.
Operation procedure for remote transmitter battery low warning
1. Place the remote transmitter inside t ...
Rear Door Checker Removal/Installation
1. Fully close the rear door glass.
2. Disconnect the negative battery cable..
3. Remove the rear door trim..
4. Remove the rear door speaker..
5. Remove bolt.
6. Remove nuts.
7. Pull out the rear door checker from the rear speaker installation hole.
8. Install in the reverse ...
Room Straight Line Dimensions (1) [Dimensions]
Point symbol
Designation
Hole diameter or bolt or nut size mm {in}
A
Front pillar inner datum hole
?7 {0.3}
B
Front pillar inner datum hole
?7 {0.3}
C
...
