Mazda CX-5 Service & Repair Manual: Magnet Clutch [Manual Air Conditioner]
Purpose
-
The magnetic clutch transmits the rotation force from the engine to the shaft in the A/C compressor.
Function
-
The magnetic clutch engages or disengages the magnetic clutch and the A/C turns on or off by switching the power transmission from the engine.

Construction
-
The magnetic clutch is installed to the A/C compressor.
-
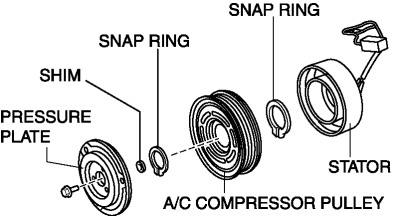
The magnetic clutch consists of the following parts:

-
Pressure plate
-
A/C compressor pulley
-
Stator
-
Snap ring
-
Shim
Operation
Magnetic clutch disengagement
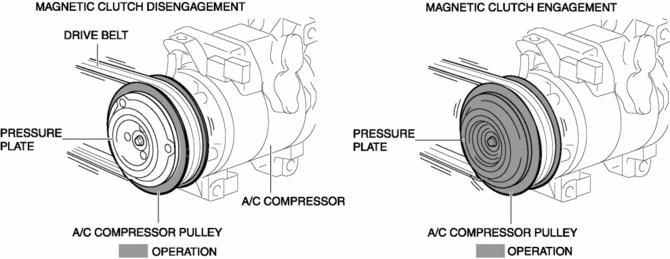
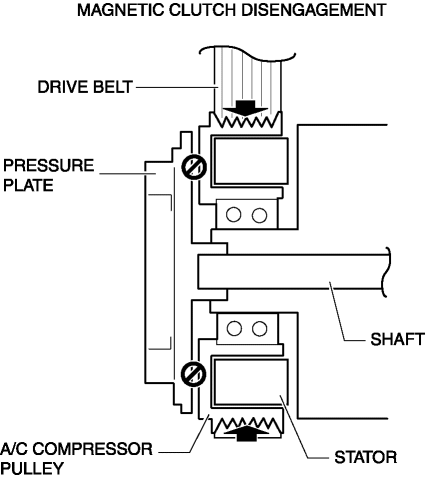
1. If there is no energization in the magnetic clutch stator from the A/C relay, the pressure plate cannot be engaged with the A/C compressor pulley because the magnetic clutch stator does not operate.

2. The rotation force from the drive belt is only transmitted to the A/C compressor pulley and the pulley spins.
Magnetic clutch engagement
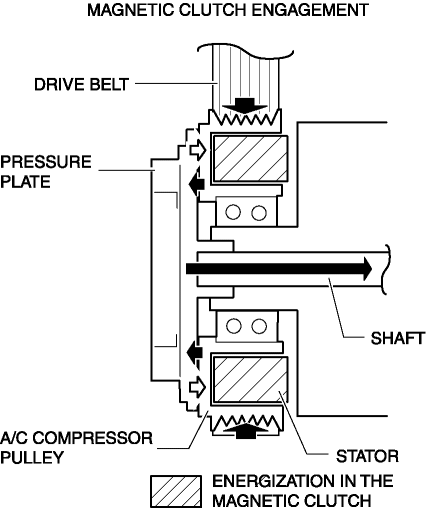
1. If there is energization in the magnetic clutch stator from the A/C relay, the magnetic clutch stator operates and the pressure plate is engaged with the A/C compressor pulley.

2. The rotation force from the drive belt is transmitted to the compressor shaft through the pressure plate from the A/C compressor pulley.
Fail-safe
-
Function not equipped.
 Magnet Clutch [Full Auto Air Conditioner]
Purpose
The magnetic clutch transmits the rotation force from the engine to the shaft
in the A/C compressor.
Function
The magnetic clutch engages or disengages the magnetic clut ...
 Pilot Bearing Inspection [C66 M R]
1. Without removing the pilot bearing, turn the bearing while applying force
in the axial direction.
If there is any malfunction, replace the pilot bearing..
...
Other materials:
Filament Repair
1. Clean the filament using isopropyl alcohol.
2. Attach tape to both sides of the filament.
3. Using a small brush or marking pen, apply silver paint.
4. After 2—3 min, carefully remove the tape without damaging the applied
area.
CAUTION:
Do not operate the rear window defro ...
Bsm Indicator Light Does Not Flash While Under Bsm Indicator Light Flashing
Conditions (With Combination Switch Operation (Turn Signal Switch)) [Blind Spot
Monitoring (Bsm)]
Description
BSM indicator light does not flash while under BSM indicator light-flashing
conditions (with combination switch operation (turn signal switch))
The BSM indicator light does not flash or illuminate continuously,
but the cond ...
Automatic Transaxle Warning Light [Fw6 A EL, Fw6 Ax EL]
Purpose/Function
The automatic transaxle warning light illuminates when the transaxle has
malfunction.
Construction
The automatic transaxle warning light is built into the instrument cluster.
Operation
If the transmission has a malfunction, the TCM sends an ...
