Mazda CX-5 Service & Repair Manual: Light Switch Removal/Installation
NOTE:
-
When removing the light switch, it is necessary to rotate the steering wheel. If the ignition is switched off from ON (engine on) with the driver's door closed, the steering wheel is locked. Therefore, perform the procedure in Steps 1 to 3 so that the steering wheel is not locked.
1. Switch the ignition ON (engine on).
2. Open the driver's door.
3. Switch the ignition to off.
4. Disconnect the negative battery cable..
5. Remove the column cover..
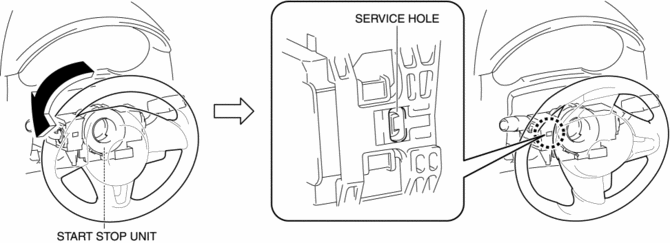
6. Rotate the steering wheel until the service hole in the position shown in the figure is visible.

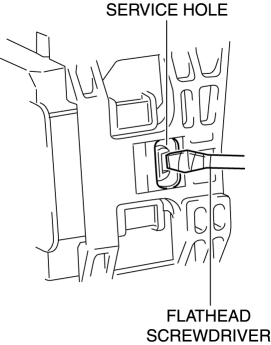
7. Insert a tape-wrapped flathead screwdriver into the service hole in the position shown in the figure.

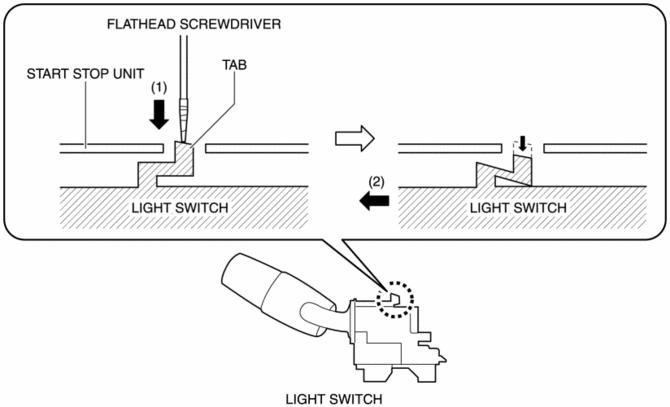
8. While pressing the light switch tab in the direction of the arrow (1) shown in the figure using a flathead screwdriver, pull out the light switch in the direction of the arrow (2) shown in the figure to detach the light switch tab and the start stop unit.

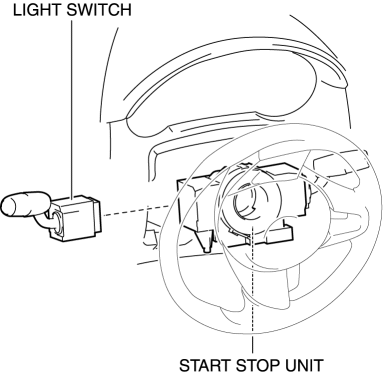
9. Remove the light switch.

10. Install in the reverse order of removal.
 Light Switch Inspection
Light Switch
1. Disconnect the negative battery cable..
2. Remove the column cover..
3. Remove the light switch..
4. Verify that the continuity between the light switch terminals is as indicate ...
 Exterior
...
Other materials:
Push Button Start Removal/Installation
1. Disconnect the negative battery cable..
2. Remove the meter hood..
3. While pressing the push button start tab in the direction of the arrow (1)
shown in the figure, push out the push button start in the direction of the arrow
(2) shown in the figure to detach the push button start tab fr ...
Awd Warning Light
Purpose, Function
Warns the driver of a AWD system malfunction.
Construction
The AWD warning light is built into the instrument cluster.
Operation
If the self-diagnostic function stores a DTC, the warning light illuminates
to alert the driver of the malfunct ...
On/Off Solenoid Removal/Installation [Fw6 A EL, Fw6 Ax EL]
WARNING:
A hot transaxle and ATF can cause severe burns. Turn off the engine and wait
until they are cool.
Always wear protective eye wear when using the air compressor. If the air
compressor is used, any particles of dirt or soiling could spatter and get into
the eyes.
...
