Mazda CX-5 Service & Repair Manual: Liftgate Latch And Lock Actuator Removal/Installation
1. Disconnect the negative battery cable..
2. Remove the following parts:
a. Liftgate upper trim.
b. Liftgate side trim.
c. Liftgate lower trim.
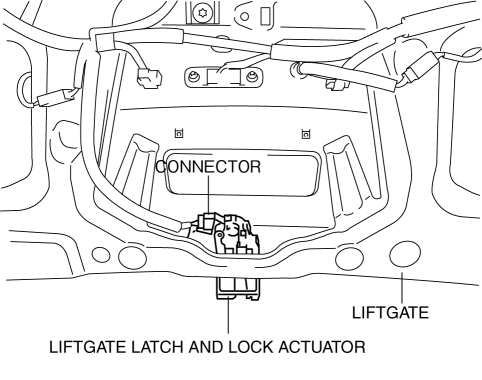
3. Disconnect the connector.
4. Remove the bolts.
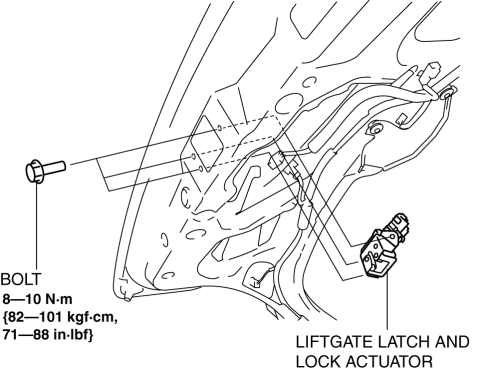
5. Remove the liftgate latch and lock actuator from the liftgate.
6. Install in the reverse order of removal.
 Liftgate Latch And Lock Actuator Inspection
The following actuator and switch are integrated with the liftgate latch
and lock actuator.
From the actuator/switch name and operation in the following table, select
the actua ...
 Liftgate Latch Switch
Purpose, Function
The switch turns on/off in conjunction with the rotation of the latch lever,
and it detects the open/closed condition of the liftgate by the voltage value
which is chang ...
Other materials:
Floor Mat
WARNING
Make sure the floor mats are hooked on the retention pins to prevent them from
bunching up under the foot pedals:
Using a floor mat that is not secured is dangerous as it will interfere with
the accelerator and brake pedal operation, which could result in an accident.
Do not install t ...
Service Publications
Service Publications
Factory-authorized Mazda service publications are available for owners who wish
to do some of their own maintenance and repair.
When requesting any of our publications through an Authorized Mazda Dealer, refer
to the chart below.
If they do not have what you need in stock ...
Back Up Light Switch Inspection
1. Disconnect the negative battery cable..
2. Remove the front under cover No.2..
3. Remove the back-up light switch..
4. Verify that the continuity between the back-up light switch terminals is as
indicated in the table.
If not as indicated in the table, replace the back-up ...
