Mazda CX-5 Service & Repair Manual: High Mount Brake Light
Purpose
-
The high-mount brake light signals vehicles to the rear that the vehicle is stopped.
Function
-
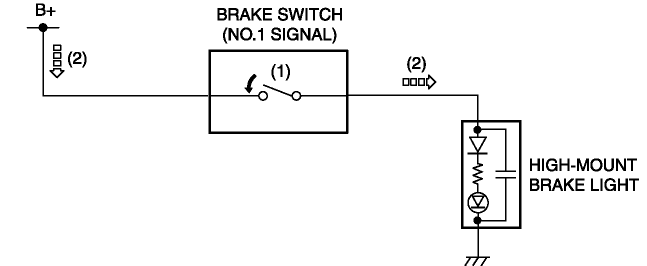
The high-mount brake light illuminates in conjunction with the operation of the brake light switch.
Construction
-
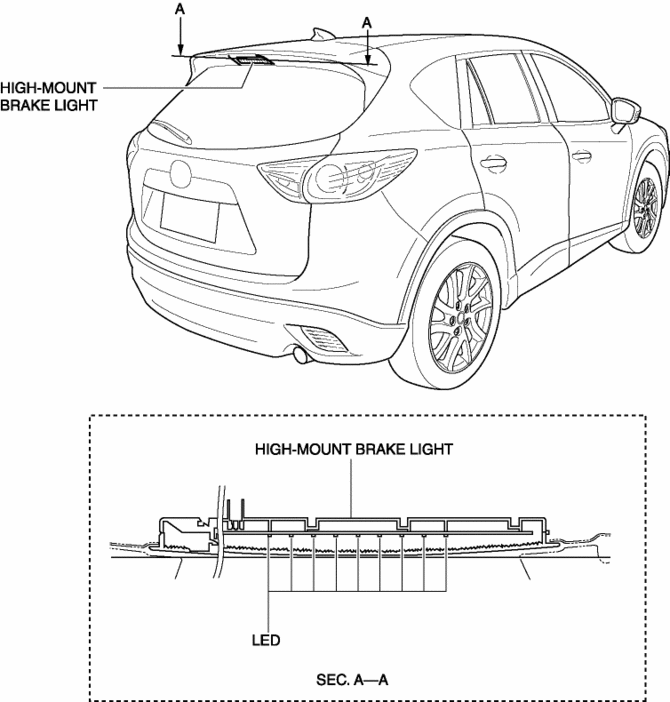
The high-mount brake light is positioned on the roof.
-
The high-mount brake light has adopted an LED.
NOTE:
-
Fogging or condensation on the inside of the high-mount brake light may occur, however, it is a natural phenomenon occurring as a result of a temperature difference between the interior and exterior of the high-mount brake light and has no effect on the light performance. Fogging or condensation will dissipate when the temperature inside the high-mount brake light rises after the high-mount brake light is illuminated and a period of time has elapsed.
Operation
Brake lights
1. When the brake pedal is depressed, the brake light switch turns on.
2. When the brake light switch turns on, the high-mount brake light illuminates.
Fail-safe
-
Function not equipped.
 Headlight Leveling Actuator
Purpose, Function
The headlight leveling actuator drives the motor based on the target optical
axis voltage, which is input from the AFS control module, to change the optical
axis of the ...
 High Mount Brake Light Removal/Installation
1. Disconnect the negative battery cable..
2. Remove the liftgate upper trim..
3. Remove the rear spoiler..
4. Disconnect the connector.
5. While pressing the high-mount brake light tab in ...
Other materials:
Gear Position Indicator [Fw6 A EL, Fw6 Ax EL]
Purpose/Function
The gear position indicator illuminates while under manual shift control
and displays the gear number while driving.
Construction
The gear position indicator is built into the instrument cluster.
Operation
The TCM sends a gear position indic ...
Headliner Removal/Installation
1. Disconnect the negative battery cable..
2. Remove the following parts:
a. Sunroof seaming welt (with sunroof system).
b. A-pillar trim.
c. Front map light.
d. Sunvisor.
e. Front scuff plate.
f. Rear scuff plate.
g. B-pillar lower trim.
h. Adjust anchor cover.
i. Upper anchor i ...
Air Intake Actuator Inspection [Full Auto Air Conditioner]
1. Connect battery positive voltage to air intake actuator terminal B (or C),
connect terminal C (or B) to ground, and then verify that the air intake actuator
operates as shown in the table.
If the operation condition is not normal, replace the air intake actuator.
...
