Mazda CX-5 Service & Repair Manual: Door Ajar Warning Light
Purpose
-
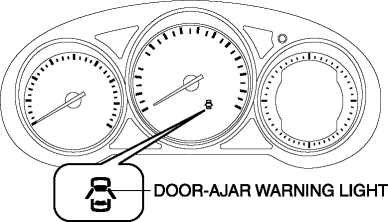
The door-ajar warning light notifies the driver that any door or the liftgate is open.
Function
-
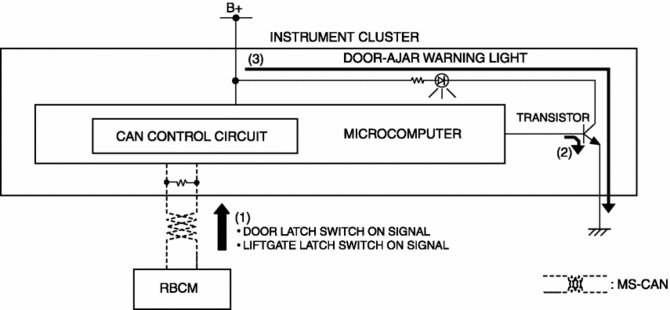
When the instrument cluster receives any of the following signals sent from the rear body control module (RBCM) via the CAN signal, the door-ajar warning light illuminates.
-
Door latch switch ON signal (door open)
-
Liftgate latch switch ON signal (liftgate open)
Construction
-
The instrument cluster controls illumination on/off of the door-ajar warning light using the instrument cluster microcomputer based on the door latch or liftgate latch position signal from the rear body control module (RBCM).
-
The door-ajar warning light is set in the instrument cluster.
Operation
1. The instrument cluster receives (1) the door latch switch ON signal or liftgate latch switch ON signal from the rear body control module (RBCM).
2. The instrument cluster microcomputer turns the transistor on (2) based on each signal.
3. When the transistor turns on, a ground circuit with the door-ajar warning light is established and the door-ajar warning light illuminates (3).
Fail-safe
-
Function not equipped.
 Cruise Set Indicator Light (Green)
Purpose/Function
Illuminates during the cruise control system operation to inform the driver
that the cruise control system is operating.
Construction
Built into the instrument ...
 Engine Oil Pressure Warning Light
Purpose
The engine oil pressure warning light warns the driver that the engine oil
level is insufficient.
Function
When the instrument cluster receives the engine oil pressure w ...
Other materials:
Generator Disassembly/Assembly [Skyactiv G 2.0]
CAUTION:
Melt the solder quickly, otherwise the diodes (rectifier) and regulator will
be damaged by excessive heat.
1. Disassemble in the order indicated in the table.
2. Assemble in the reverse order of disassembly.
1
Rotor component
...
Customer Assistance (Canada)
Satisfaction Review Process
Your complete and permanent satisfaction is of primary concern to Mazda. All
Authorized Mazda Dealers have both the knowledge and tools to keep your Mazda in
top condition. In our experience, any questions, problems, or complaints regarding
the operation of your Ma ...
Room Straight Line Dimensions (1) [Dimensions]
Point symbol
Designation
Hole diameter or bolt or nut size mm {in}
A
Front pillar inner datum hole
?7 {0.3}
B
Front pillar inner datum hole
?7 {0.3}
C
...
