Mazda CX-5 Service & Repair Manual: Dashboard Removal/Installation
1. Disconnect the negative battery cable..
2. Remove the following parts:
a. Windshield wiper arm and blade.
b. Cowl grille.
c. Windshield wiper motor.
d. Front scuff plate.
e. Front side trim.
f. Glove compartment.
g. Dashboard under cover.
h. Decoration panel.
i. Center panel.
j. Audio unit.
k. Front console box.
l. Shift lever knob (MTX).
m. Shift panel.
n. Upper panel.
o. Rear console.
p. Side wall.
q. Front console.
r. Selector lever component (MTX).
s. Selector lever component (ATX).
t. Hood release lever.
u. Lower panel.
v. Knee bolster.
w. Climate control unit.
x. Column cover.
y. Driver-side air bag module.
z. Steering wheel.
aa. Steering shaft.
ab. Switch panel.
ac. Meter hood.
ad. Instrument cluster.
ae. A-pillar trim.
3. Set the parking brake cover aside.
4. Disconnect the dashboard harness connectors at the tunnel area and remove the wiring harness clip.
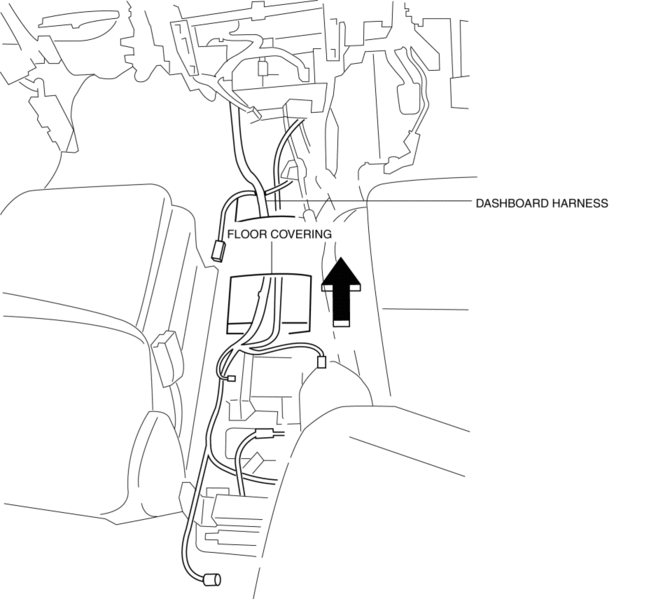
5. Pull out the dashboard harness in the direction of the arrow shown in the figure while avoiding the floor covering.
CAUTION:
-
When pulling out the dashboard harness, if the connector is hooked to the floor mat, it may cause a short circuit in the wiring harness or the connector may be damaged. Pull out the dashboard harness while lifting the floor mat so as not to hook the connector.
6. Remove the bolts A and nut B shown in the figure.
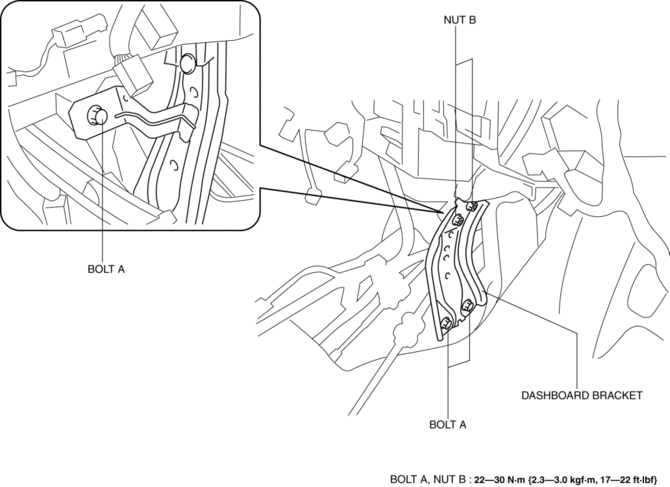
7. Remove the dashboard bracket.
8. Remove the bolt C..
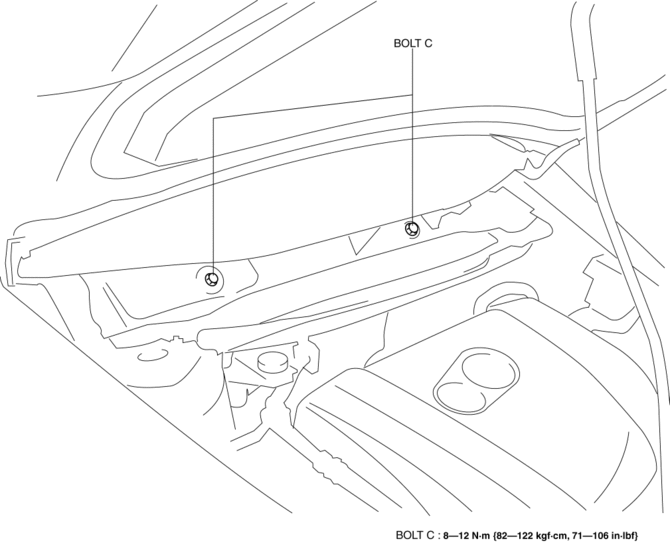
9. Disconnect the dashboard harness connectors.
10. Remove the caps.
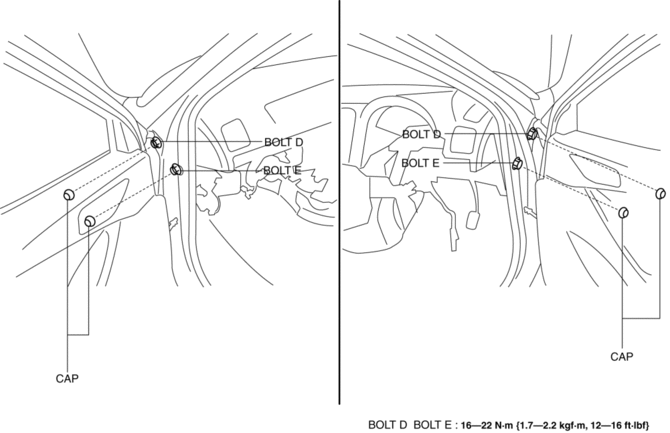
11. Remove the bolt D and bolt E..
CAUTION:
-
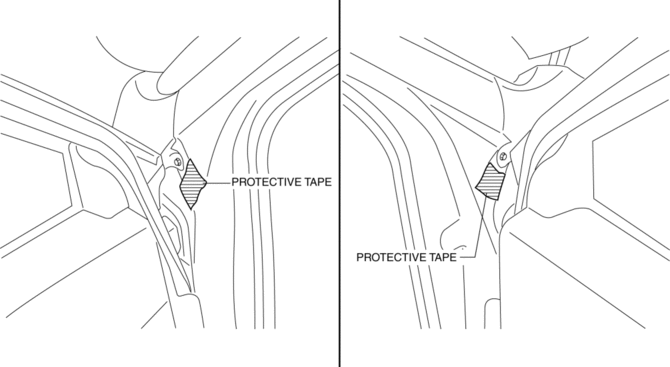
Bolts D cannot be removed completely because they contact the front door. If the front door is closed with the bolts D sticking out, it may cause a dent or damage to the coating film. After taking out the dashboard from the cabin, secure removed bolts D to the vehicle body using tape so that they do not stick out.
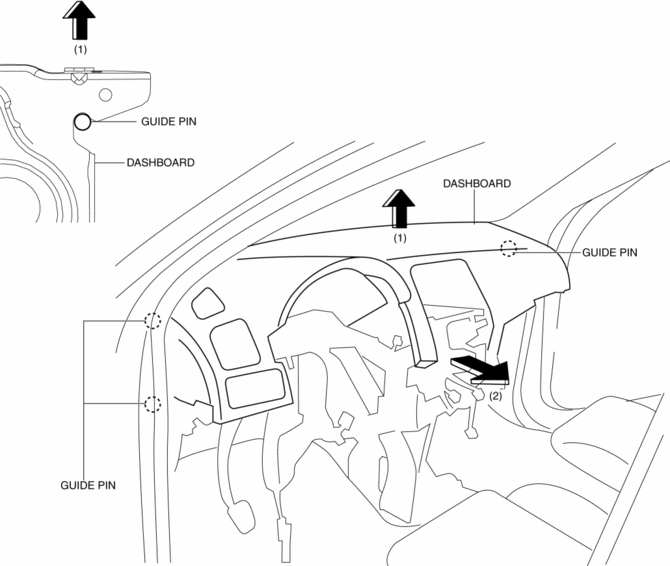
12. Pull up the dashboard in the direction shown in the direction of the arrow in the order of (1), (2) shown in the figure, then remove the guide pin.
13. Turn the dashboard 90° in the direction of the arrow shown in the figure.
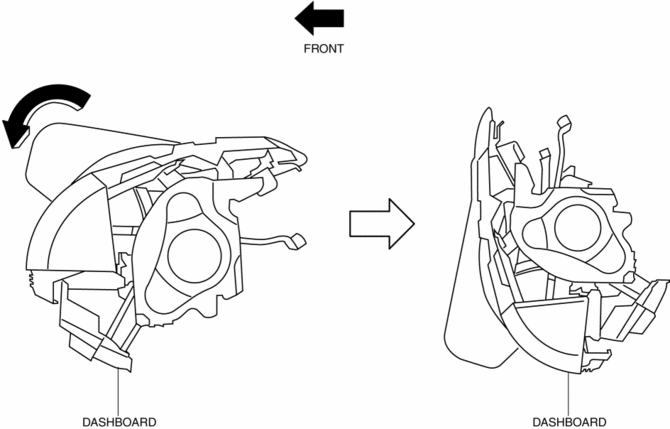
14. Take the dashboard off from the front driver-side door or front passenger-side door opening.
15. Install in the reverse order of removal.
Dashboard Installation Note
-
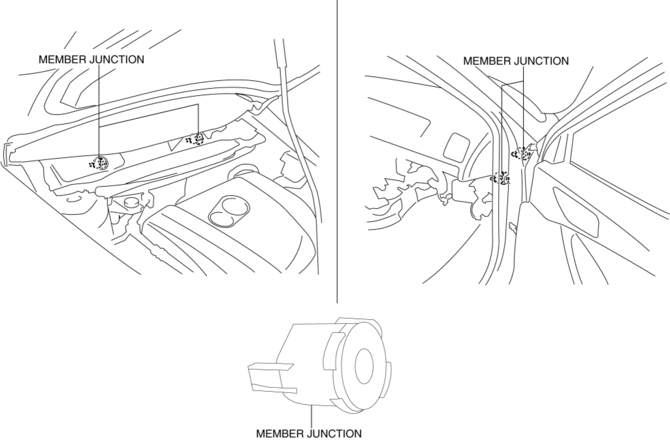
When installing the dashboard, if the position of the member junction is deviated, the bolts cannot be installed. Before installing the dashboard, align the member junction and bolts to the position shown in the figure.
 Dashboard Disassembly/Assembly
1. Disassemble in the order indicated in the table.
1
Wiring harness
2
Screw A
3
Screw B
4
...
 Dashboard Under Cover Removal/Installation
1. Detach hooks A in the direction of arrow (1) shown in the figure.
2. Pull the dashboard under cover in the direction of arrow (2) while detaching
pins B.
3. Remove the dashboard under cov ...
Other materials:
Rear ABS Wheel Speed Sensor Removal/Installation
1. Remove the trunk board..
2. Remove the trunk end trim..
3. Remove the rear scuff plate..
4. Remove the trunk side trim..
5. Disconnect the rear ABS wheel-speed sensor connector.
6. Press the rear ABS wheel-speed sensor tabs and press out the sensor toward
the outside of the vehicl ...
Transmission/Transaxle Abbreviations
AAS
Active Adaptive Shift
ABS
Antilock Brake System
ABDC
After Bottom Dead Center
ACC
Accessories
AFS
Adaptive Front Lighting System
ALC
...
A/C Compressor Removal/Installation
1. Disconnect the negative battery cable..
2. Discharge the refrigerant..
3. Remove the front under cover No.2..
4. Remove the drive belt..
5. Disconnect the connector.
6. Remove bolts A.
CAUTION:
If moisture or foreign material enters the refrigeration cycle, cooling ability ...
